or Call Us at 1-800-776-2228
or Call Us at 1-800-776-2228
For the longest time, I had a blank wall in my courtyard behind a vintage iron sofa I scored at an antique faire. I wanted to build a simple, custom crisscross wall trellis that fits the space just perfectly. Keep reading to find out how to make a trellis.
Professional Electric Staple Gun and Nailer

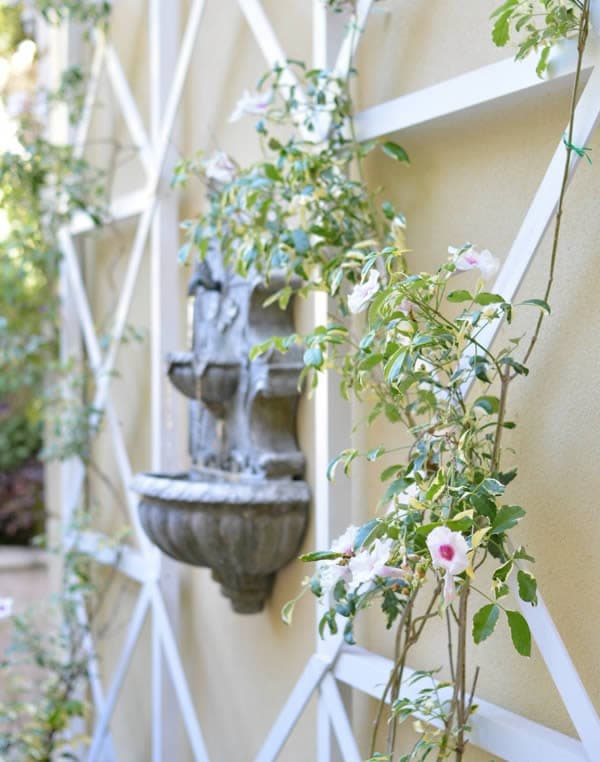
I went through several design ideas before deciding to mimic a simple ‘X’ pattern. I’m so happy with how this design turned out; it fits the style of my home and frames my European-style fountain that hangs on the wall. This was the final sketch and off I went to buy lumber. I made sure all the 2×2” boards were straight and then grabbed enough lattice to form the crisscross pattern.
I went through several design ideas before deciding to mimic a simple ‘X’ pattern. I’m so happy with how this design turned out; it fits the style of my home and frames my European-style fountain that hangs on the wall. This was the final sketch and off I went to buy lumber. I made sure all the 2×2” boards were straight and then grabbed enough lattice to form the crisscross pattern.
To begin I used 2×2” lumber to create the frame. I used a miter saw to trim the wood, then used 2-1/2” wood screws to attach. Before screwing it together, it’s important to drill pilot holes first so that your wood screws go in straight and don’t split the wood.
To begin I used 2×2” lumber to create the frame. I used a miter saw to trim the wood, then used 2-1/2” wood screws to attach. Before screwing it together, it’s important to drill pilot holes first so that your wood screws go in straight and don’t split the wood.
I trimmed the 1-3/8” lattice to form the crisscross pattern. I left the middle ‘X’ out to allow for room for my wall fountain. For the corners, I cut the lattice so its edge sits at a 90-degree angle on top of the corner of the 2×2” frame. I found it easiest to use a pencil to mark the edges of the lattice and trim with the miter saw as I went along. The frame starts to come together as you make the cuts with the miter saw. In the middle, I layered a second level of lattice of the design to form the crisscross pattern across the grid.
I trimmed the 1-3/8” lattice to form the crisscross pattern. I left the middle ‘X’ out to allow for room for my wall fountain. For the corners, I cut the lattice so its edge sits at a 90-degree angle on top of the corner of the 2×2” frame. I found it easiest to use a pencil to mark the edges of the lattice and trim with the miter saw as I went along. The frame starts to come together as you make the cuts with the miter saw. In the middle, I layered a second level of lattice of the design to form the crisscross pattern across the grid.
Using Arrow’s T50AC™ Electric Staple Gun and Nailer and Arrow’s 5/8” brad nails, I nailed the entire trellis together in less than 5 minutes! This electric nailer is crazy easy to use. It has less kickback than a brad nailer attached to a compressor, so it’s perfect for working with thinner wood like this.
Using Arrow’s T50AC™ Electric Staple Gun and Nailer and Arrow’s 5/8” brad nails, I nailed the entire trellis together in less than 5 minutes! This electric nailer is crazy easy to use. It has less kickback than a brad nailer attached to a compressor, so it’s perfect for working with thinner wood like this.
I used bun feet as finials to add a little detail to the top. This is optional, of course, but I liked the idea of them as a way to embellish the top corners.
I used bun feet as finials to add a little detail to the top. This is optional, of course, but I liked the idea of them as a way to embellish the top corners.
I spray painted the entire trellis with a white primer and paint, and screwed it to the wall using a lag screw.
I spray painted the entire trellis with a white primer and paint, and screwed it to the wall using a lag screw.
I left the middle ‘X’ out of the design to allow room for my wall fountain so that the crisscross pattern frames it. Without the fountain, you’d simply finish off that center part of the trellis grid with an additional ‘X’. That's how you make a trellis.
It is so nice to sit out in the courtyard, enjoying the new DIY crisscross trellis. I love to sit here on a cool morning and sip my coffee, or enjoy a glass of wine in the evening.
Get Arrow tips, tricks, projects and promos in your inbox!
Hey there! We’ve updated our Privacy and Cookie Policies at the request of some of our friends in Europe. Click Accept to let us know you’re okay with the updates. Thanks!
View Cookie Policy Accept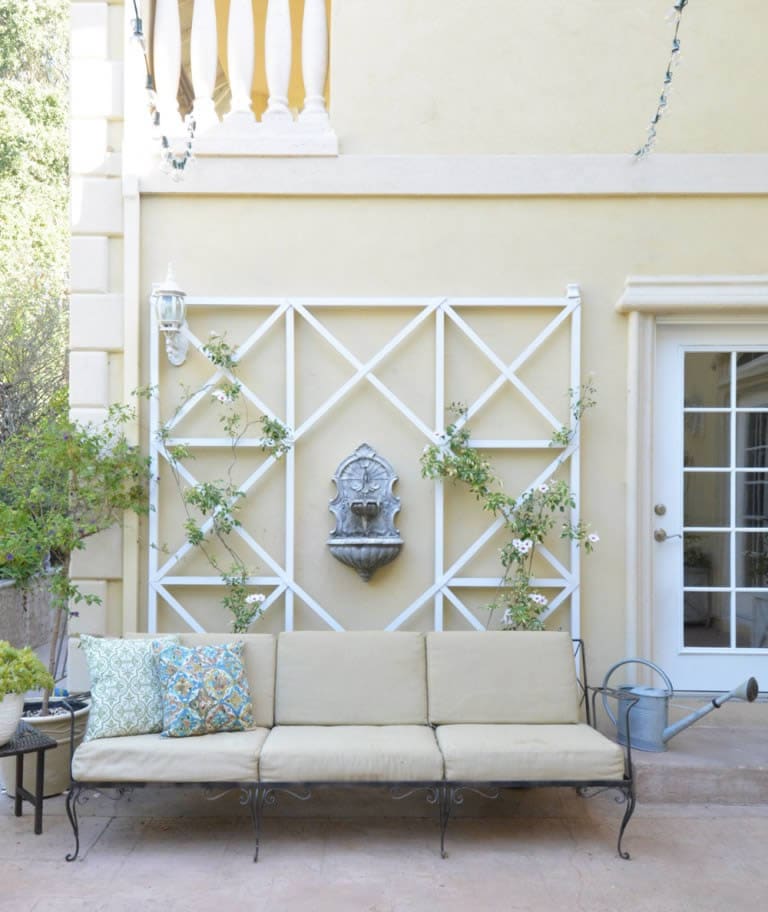