or Call Us at 1-800-776-2228
or Call Us at 1-800-776-2228
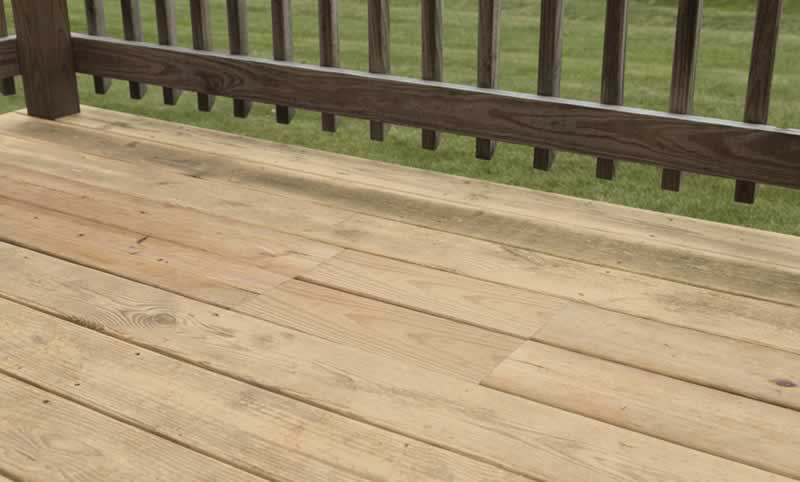
Does your outdoor deck have a couple of small broken boards? Two boards on our treated lumber deck were recently damaged due to a heavy item falling on them. In this tutorial, we’ll show you how to replace small damaged sections of a deck with the Arrow PT18G Pneumatic Brad Nailer. Don’t forget to grab a pair of gloves and safety goggles. State, local and municipal codes vary for home improvements depending upon your location, so please check before proceeding with your residential repair.

Pneumatic Brad Nailer
Use a stud finder to scan the area around the damaged boards to determine the location of the nearest support joists. Arrow Tip: Instead of a stud finder, you can also use the Walabot 3D imaging tool. This handy device pairs with your Android phone to show pipes or wiring beneath your deck boards, as well as support joists.
Use a stud finder to scan the area around the damaged boards to determine the location of the nearest support joists. Arrow Tip: Instead of a stud finder, you can also use the Walabot 3D imaging tool. This handy device pairs with your Android phone to show pipes or wiring beneath your deck boards, as well as support joists.
Mark the location of the support joists on the small damaged deck boards with a pencil. Place marks on the boards on the inside of any existing screws or nails. You’ll want those to stay in position to keep the undamaged portion of the boards secured to the joists.
Mark the location of the support joists on the small damaged deck boards with a pencil. Place marks on the boards on the inside of any existing screws or nails. You’ll want those to stay in position to keep the undamaged portion of the boards secured to the joists.
Measure the thickness of the boards at one end of the deck.
Measure the thickness of the boards at one end of the deck.
Unplug or remove the battery from the circular saw. Then, set the saw to the correct cutting depth based on the measurement from the previous step. It should be set to cut no more than 1/32” deeper than the thickness of the boards.
Unplug or remove the battery from the circular saw. Then, set the saw to the correct cutting depth based on the measurement from the previous step. It should be set to cut no more than 1/32” deeper than the thickness of the boards.
Use the circular saw to cut through most of the width of the boards. Stop your cut about 1-2 inches from the edge of the damaged boards to avoid cutting into the undamaged boards.
Use the circular saw to cut through most of the width of the boards. Stop your cut about 1-2 inches from the edge of the damaged boards to avoid cutting into the undamaged boards.
Use the oscillating saw to finish up the cuts. Cut slowly and carefully to avoid any unwanted damage.
Use the oscillating saw to finish up the cuts. Cut slowly and carefully to avoid any unwanted damage.
Carefully tap the pry bar into the space between the damaged board and the board next to it. Then slowly lift the board off of the support joist. Discard all damaged boards after removal.
Carefully tap the pry bar into the space between the damaged board and the board next to it. Then slowly lift the board off of the support joist. Discard all damaged boards after removal.
Measure the length of the area that was removed. This should be centerline to centerline of the joists. Mark the dimensions on the replacement boards.
Measure the length of the area that was removed. This should be centerline to centerline of the joists. Mark the dimensions on the replacement boards.
Use the circular saw to cut the replacement boards to size.
Use the circular saw to cut the replacement boards to size.
Apply a generous amount of construction glue/sealant to the underside of the boards, where it will make contact with the joists, and to the ends of the board to seal and prevent water seepage. Place a bead of glue on the joists as well.
Apply a generous amount of construction glue/sealant to the underside of the boards, where it will make contact with the joists, and to the ends of the board to seal and prevent water seepage. Place a bead of glue on the joists as well.
Place the board into position. Use the Arrow PT18G Pneumatic Brad Nailer and Arrow 2-inch brad nails to secure to the joist. The PT18G can drive the long nails easily into the joist for a secure hold. Using the PT18G also eliminates the possibility of a screw splitting the end of a board. Fire a nail about every 1 to 1-1/2 inches along the width of the board. If the board on either side is not secured to the joist, nail those as well.
Place the board into position. Use the Arrow PT18G Pneumatic Brad Nailer and Arrow 2-inch brad nails to secure to the joist. The PT18G can drive the long nails easily into the joist for a secure hold. Using the PT18G also eliminates the possibility of a screw splitting the end of a board. Fire a nail about every 1 to 1-1/2 inches along the width of the board. If the board on either side is not secured to the joist, nail those as well.
Repeat the previous step for all additional replacement boards.
Repeat the previous step for all additional replacement boards.
Sit back and enjoy a glass of ice-cold lemonade on your repaired deck.
Sit back and enjoy a glass of ice-cold lemonade on your repaired deck.
We’d love to see how your deck project turned out! Share your project pictures on Facebook, Instagram or X by using #MadeWithArrow or tagging Arrow Fastener.
Get Arrow tips, tricks, projects and promos in your inbox!
Hey there! We’ve updated our Privacy and Cookie Policies at the request of some of our friends in Europe. Click Accept to let us know you’re okay with the updates. Thanks!
View Cookie Policy Accept