or Call Us at 1-800-776-2228
or Call Us at 1-800-776-2228
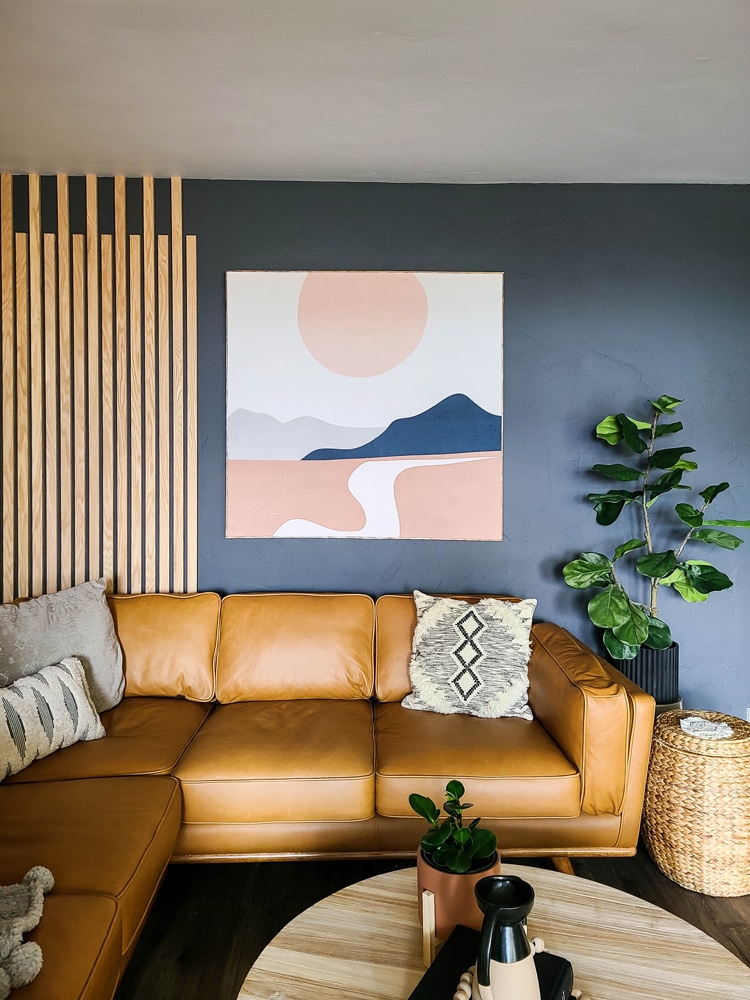
If your bedroom or living room could use some wall art, then this DIY tapestry frame may be just what you’re looking for! It’s also a great way to add a little modern boho touch to any space. Head to Etsy or Society6 to choose the perfect tapestry to match your taste, and then grab your Arrow PT18G pneumatic brad nailer and Arrow T50ACN electric stapler and nailer. Let’s get to work!

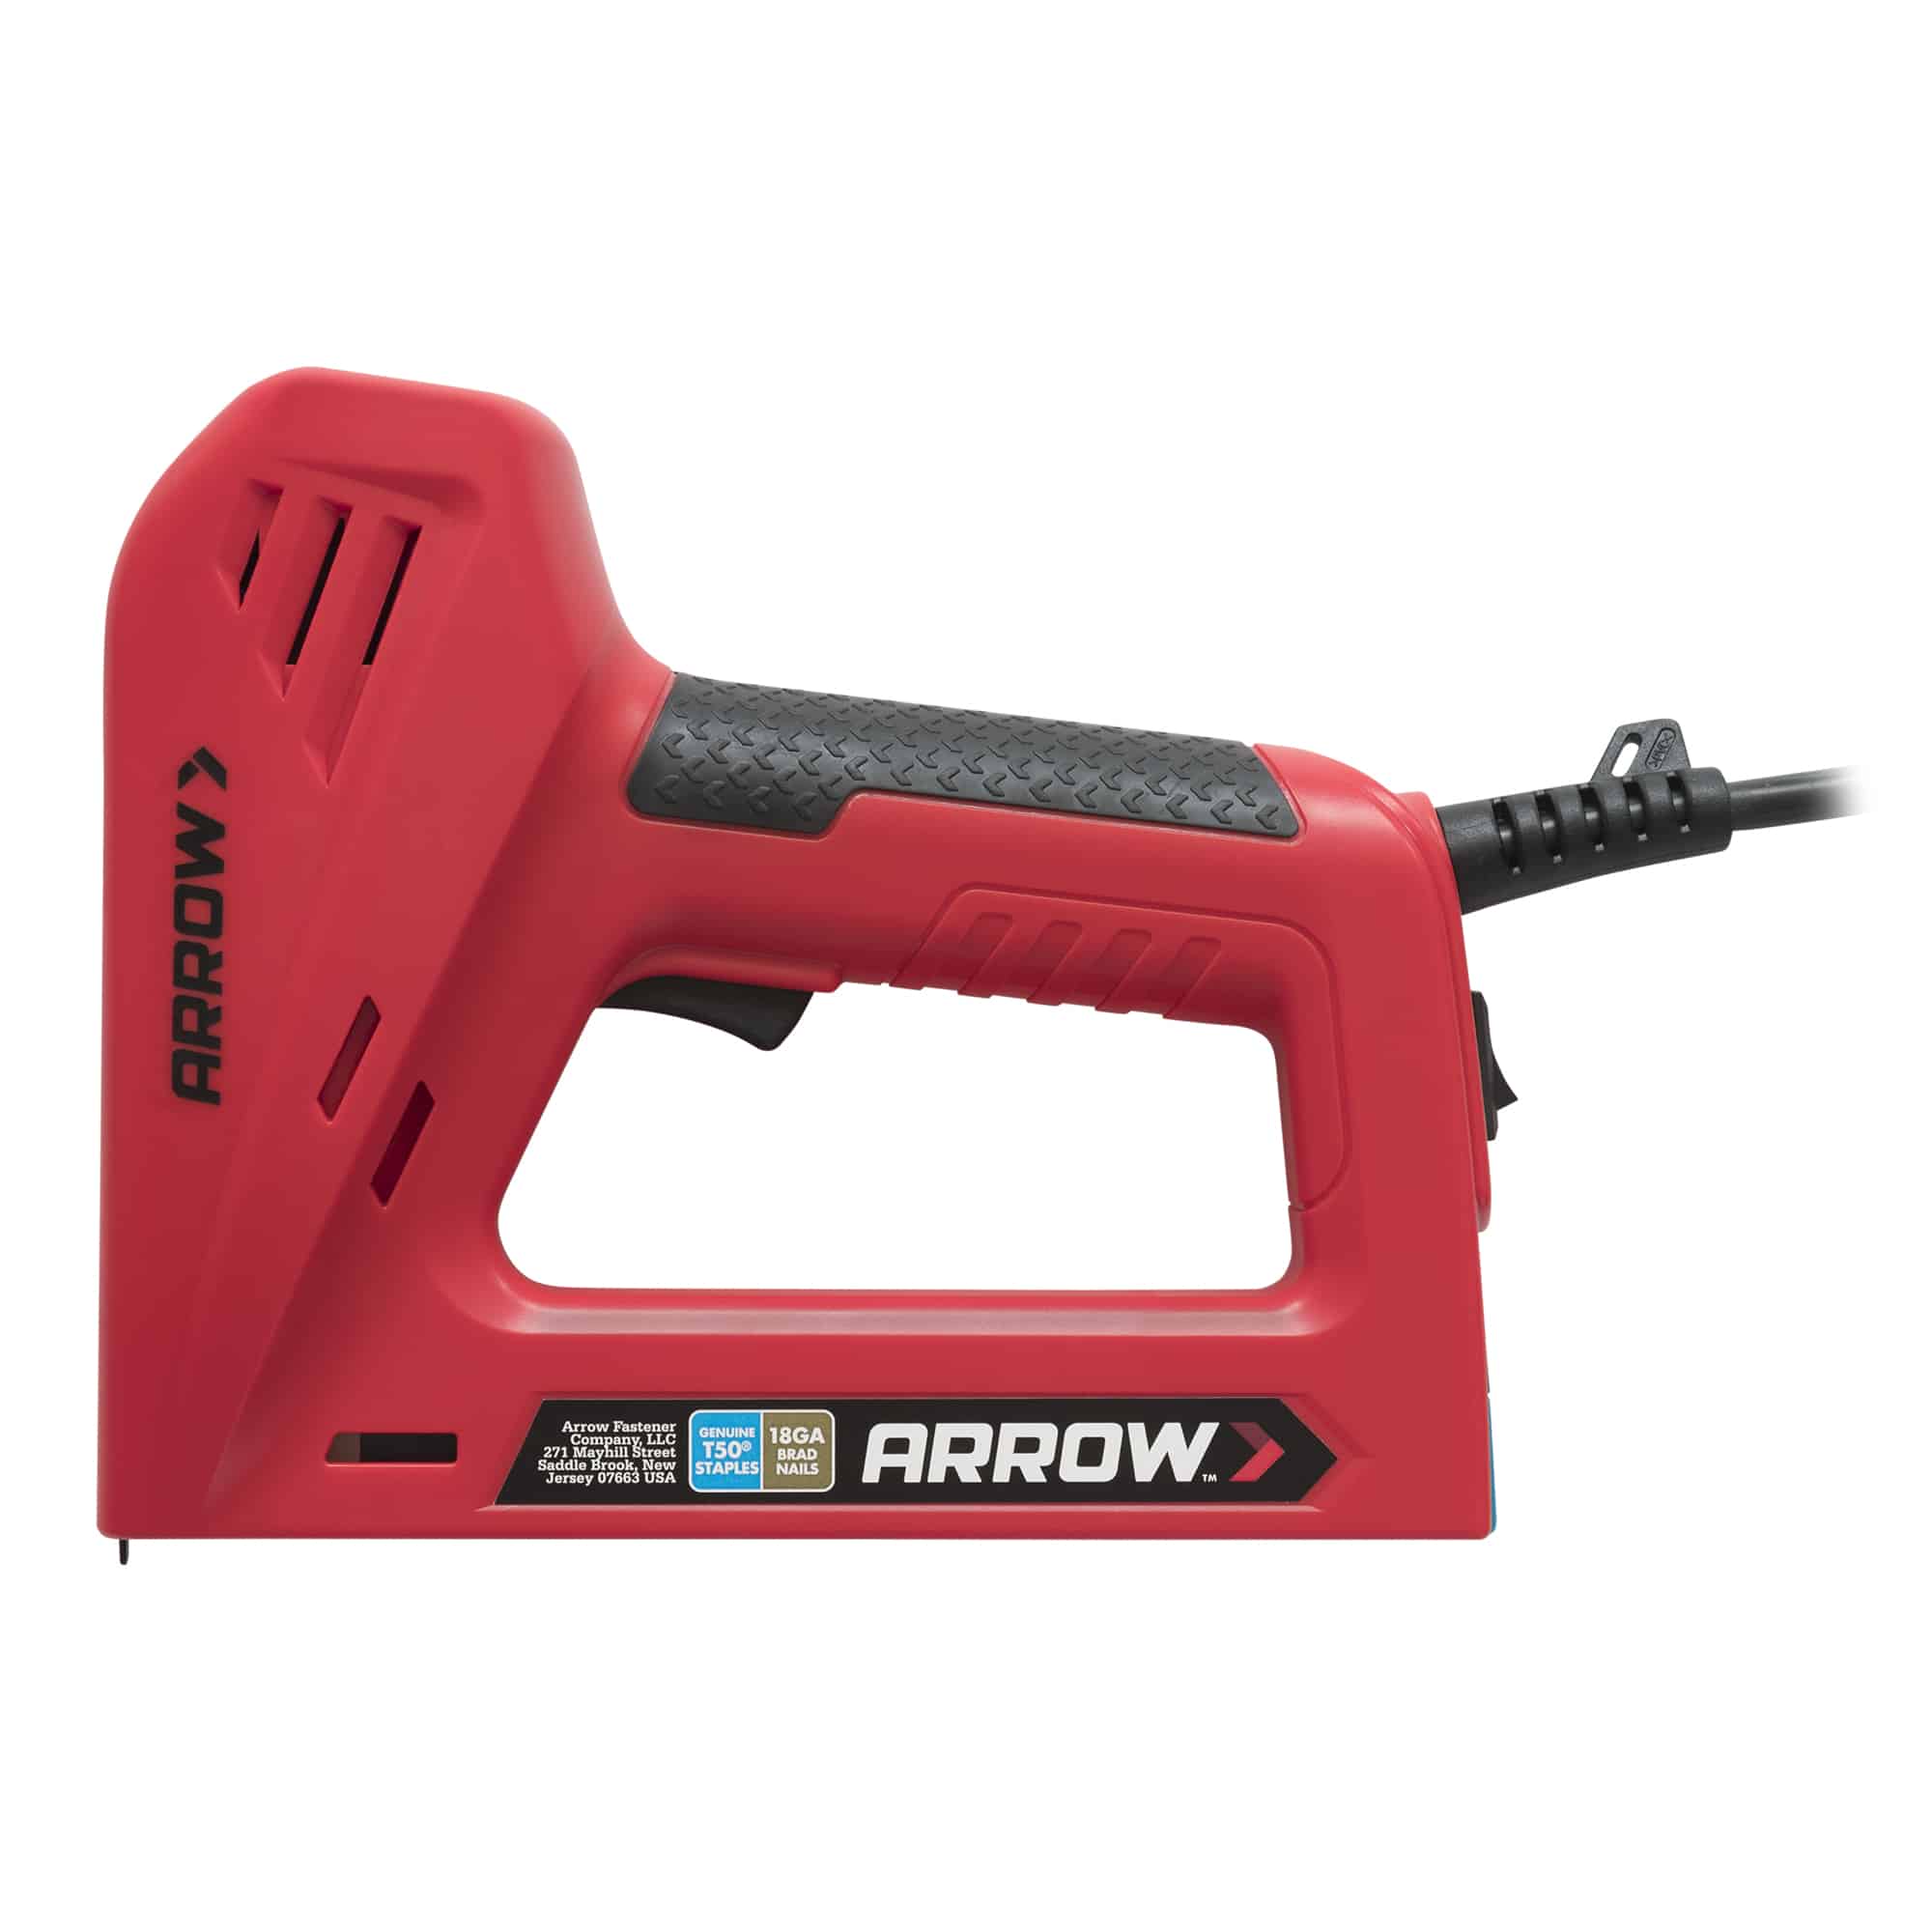
Pneumatic Brad Nailer
Electric Stapler and Nailer
To make a tapestry frame, you must start with a tapestry, of course! If you can’t find one you like, you can use a fun-patterned fabric or even a shower curtain.
Time to create your frame structure! Start by cutting the lumber down to size. For example, our tapestry is 51″ x 60″, so we built ours to measure about 45″ x 45″. We also added some cross braces in the middle of the structure for extra support.
Keeping everything in place with corner clamps makes the whole process easier. We suggest Pony Jorgensen! If you can’t get corner clamps or clamping squares, recruit a friend to hold the wood pieces square while you glue and nail your structure together.
Just use a little bit of wood glue at the joints, then secure with 1 ½″ brad nails using the Arrow PT18G pneumatic brad nailer.
Next, you’ll want to get your tapestry wrinkle-free and flat. Press and smooth it out using a fabric iron.
To attach your tapestry to the frame structure, pull the fabric tight around the structure, then use your Arrow T50ACN electric stapler and nailer and ⅝″ staples to staple it to the back. We added staples every couple of inches and held it really tight while stapling – another time when a friend comes in handy! When pulling the fabric taut, be sure to avoid shifting or wrinkling the tapestry.
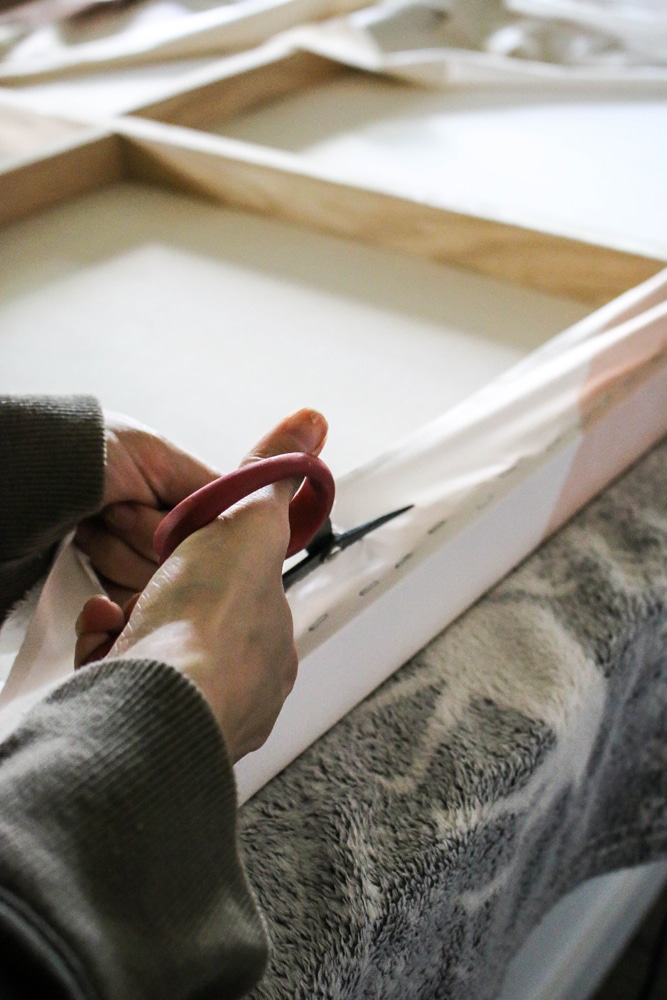
On the corners of the tapestry, take your time to get the fabric folded nicely so it lies as flat as possible. Hold tight and add several staples to the back at the corners to secure the fold. Then cut off any excess tapestry on the back with scissors.
You could totally stop here if you want a tapestry that looks like a canvas, but we wanted to add a wood frame to the edges! We used inexpensive, lightweight lattice wood strips to make the frame. Once the wood frame pieces are cut to size, lightly sand each piece smooth. Finish by applying wood stain and sealing with polyurethane. Let dry.
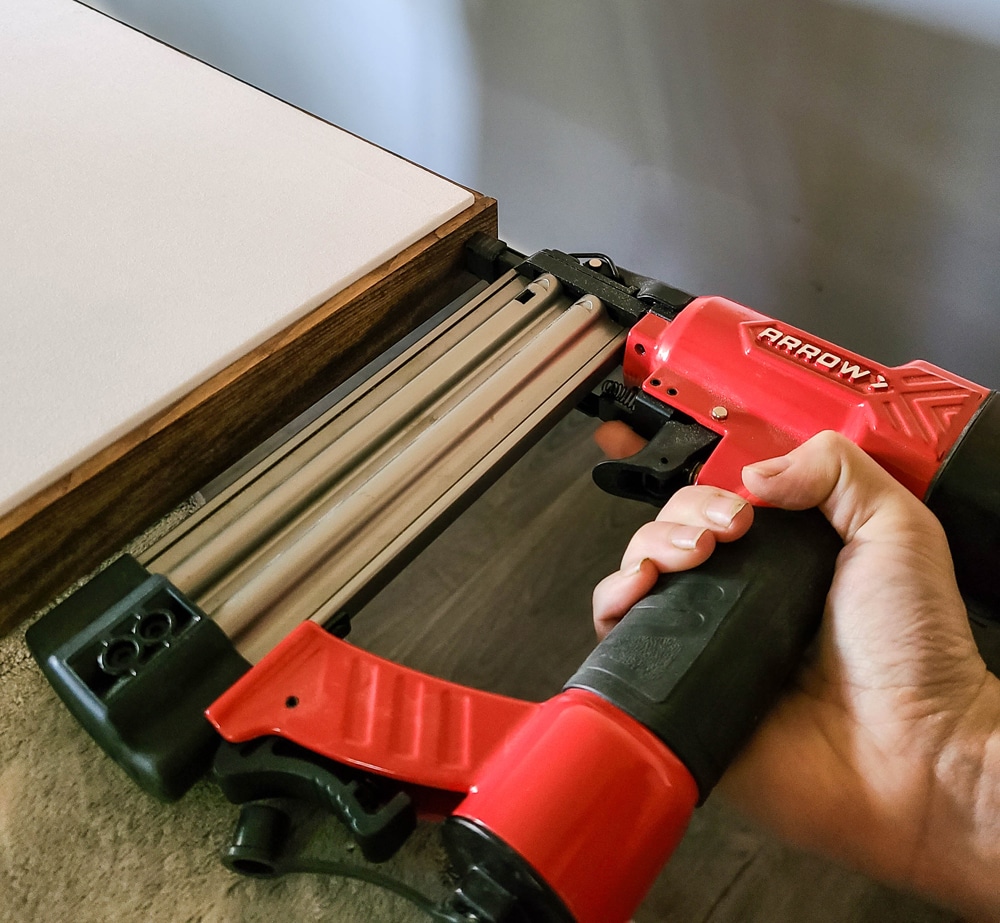
For the final step, cover the edges of the tapestry frame with your stained and sealed wood strips. Hold the wood strips against the edge of the tapestry structure and nail them in place using the Arrow PT18G pneumatic brad nailer with ⅝″ brad nails. For every 8″ or so, add a nail along the edge of the tapestry frame.
And voilà! Now you have a DIY tapestry frame creation that looks like expensive art. We love the splash of color this framed tapestry adds to the wall.
Share your work with us on Facebook and Instagram by tagging @ArrowFastener or using #MadeWithArrow.
Get Arrow tips, tricks, projects and promos in your inbox!
Hey there! We’ve updated our Privacy and Cookie Policies at the request of some of our friends in Europe. Click Accept to let us know you’re okay with the updates. Thanks!
View Cookie Policy Accept