or Call Us at 1-800-776-2228
or Call Us at 1-800-776-2228
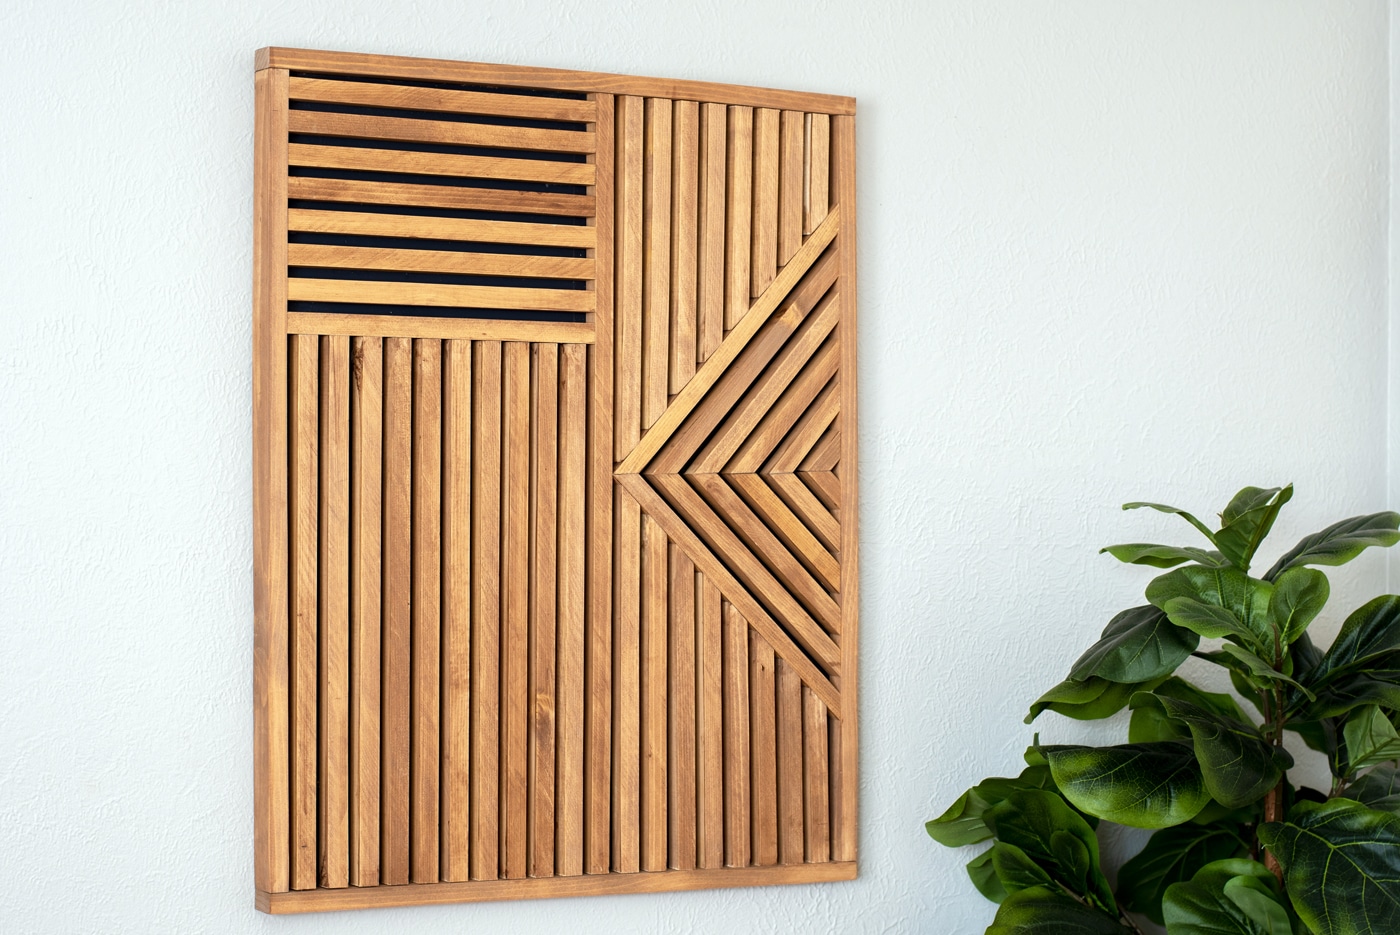
If you have an empty wall in your home, add your own unique touch by making this simple wood wall art. This DIY wood wall art project is so much fun thanks to the GT300 professional high temp glue gun. The best part is that it is totally customizable – make it any size, pattern, or color!
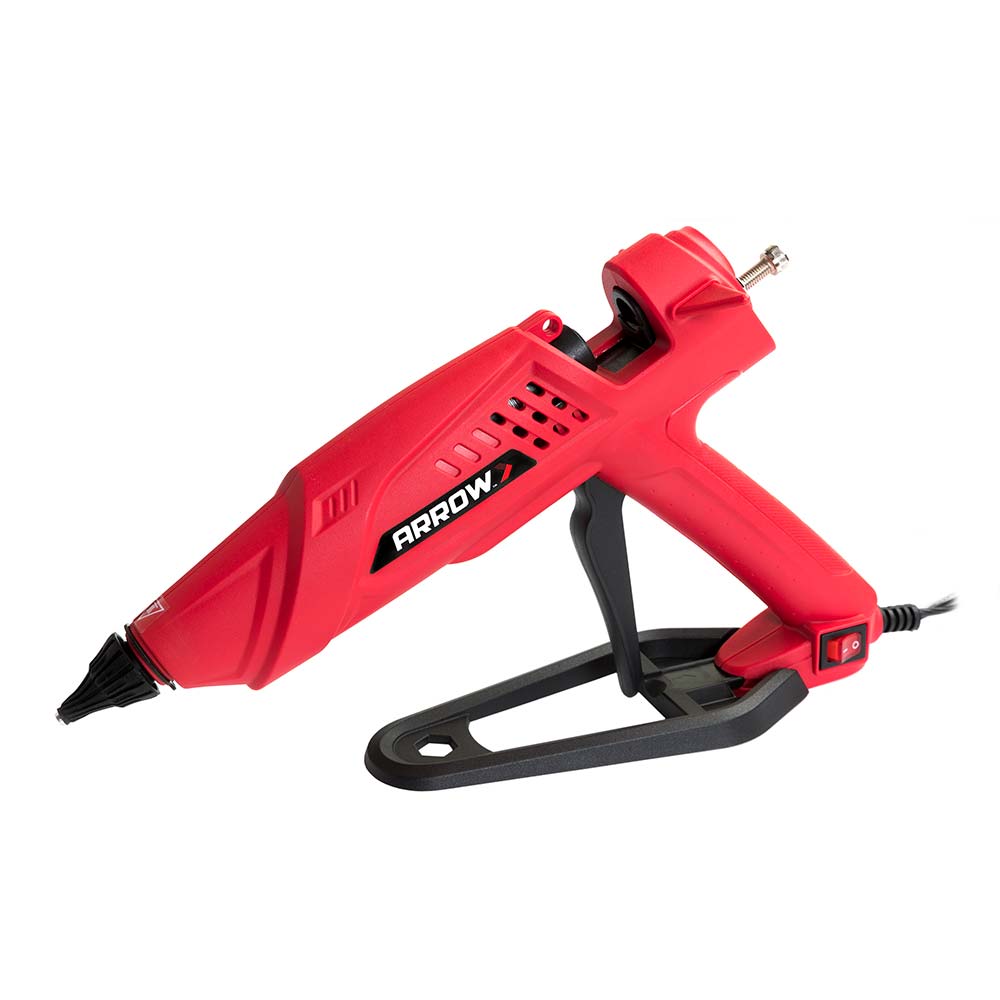
Professional High-Temp Glue Gun

Professional Electric Nailer
To cut the slats for your art, rip the 1″ x 8″ or 1″ x 10″ boards to ¾” square dowels using a table saw.
It’s best to cut down the boards to a reasonable length before ripping so you don’t have to manage long boards across the table saw.
Time to prepare your base. Paint or stain the 2′ x 3′ plywood in the color of your choice.
Once dry, mark lines for the pattern. This is completely up to you, but we marked one center line from top to bottom, divided the right side in half to make the angled pattern, and divided the left side in thirds for the horizontal pattern.
Arrange the slats on your plywood base in the pattern you want and trim them accordingly, being sure to leave some overhang on all sides. We used two 1″ x 8″ boards as spacers to create equal spacing between each slat.
For our wall art, the angled slats are all cut at 45 degrees. Once you set the miter saw, be sure to leave it at that angle to get tight, reproducible cuts.
Once the pattern is defined, sand the slats using a fine-grit sanding sponge to remove any blade marks, then wipe to remove all the sanding dust.
Paint or stain the slats in the color of your choice – be sure to keep track of the position of the slats!
Once the paint or stain has dried, start attaching the slats using your GT300 professional high temp glue gun. A few pointers: it’s important to let the glue get as hot as possible to get the strongest bond, and remember to use the spacers to create equal spacing as you go.
Now that the entire pattern has been glued, measure and clamp a straight edge and trim off the overhanging slats using a circular saw. After one edge is cut straight, you can switch to the table saw to trim off the opposite edge.
Measure and cut your 1′ x 2′ boards to form the frame. Sand and stain them, then attach them using the ET200BN professional electric nailer and brad nails.
As you nail, be careful to nail toward the bottom of the frame so the nails go into the plywood base.
When you’re finished, hang your new wall art on any blank wall in your house, or you can even give it as a housewarming gift. The possibilities with this project are endless!
We’d love to see your DIY wood wall art! Share your work with us on Facebook and Instagram by tagging @ArrowFastener or using #MadeWithArrow.
Get Arrow tips, tricks, projects and promos in your inbox!
Hey there! We’ve updated our Privacy and Cookie Policies at the request of some of our friends in Europe. Click Accept to let us know you’re okay with the updates. Thanks!
View Cookie Policy Accept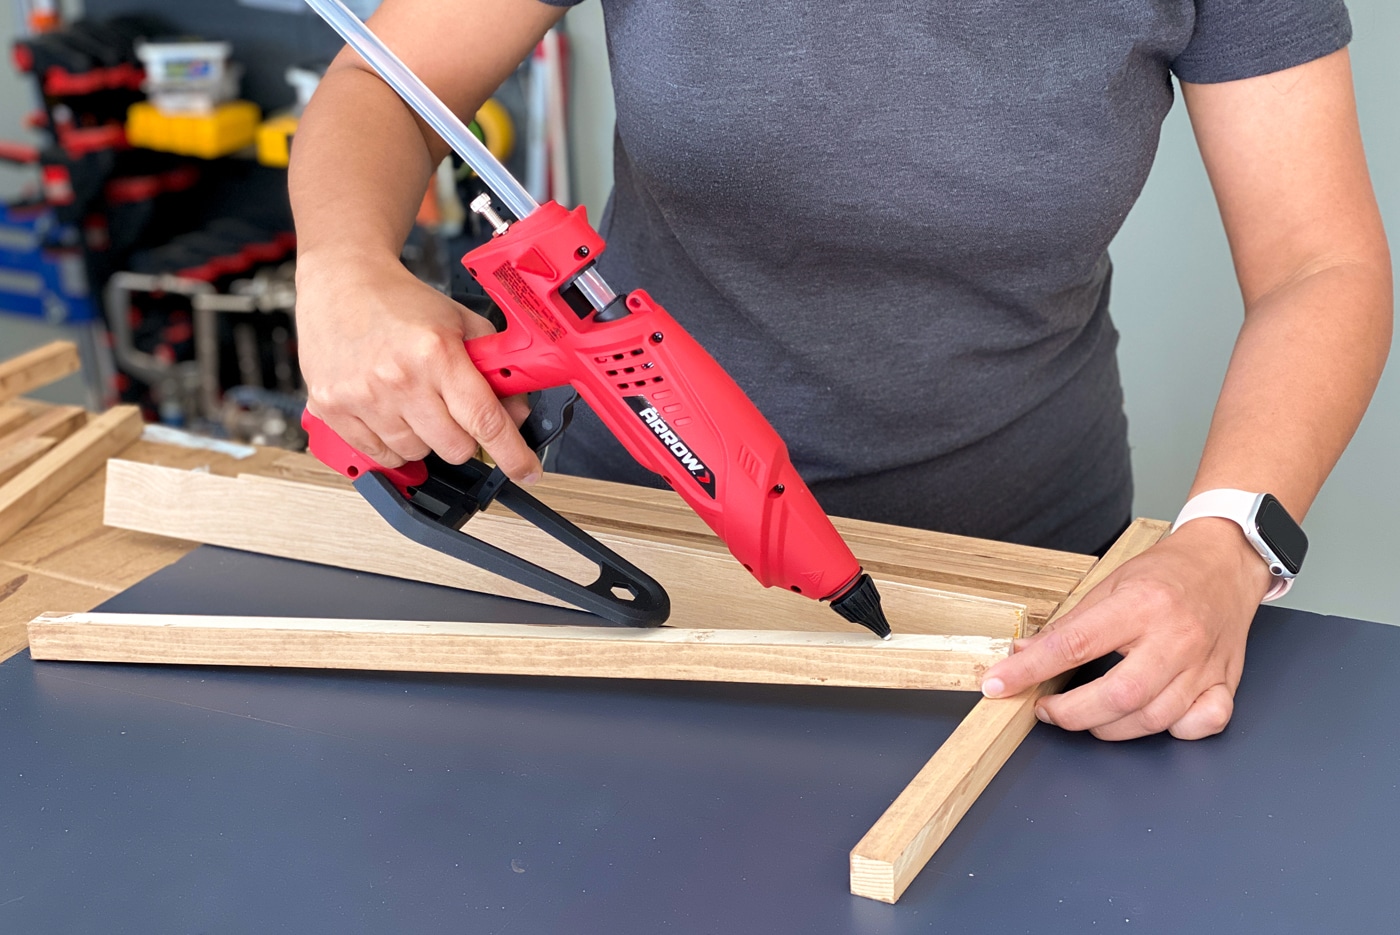