or Call Us at 1-800-776-2228
or Call Us at 1-800-776-2228
Design and personalize a cable mural using the Arrow T25 Low Voltage Wire Staple Gun.
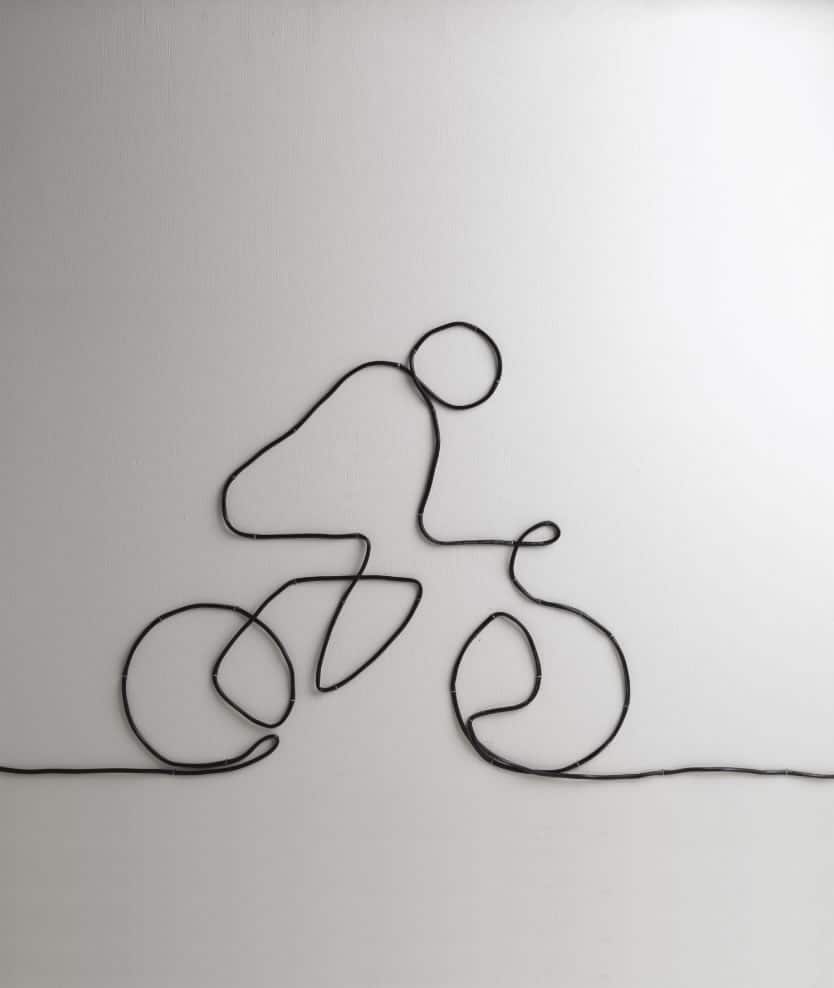
Here’s a unique way to utilize any spare cable wire. Design a simple wall mural and secure the cable to a wood panel. Create a design that fits your personality and style. It could be your favorite city skyline or the silhouette of a furry friend; the possibilities are endless! Appropriate personal protective equipment such as safety goggles, gloves and hearing protection should be worn at all times.
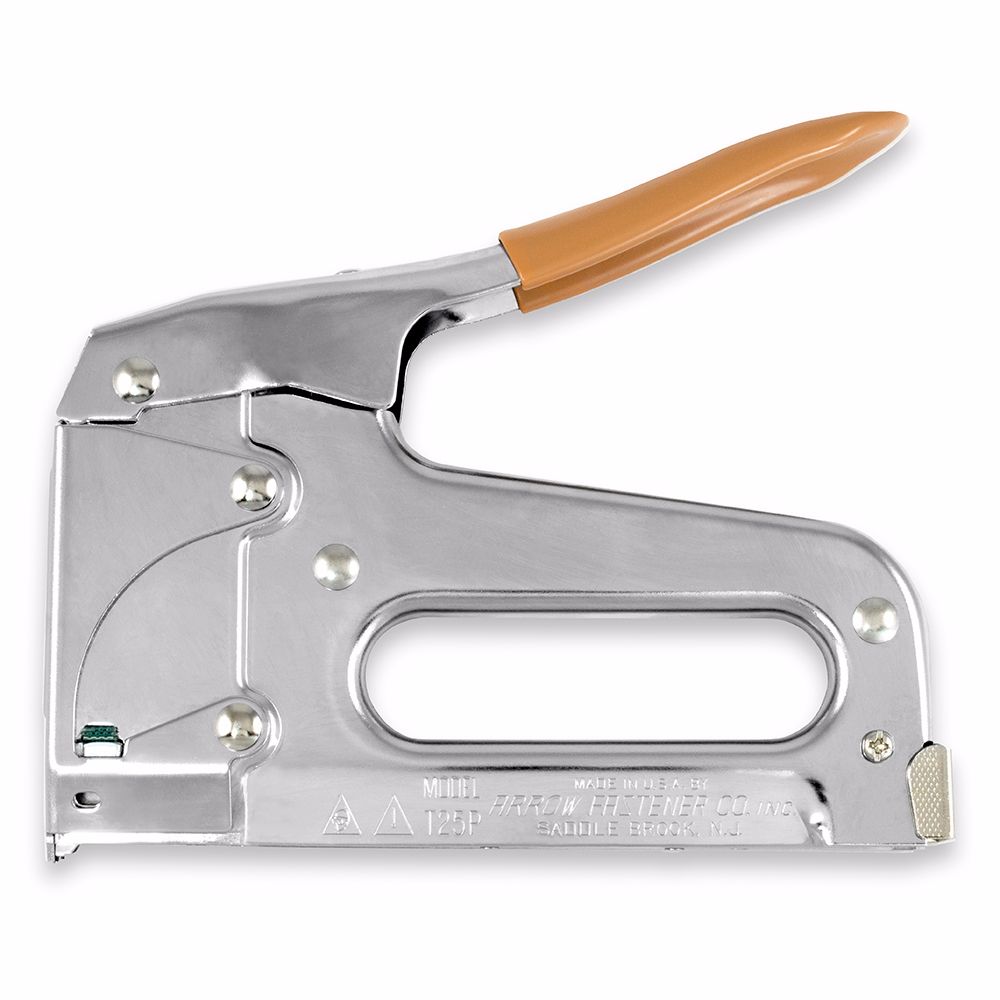
Professional Low Voltage Wire/Cable Staple Gun

Paint the front of the plywood the color of your choice.
Paint the front of the plywood the color of your choice.
Once the paint has dried completely, turn plywood over and measure
evenly on each side. Mark with a pencil.
Once the paint has dried completely, turn plywood over and measure
evenly on each side. Mark with a pencil.
Make a small hole at each mark using the awl.
Make a small hole at each mark using the awl.
Secure the D-rings to the back of the plywood with the screws.
Secure the D-rings to the back of the plywood with the screws.
Loop and secure wire through the D-rings to use for hanging the panel onto a wall. Turn the plywood over.
Loop and secure wire through the D-rings to use for hanging the panel onto a wall. Turn the plywood over.
Using the pencil, lightly draw your design on the panel.
Using the pencil, lightly draw your design on the panel.
Begin securing the cable to the panel using the Arrow T25. Follow the design, covering the pencil lines as you go, stapling every four to five inches. Erase any visible marks.
Begin securing the cable to the panel using the Arrow T25. Follow the design, covering the pencil lines as you go, stapling every four to five inches. Erase any visible marks.
Turn the panel over to secure the cable.
Turn the panel over to secure the cable.
Use wire cutter to cut off any extra cable.
Use wire cutter to cut off any extra cable.
Hang it on the wall and enjoy!
Hang it on the wall and enjoy!
We’d love to see how your DIY Cable Mural project turned out! Share your results with us on Facebook, Instagram or X by tagging #MadeWithArrow.
Get Arrow tips, tricks, projects and promos in your inbox!
Hey there! We’ve updated our Privacy and Cookie Policies at the request of some of our friends in Europe. Click Accept to let us know you’re okay with the updates. Thanks!
View Cookie Policy Accept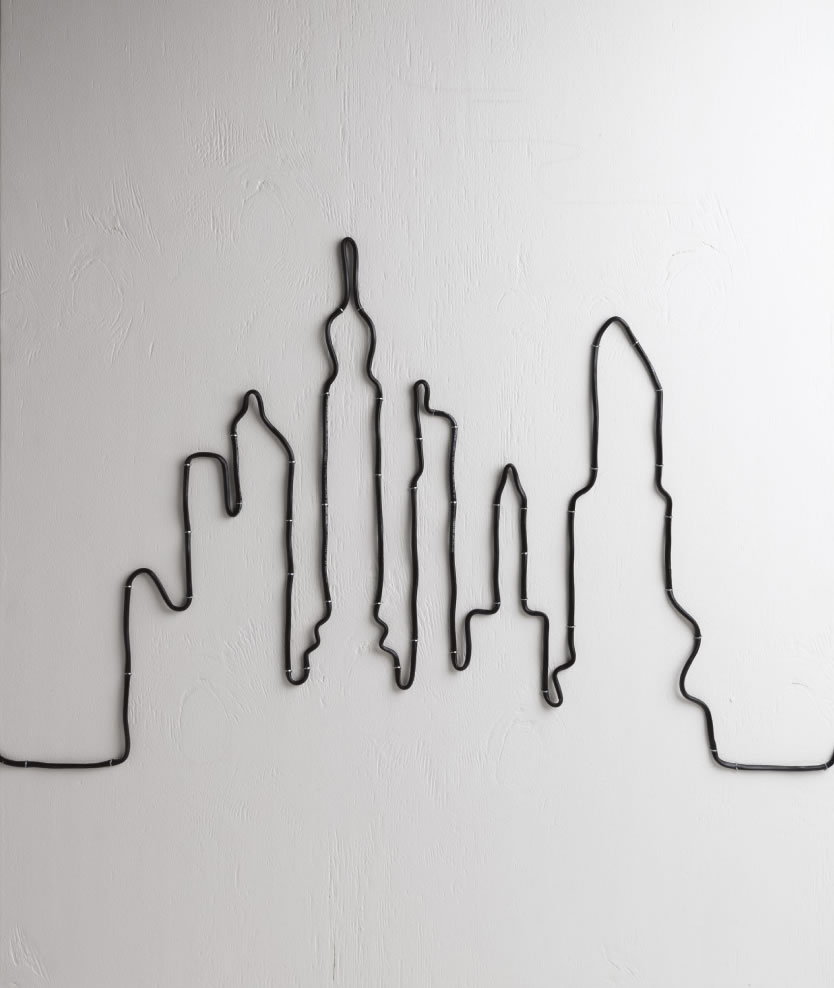