or Call Us at 1-800-776-2228
or Call Us at 1-800-776-2228
Looking for a fun project that will make any room look great? This LED bulletin board is a unique way to display photos, leave reminders, and add color to your room. In this tutorial, we’ll show you how to build your own LED Light Up Bulletin Board using your Arrow PT18G Pneumatic Brad Nailer, and your Arrow T50X Staple Gun.

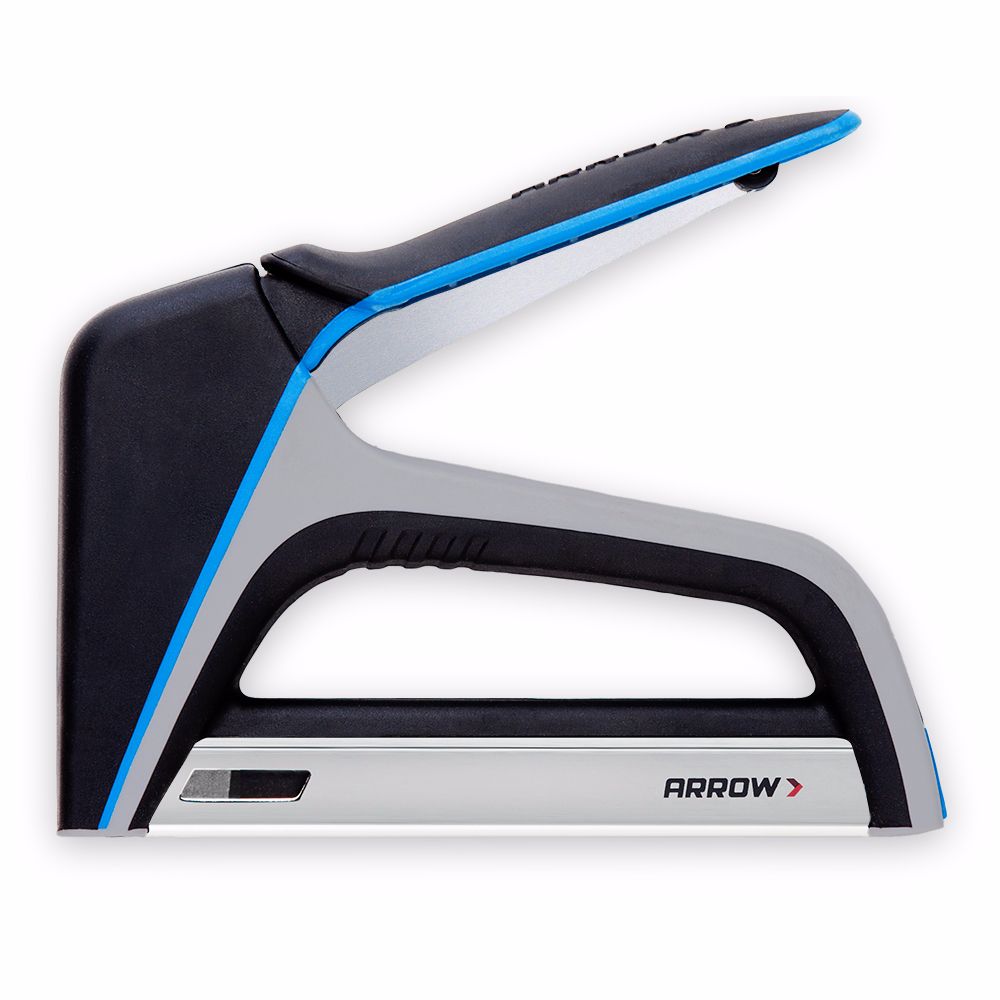
Pneumatic Brad Nailer
TacMate™ Heavy-Duty Staple Gun
Start by building the bulletin board frame. Lay out the four 1x3s, and lay the 1x2s on top. The side facing down will be the front of the LED Bulletin Board. For our frame, we used a simplified version of a basic overlap joint using the 1×3 and 1×2 boards.
If you’re going to be adding the optional LED light strip, put a small notch in one of the 36 inch 1x3s. Make sure the notch is cut 3 inches down, and is large enough to fit the wires of your light strip.
Apply glue to the first 1×2, and then glue the sides of the 1x3s beneath it together, on both the top corner and the bottom. Place the 1×2 on top of the three 1x3s. You can start on either the left or right side of the bulletin board for this step.
Apply glue to the first 1×2, and then glue the sides of the 1x3s beneath it together, on both the top corner and the bottom. Place the 1×2 on top of the three 1x3s. You can start on either the left or right side of the bulletin board for this step.
Using your PT18G, nail the 1×2 to the 1x3s. Use 1-1/4 inch brad nails for this step. You can double check the length of your brad nails by holding them up to the wood you will be nailing together, making sure that they’re shorter in length. Nail the 1×2 to all three 1x3s that the 1×2 is laying on.
Repeat Step 2 for the opposite side by gluing the 1×2 board, gluing the 1x3s in the top and bottom corners, and placing the 1×2 on top. Then repeat Step 3 for this side by nailing the 1×2 to each of the three 1x3s. Use your square to make sure each corner is properly fitted before nailing.
Glue and nail the top 1×2 to the top 1×3. Before you do the same with the bottom 1×2, put the wires of the LED light strip into the notch. When the wires are in place, apply some glue to the 1×2, put it on top, and nail it to the 1×3. Be careful not to nail through the wires.
Glue and nail the top 1×2 to the top 1×3. Before you do the same with the bottom 1×2, put the wires of the LED light strip into the notch. When the wires are in place, apply some glue to the 1×2, put it on top, and nail it to the 1×3. Be careful not to nail through the wires.
Paint your frame. You can use any painting method of your choice. For our bulletin board, we used spray paint. If you do the same, make sure you’re outside or in a well ventilated area. Don’t forget to cover the LED light strip so that you don’t get any paint on it. We used painters tape and newspaper for that.
Paint your frame. You can use any painting method of your choice. For our bulletin board, we used spray paint. If you do the same, make sure you’re outside or in a well ventilated area. Don’t forget to cover the LED light strip so that you don’t get any paint on it. We used painters tape and newspaper for that.
Use a box cutter to cut a piece of insulation foam to fit inside of the rectangle made by the 1x2s. The dimensions of the foam should be 33” x 26”.
Use a box cutter to cut a piece of insulation foam to fit inside of the rectangle made by the 1x2s. The dimensions of the foam should be 33” x 26”.
Cut a piece of fabric to wrap around the foam. Make sure the fabric is a few inches larger than the foam. We cut ours to about 39” x 32”, to leave about three (3) inches on each side of the foam. We recommend ironing the fabric before attaching it to the foam, to get rid of wrinkles.
When the frame’s paint is done drying, drape the fabric over the back of the frame, and fit the foam inside. Fold the edges over, and staple them to the foam using your T50X Staple Gun with 1/4 inch T50 staples.
You can fold up the fabric as shown to the right, which will make it look neater. And you can cut the corners if you have excess fabric. Be sure to pull the fabric as tight as possible around the foam, otherwise you will end up with wrinkles in the front.
Remove the foam from the frame. Attach the LED light strip around the insides of the 1×3 boards by peeling and sticking. Cut the strip to the desired length.
Remove the foam from the frame. Attach the LED light strip around the insides of the 1×3 boards by peeling and sticking. Cut the strip to the desired length.
If you want to attach the optional string to your bulletin board, cut a piece of twine or yarn to 35 inches. Measure six (6) inches down from the top on each of the side 1×3 boards. Using your T50X and 1/4 inch staples, staple the twine or yarn to each side at the six (6) inch mark.
If you want to attach the optional string to your bulletin board, cut a piece of twine or yarn to 35 inches. Measure six (6) inches down from the top on each of the side 1×3 boards. Using your T50X and 1/4 inch staples, staple the twine or yarn to each side at the six (6) inch mark.
Place the foam back into the frame. Use your PT18G to nail the foam into the 1×3 boards, this time using 1 inch brad nails, rather than 1-1/4 inch.
Place the foam back into the frame. Use your PT18G to nail the foam into the 1×3 boards, this time using 1 inch brad nails, rather than 1-1/4 inch.
Attach a 1/4 inch piece of wood to the bottom 1×2. The 1/4 inch wood should be slightly larger than the foam board, and should overlap the 1×2 on the sides and bottom. Do the same with the other 1/4 inch wood on the top 1×2.
Attach a 1/4 inch piece of wood to the bottom 1×2. The 1/4 inch wood should be slightly larger than the foam board, and should overlap the 1×2 on the sides and bottom. Do the same with the other 1/4 inch wood on the top 1×2.
Attach hanging hardware. You can use any hardware of your choice, but for ours we installed two eyebolt screws on each side of the back of the frame. To do this, place each screw six (6) inches down on the 1×2 boards. Screw each in by hand tightly. Then thread picture hanging wire through the screws, and tie off each end.
Attach hanging hardware. You can use any hardware of your choice, but for ours we installed two eyebolt screws on each side of the back of the frame. To do this, place each screw six (6) inches down on the 1×2 boards. Screw each in by hand tightly. Then thread picture hanging wire through the screws, and tie off each end.
The frame of your LED bulletin board is now complete. All that’s left is adding decorations. This part is up to you, but here’s how we made ours: Take a note card holder and cut the top off. Use your T50X to staple it to the bottom right corner of the bulletin board.
The frame of your LED bulletin board is now complete. All that’s left is adding decorations. This part is up to you, but here’s how we made ours: Take a note card holder and cut the top off. Use your T50X to staple it to the bottom right corner of the bulletin board.
Next clip miniature clothespins onto the string to hang photos from.
Next clip miniature clothespins onto the string to hang photos from.
Then stick the three Command™ Hooks onto the bottom left corner of the board. Place them in line next to each other, but space them about an inch apart from each other.
Then stick the three Command™ Hooks onto the bottom left corner of the board. Place them in line next to each other, but space them about an inch apart from each other.
Attach the three peel-and-stick pen holders to the right side of the board, above the note card holder. Hang a variety of colored markers from the string.
Attach the three peel-and-stick pen holders to the right side of the board, above the note card holder. Hang a variety of colored markers from the string.
Attach a magnetic strip to the back of the LED light remote, and one to the upper left hand side of the board.
Attach a magnetic strip to the back of the LED light remote, and one to the upper left hand side of the board.
Fill the notecard holder with note cards, and stick a handful of thumbtacks into the board.
Fill the notecard holder with note cards, and stick a handful of thumbtacks into the board.
We’d love to see how your LED bulletin board project turned out! Share your project pictures on Facebook, Instagram or X by using #ArrowStrong, or by tagging Arrow Fastener.
Get Arrow tips, tricks, projects and promos in your inbox!
Hey there! We’ve updated our Privacy and Cookie Policies at the request of some of our friends in Europe. Click Accept to let us know you’re okay with the updates. Thanks!
View Cookie Policy Accept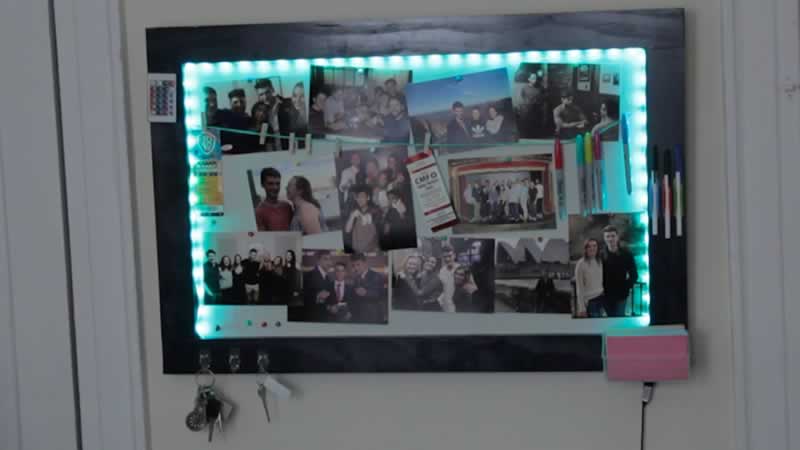