or Call Us at 1-800-776-2228
or Call Us at 1-800-776-2228
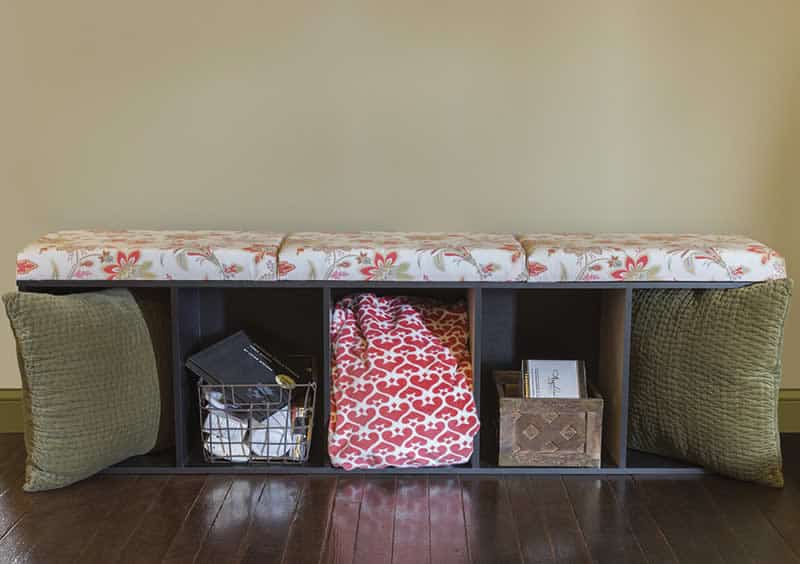
Looking for some extra seating this winter? Transform an old bookcase into a cozy bench with the Arrow T50PBN Staple Gun & Nailer. This easy bookshelf bench DIY project can be tackled in an afternoon! Don’t forget to grab a pair of safety goggles and gloves (optional) before getting started!
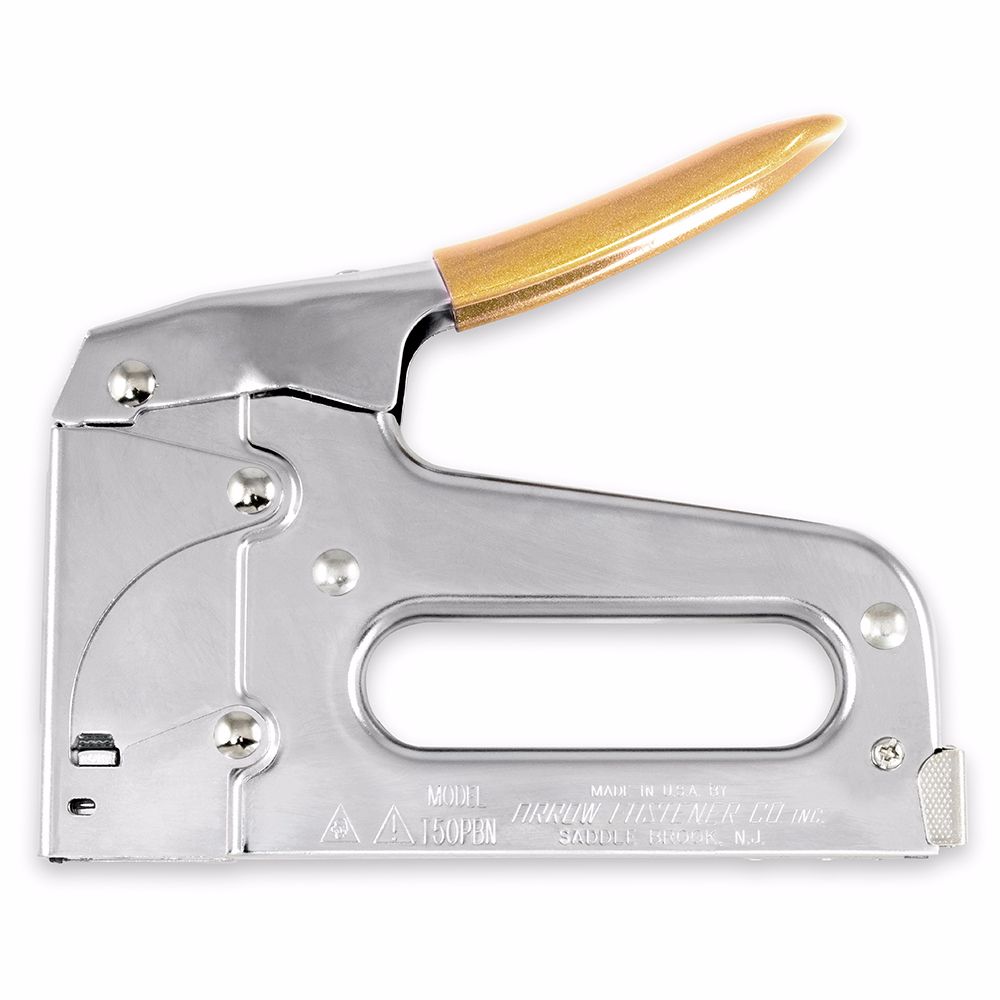
Heavy Duty Staple Gun and Nailer
Turn the bookcase on its side. To get the size for the cushions, measure the width and length of the side of the bookcase, which will be the seating area. Ours measured 11-1/2” x 48”.
Turn the bookcase on its side. To get the size for the cushions, measure the width and length of the side of the bookcase, which will be the seating area. Ours measured 11-1/2” x 48”.
You can style the bench cushion a few different ways depending on whether you want one long cushion or individual cushions. We wanted individual cushions so we had three pieces cut to 11-1/2” x 16” at our local home center.
You can style the bench cushion a few different ways depending on whether you want one long cushion or individual cushions. We wanted individual cushions so we had three pieces cut to 11-1/2” x 16” at our local home center.
Mark a hole every 5-3/4” across the board, as shown below. Then clamp the cushion boards on top of the bookcase, and drill a hole at every mark. Make sure to drill all the way through into the bench.
Mark a hole every 5-3/4” across the board, as shown below. Then clamp the cushion boards on top of the bookcase, and drill a hole at every mark. Make sure to drill all the way through into the bench.
Unclamp the boards from the bookcase. Using your utility knife, cut the foam to the size of the cushion board. Place a board on the foam and score about 1/4” deep along the perimeter of foam first. Then remove the plywood and cut through the rest of the way, moving slowly to create neat edges.
Unclamp the boards from the bookcase. Using your utility knife, cut the foam to the size of the cushion board. Place a board on the foam and score about 1/4” deep along the perimeter of foam first. Then remove the plywood and cut through the rest of the way, moving slowly to create neat edges.
Measure and cut the fabric for the cushions. Add at least 1-1/2” to the length and width of the seats so you can easily wrap the fabric around the cushion.
Measure and cut the fabric for the cushions. Add at least 1-1/2” to the length and width of the seats so you can easily wrap the fabric around the cushion.
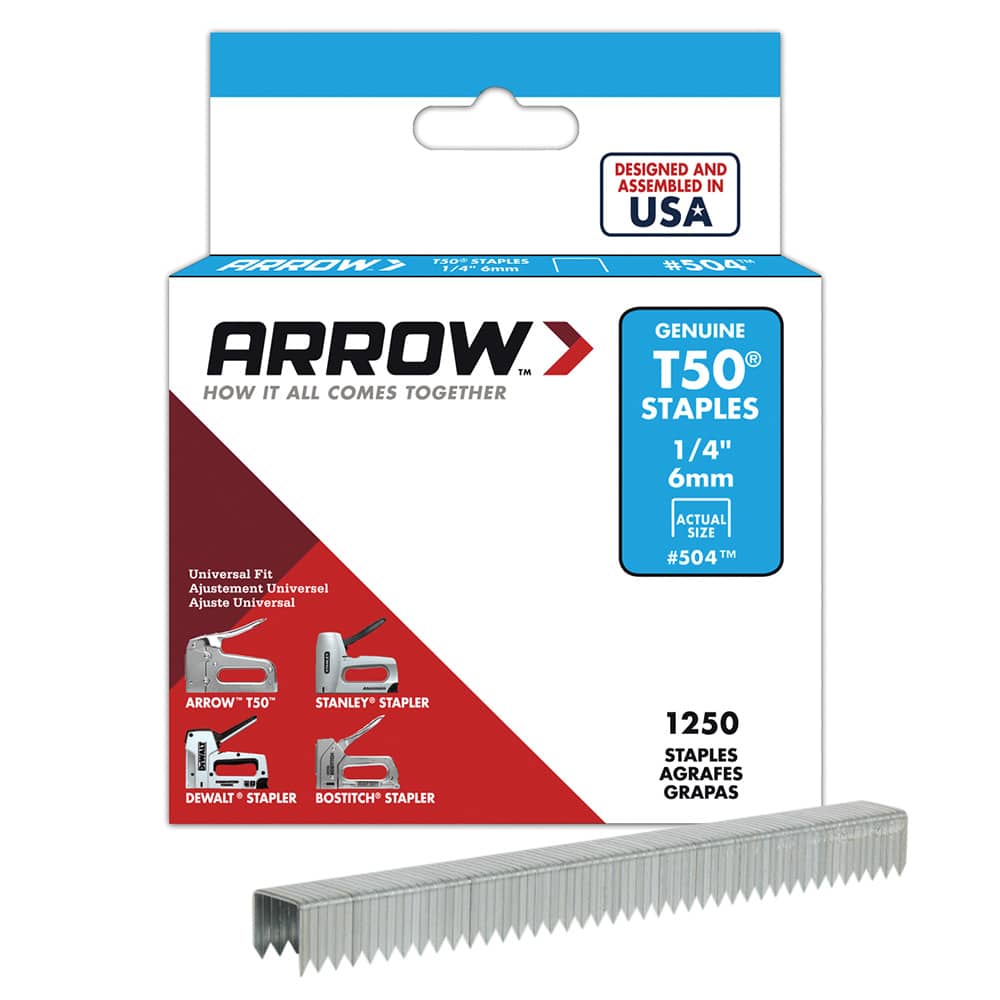
Wrap the fabric over the foam. Staple the fabric to the back of the board using the Arrow T50PBN Staple Gun & Nailer and 1/4” T50 staples. We chose shorter staples because we were fastening thin fabric to a hard plywood surface. If your fabric is thicker, you may need a longer staple like the 3/8”. Fold corners neatly.
Wrap the fabric over the foam. Staple the fabric to the back of the board using the Arrow T50PBN Staple Gun & Nailer and 1/4” T50 staples. We chose shorter staples because we were fastening thin fabric to a hard plywood surface. If your fabric is thicker, you may need a longer staple like the 3/8”. Fold corners neatly.
If you want to give the bookcase bench seat an entirely different look, now is the time to paint it! Painting after attaching the padded seats to the unit will be much more difficult. We liked the original color of ours, so we chose to leave it as is.
If you want to give the bookcase bench seat an entirely different look, now is the time to paint it! Painting after attaching the padded seats to the unit will be much more difficult. We liked the original color of ours, so we chose to leave it as is.
Finally, place the wrapped boards on top of the seating area and line up the drill holes. Then secure with screws. Make sure the screw is not protruding through the plywood.
Finally, place the wrapped boards on top of the seating area and line up the drill holes. Then secure with screws. Make sure the screw is not protruding through the plywood.
We’d love to see how your bookshelf bench DIY project turned out! Share your results on Facebook, Instagram or X by using #MadeWithArrow or tagging Arrow Fastener.
Get Arrow tips, tricks, projects and promos in your inbox!
Hey there! We’ve updated our Privacy and Cookie Policies at the request of some of our friends in Europe. Click Accept to let us know you’re okay with the updates. Thanks!
View Cookie Policy Accept