or Call Us at 1-800-776-2228
or Call Us at 1-800-776-2228
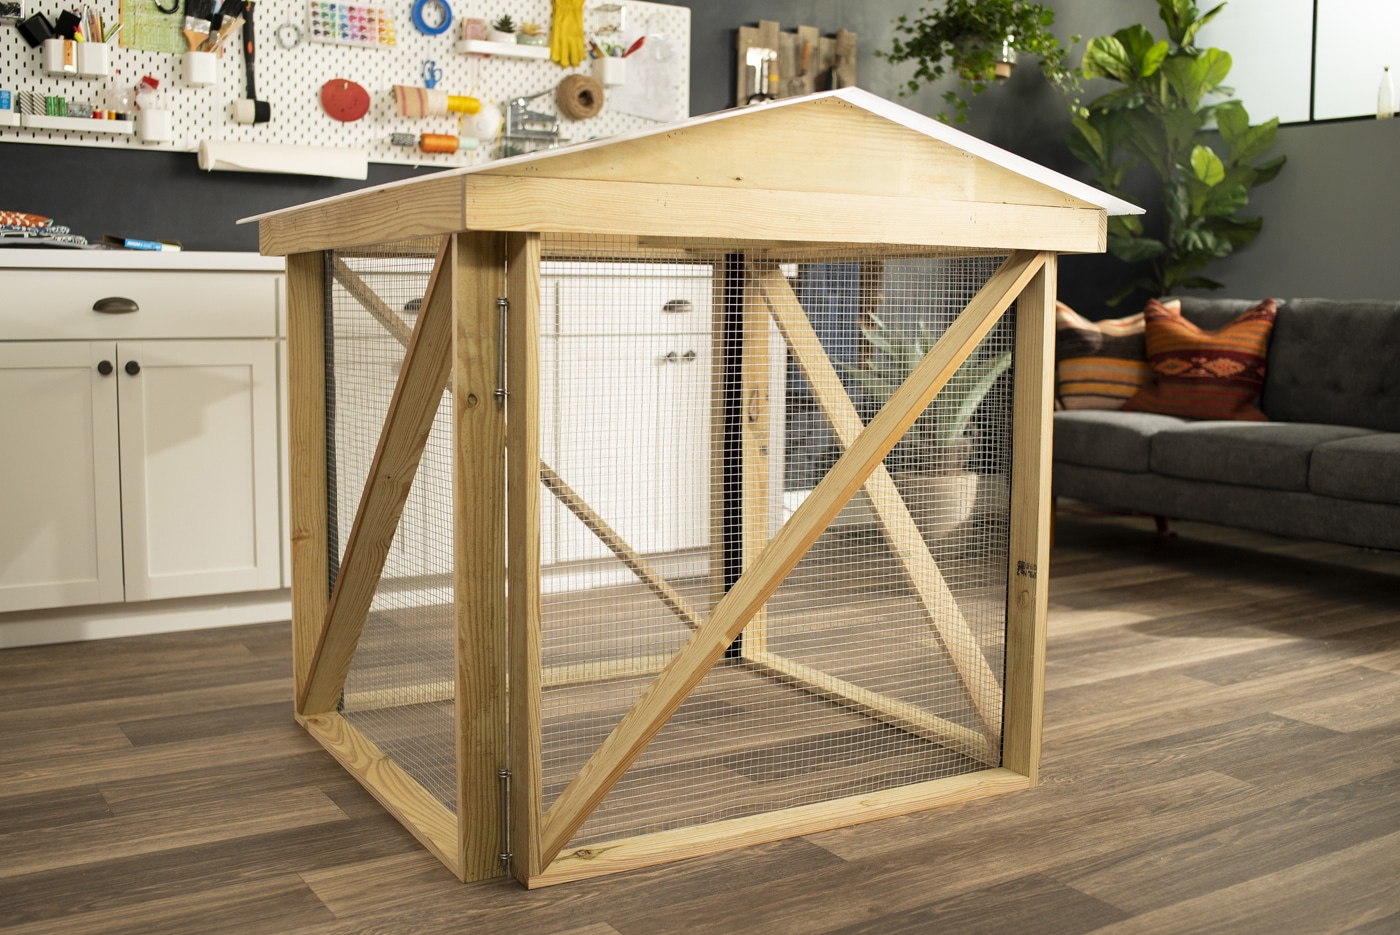
Calling all green thumbs! Want to get into composting but don’t know where to start? Grab your Arrow PT18G pneumatic brad nailer and Arrow T50DCD cordless staple gun and give this composter project a try!

Pneumatic Brad Nailer
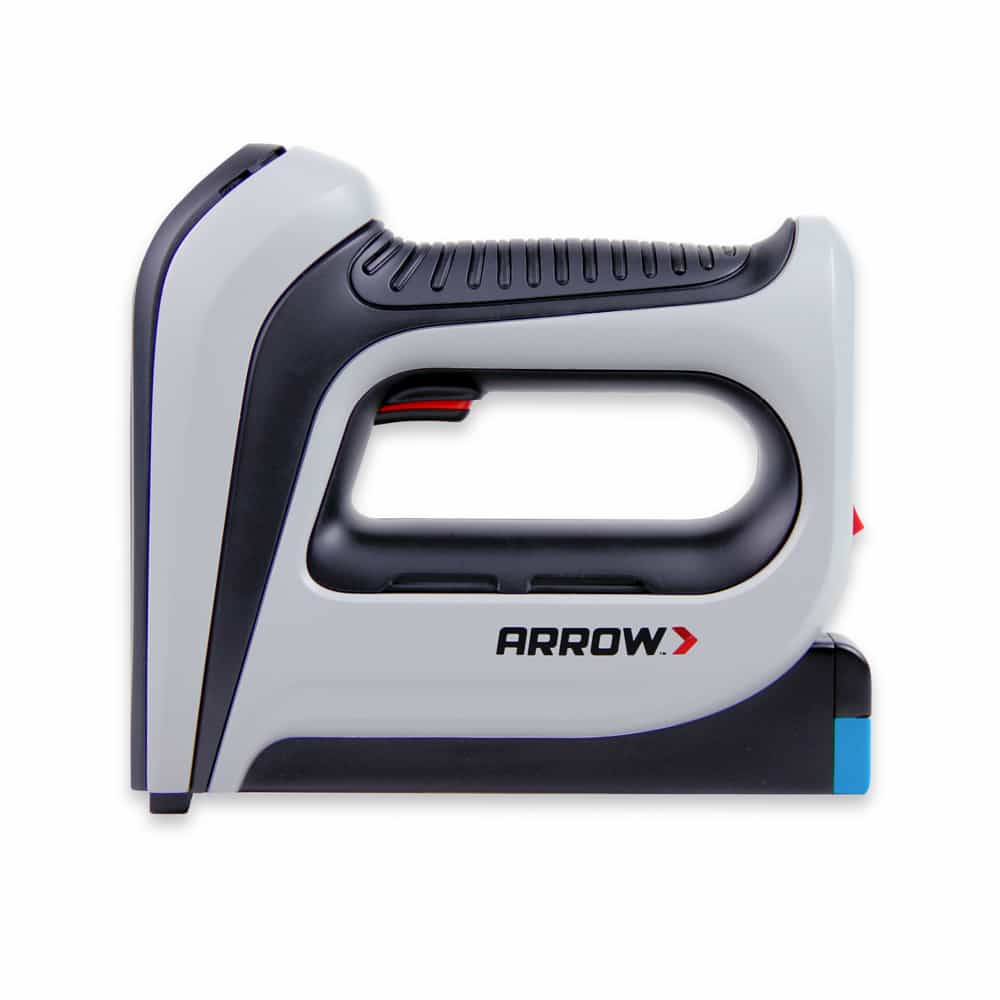
Cordless Staple Gun
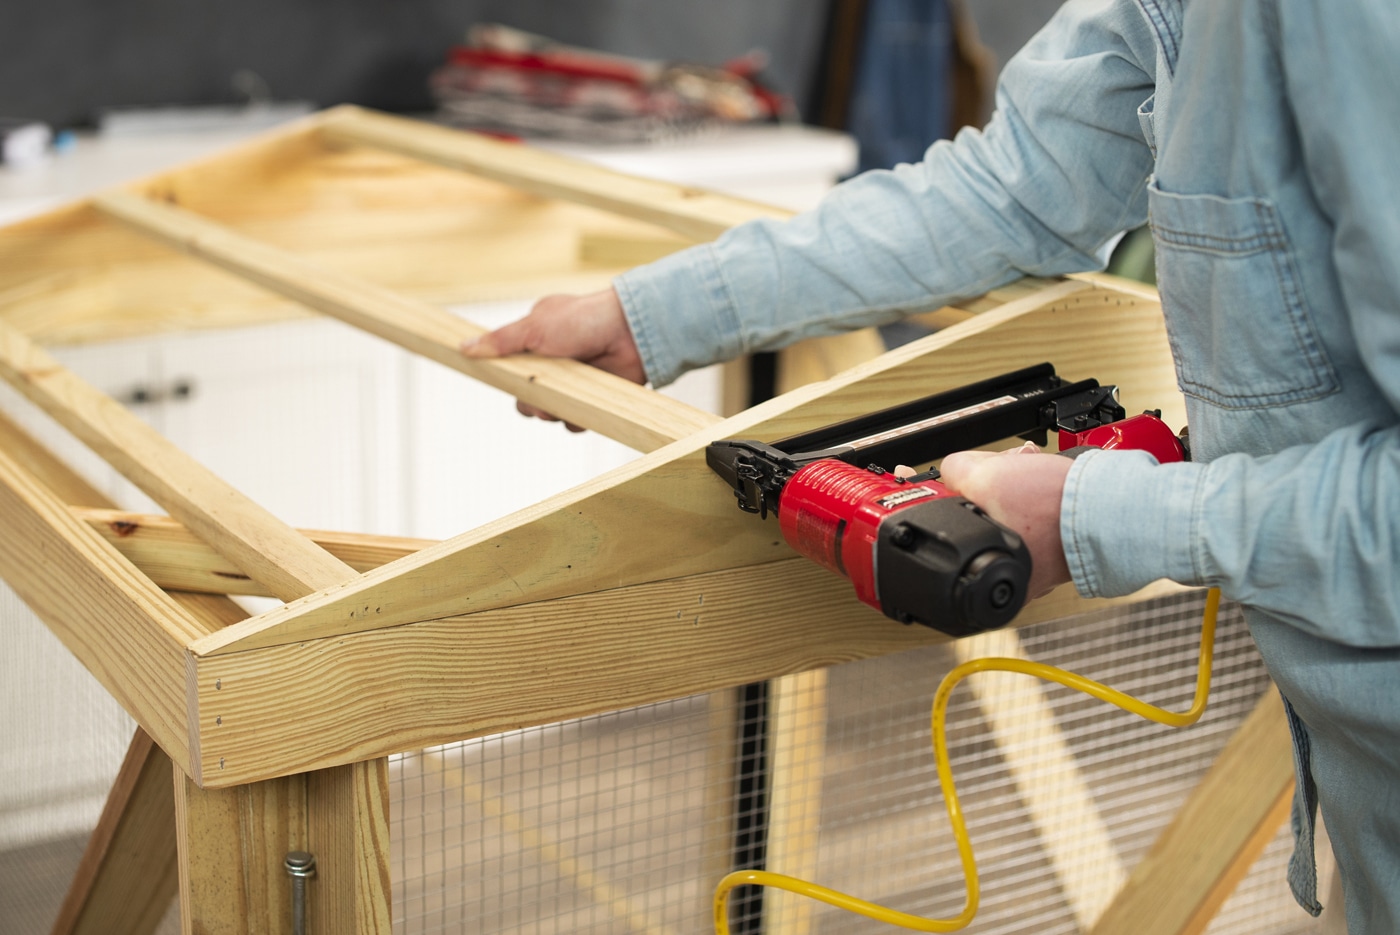
Using your PT18G pneumatic brad nailer, assemble the four side panels and top frame of the composter. Set aside the top frame for now.
Lay the four assembled panels side by side and staple on the hardware cloth using your T50DCD cordless staple gun.
We chose a 36″ hardware cloth to fit our project dimensions. This eliminated a lot of cutting. You can use the metal cutting shears to trim the excess hardware cloth after securing the last panel, but be careful – it’s sharp!
Staple the nylon webbing at the joints over the hardware cloth to add strength and durability to the corners.
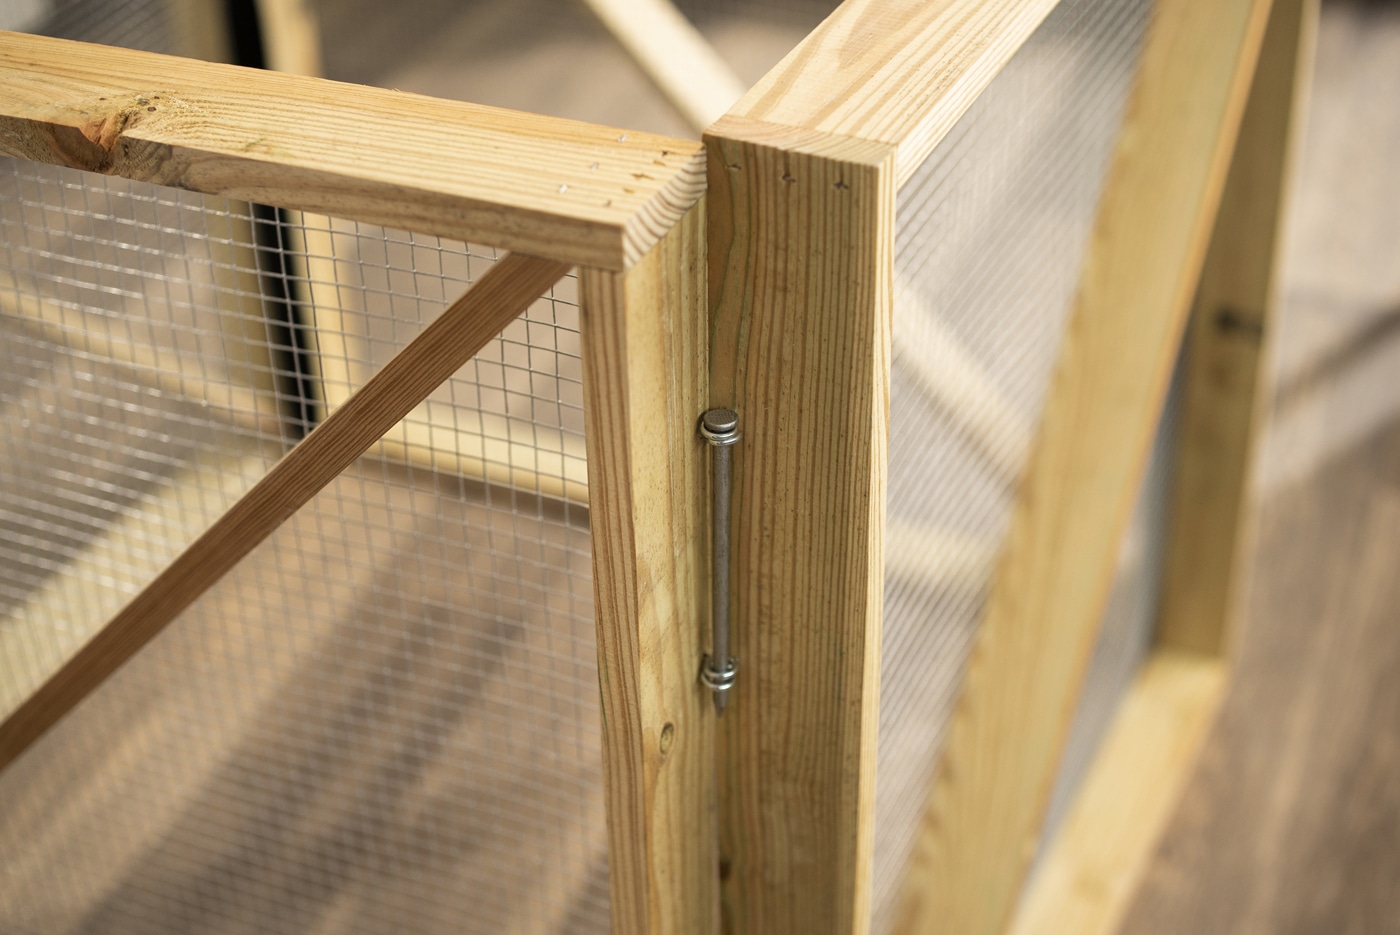
Stand up the side panels vertically and square them up to create the box. Add eye bolts to the top and bottom of the open joint. Depending on the type of wood, you may need to drill a pilot hole before screwing in the eye bolts. Insert the galvanized spikes to lock the joints together. The spikes can be removed to access the compost.
Take the assembled top frame and place it over the box. The corner bracing should allow this to float freely while locking the side panels and roof in place.
Using your PT18G pneumatic brad nailer, install gable ends cut from the 1″ x 6″ board to fit your final top frame dimension. The width of your top frame will depend on the width of the side panel material you chose.
Cut and install spreaders to the gable ends to support the roofing material. A simple flat roof or a shed roof can be used instead of the gable roof.
Finally, use your T50DCD cordless staple gun to staple and secure the corrugated polycarbonate plastic roof panels. The clear roof panels allow for solar heating while also protecting the compost from the elements.
The roof overhang can be trimmed back if you’d like.
Now that you’ve got your composter, it’s time to start saving your leaves, kitchen scraps, and coffee grounds. And the best part? This unit can be moved and stored flat seasonally.
Get Arrow tips, tricks, projects and promos in your inbox!
Hey there! We’ve updated our Privacy and Cookie Policies at the request of some of our friends in Europe. Click Accept to let us know you’re okay with the updates. Thanks!
View Cookie Policy Accept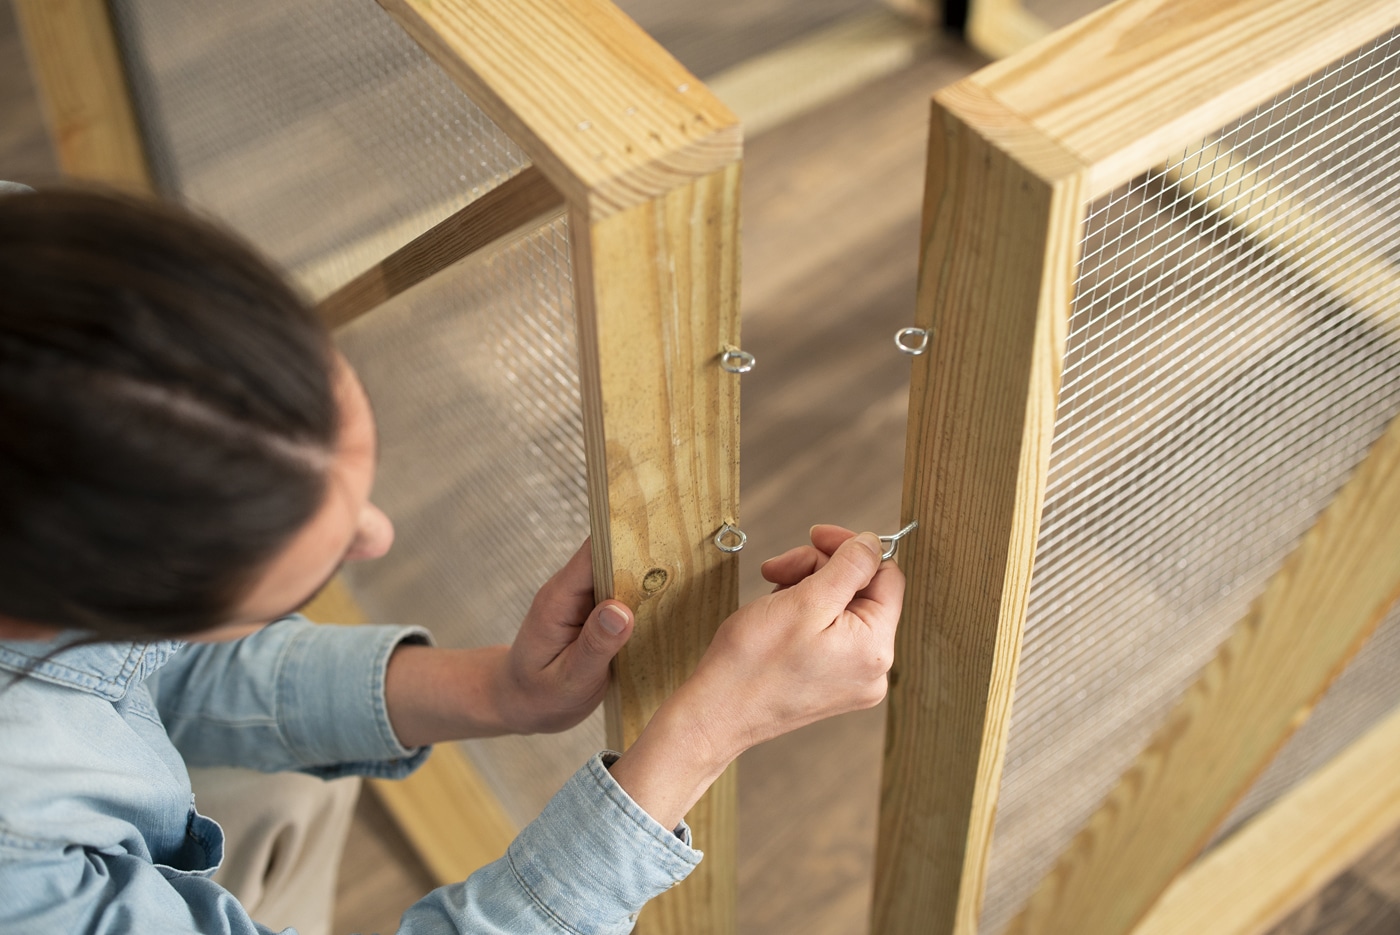