or Call Us at 1-800-776-2228
or Call Us at 1-800-776-2228
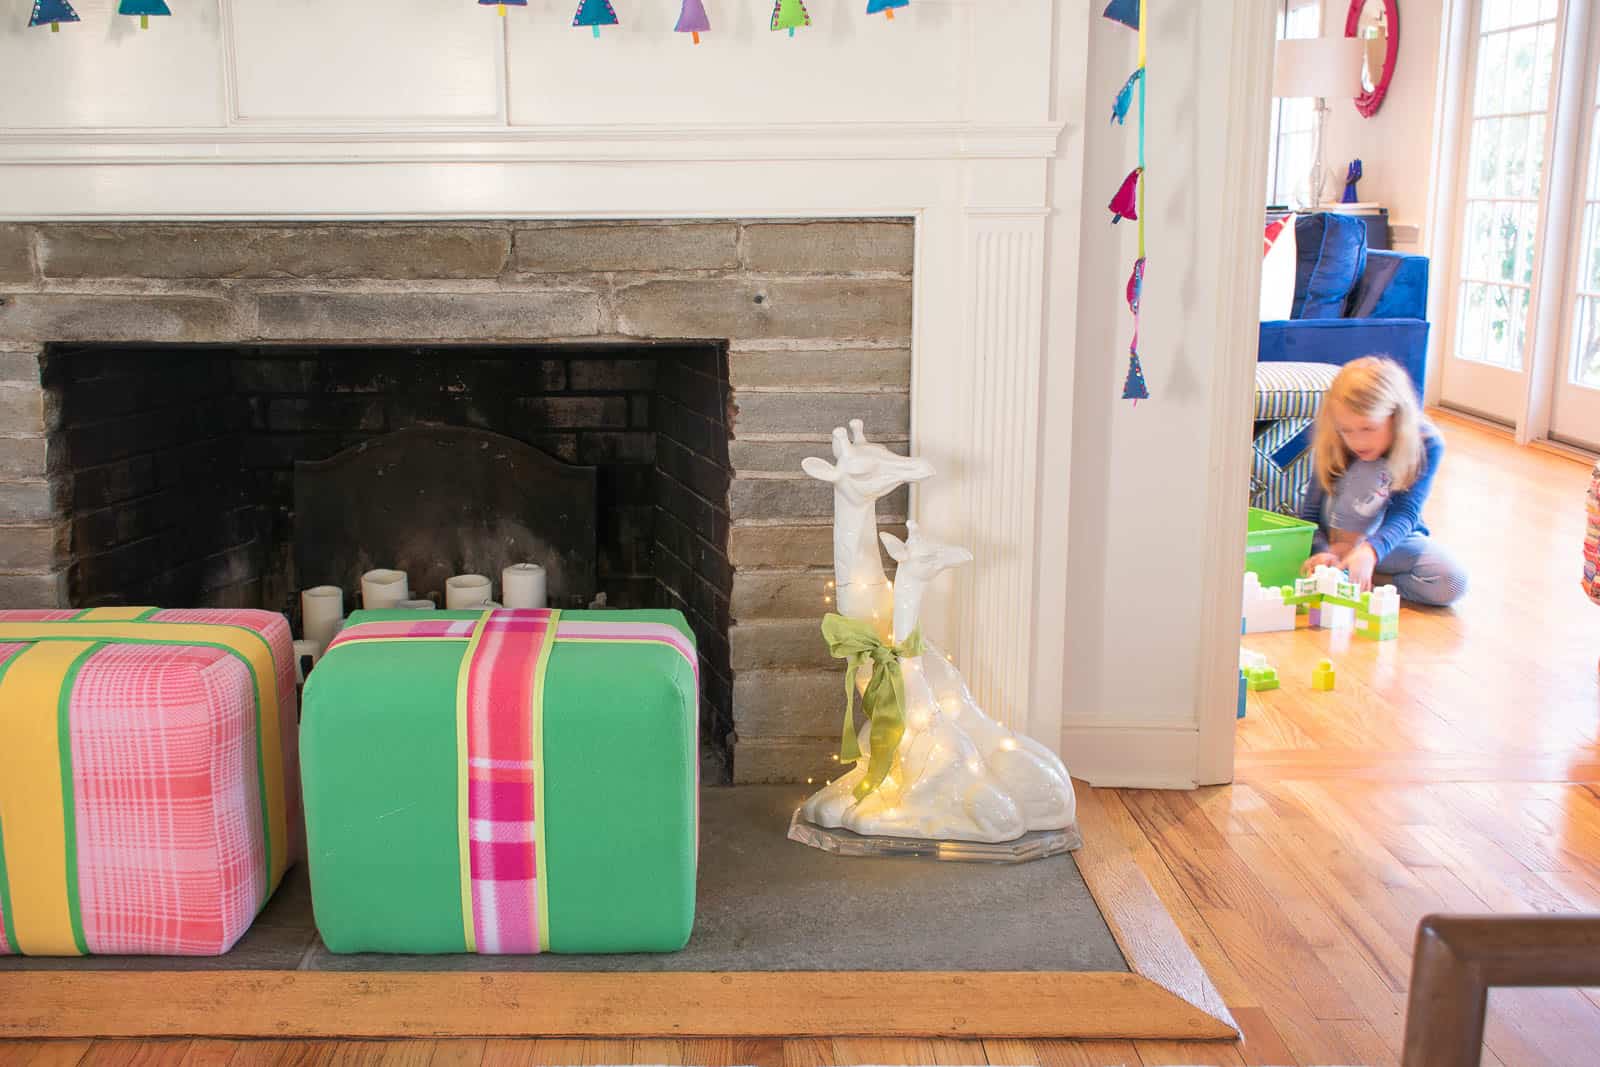
If you love entertaining in your home, this one’s for you! We’ll show you how to make a one-of-a-kind ottoman that will wow guests at your next party. The best part? It can be customized based on the ribbon and fabric you chose. So grab your trusted Arrow tools, and the other materials listed below, and let’s get to work on this functional (and fabulous) soon-to-be crowd pleaser.
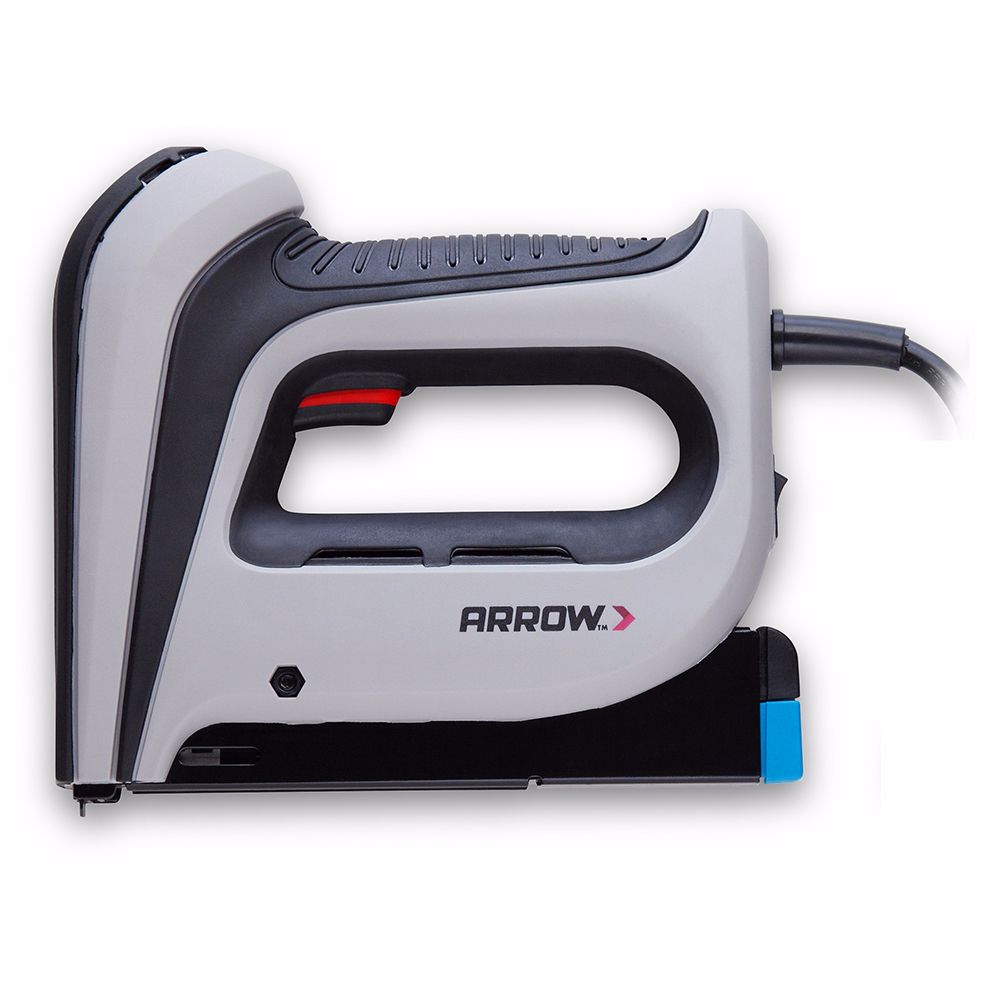
Compact Electric Staple Gun
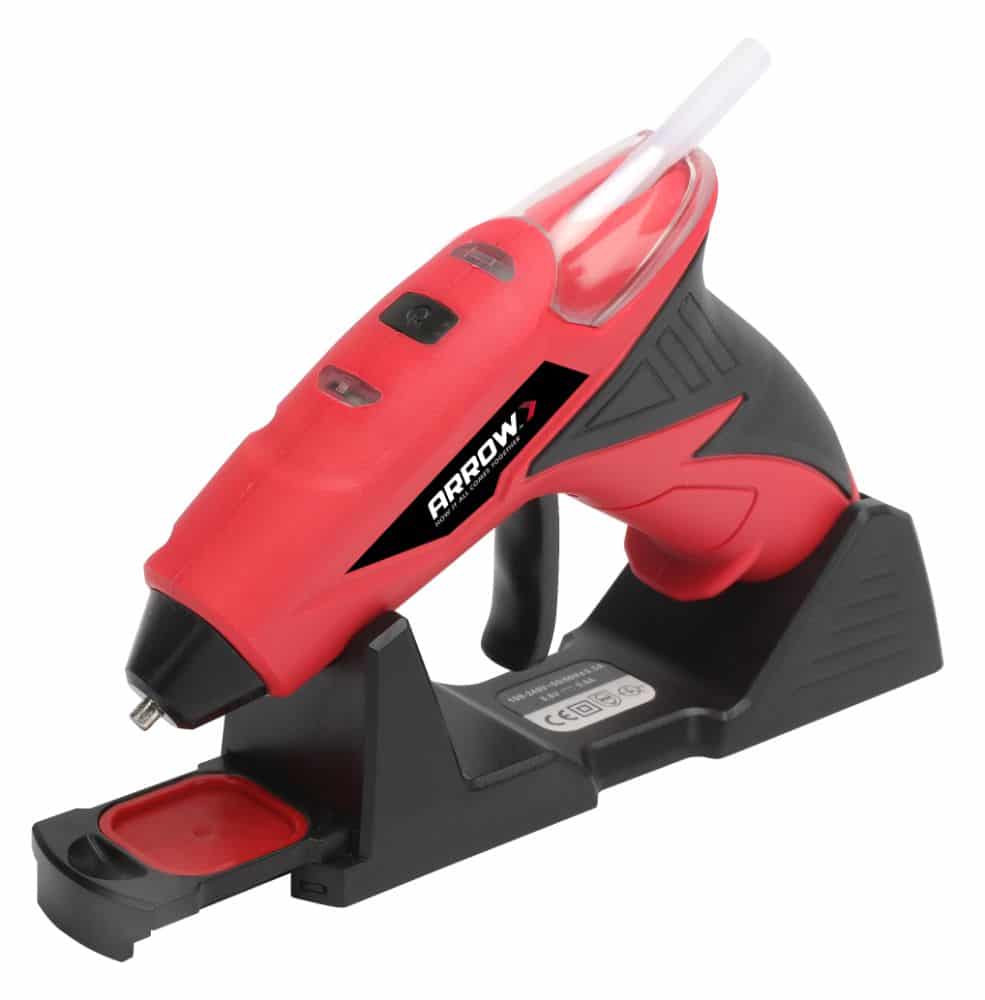
Cordless Glue Gun

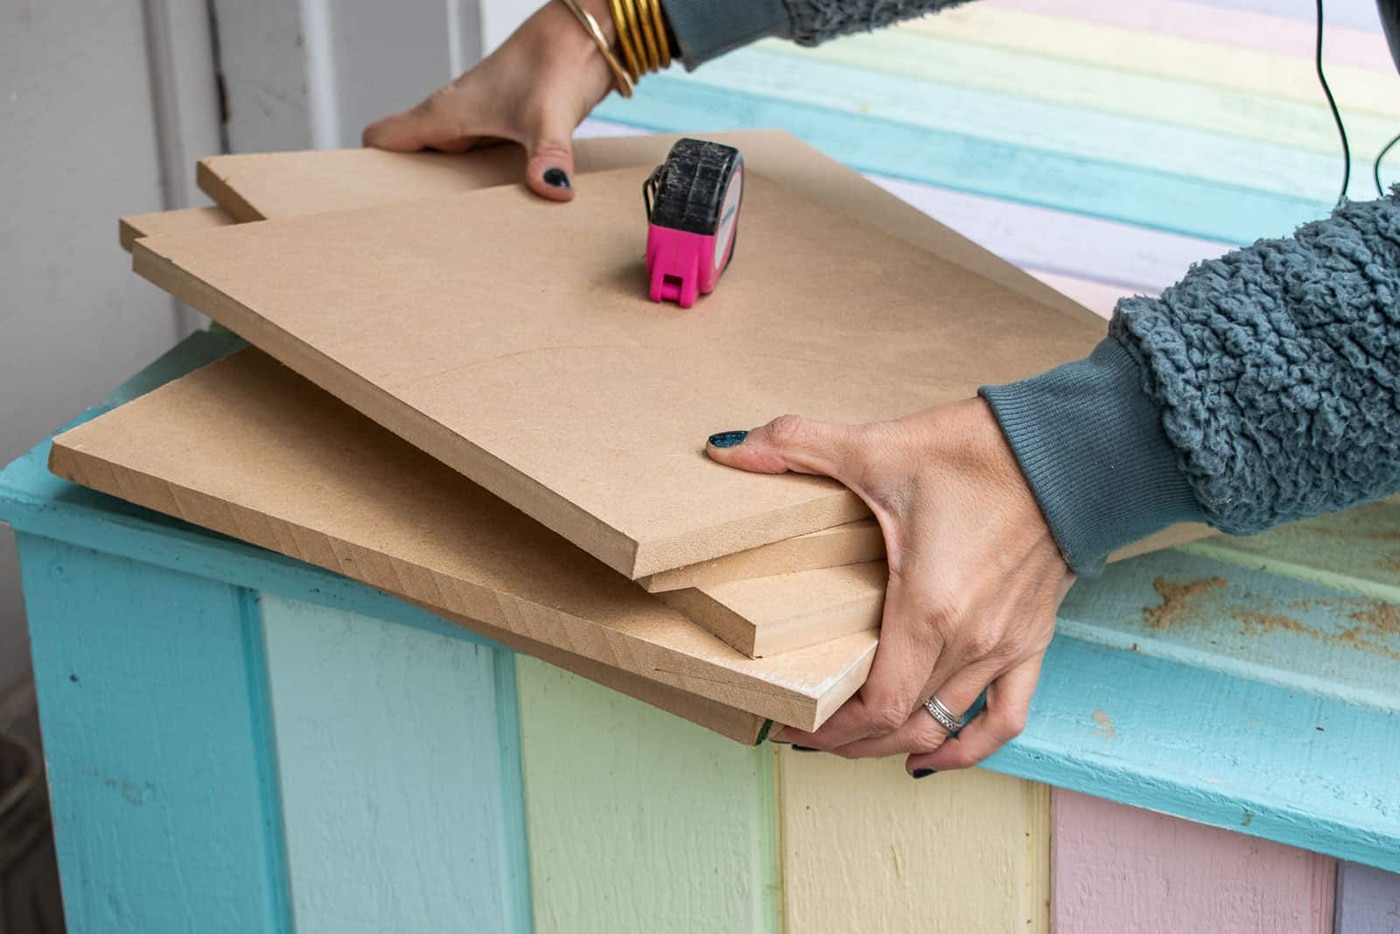
The first step of this project is to cut the pieces for the cube base of the ottoman. We’re using medium-density fiberboard (MDF) to save on costs, but you can replace with another wood if you prefer. To start, take your 2’ × 4’ half-inch MDF and saw it lengthwise into two 12” pieces. (Time saving tip: when purchasing the MDF, you can ask a store associate to make this cut for you.) Then, cut the boards so you have:
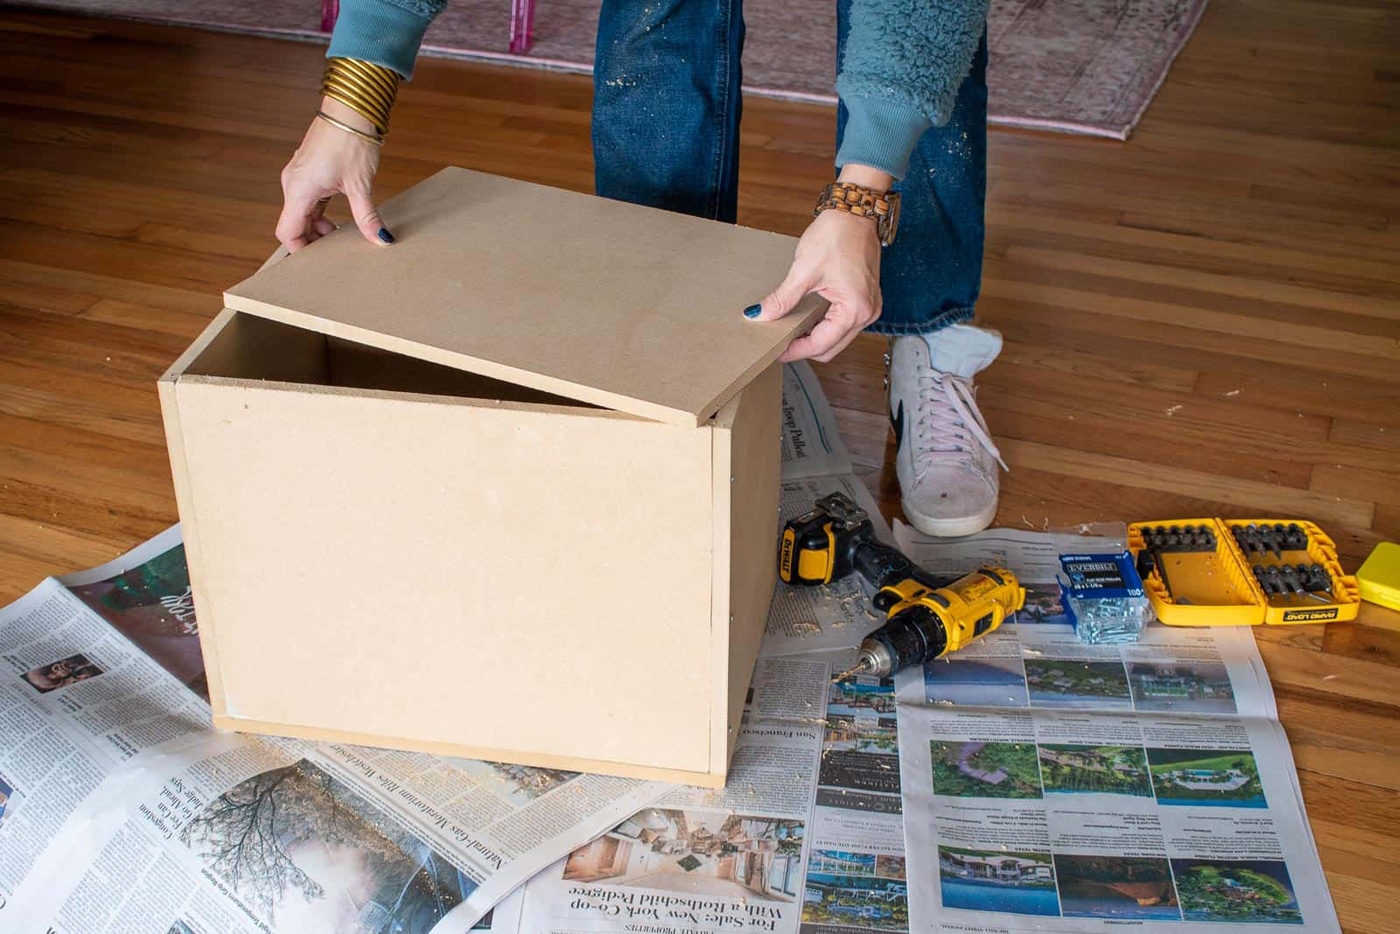
Your next task is to assemble the cube. Start by predrilling holes for the screws. Use your power drill to create holes where you plan on connecting the side, end, top, and bottom boards. Then, use #6 1 1/2” screws in the predrilled holes to attach each piece. At this point, you should have a full cube. Now that we have the functional part down, let’s move onto the fun stuff!
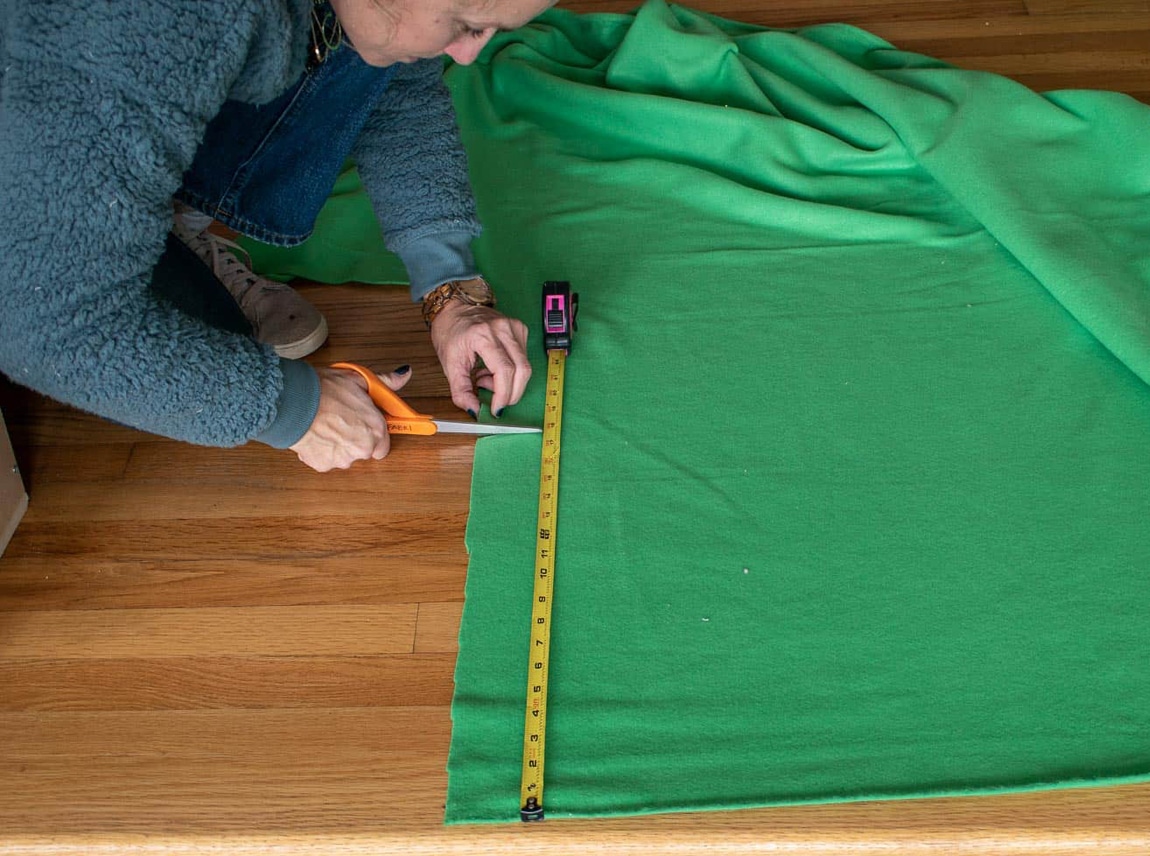
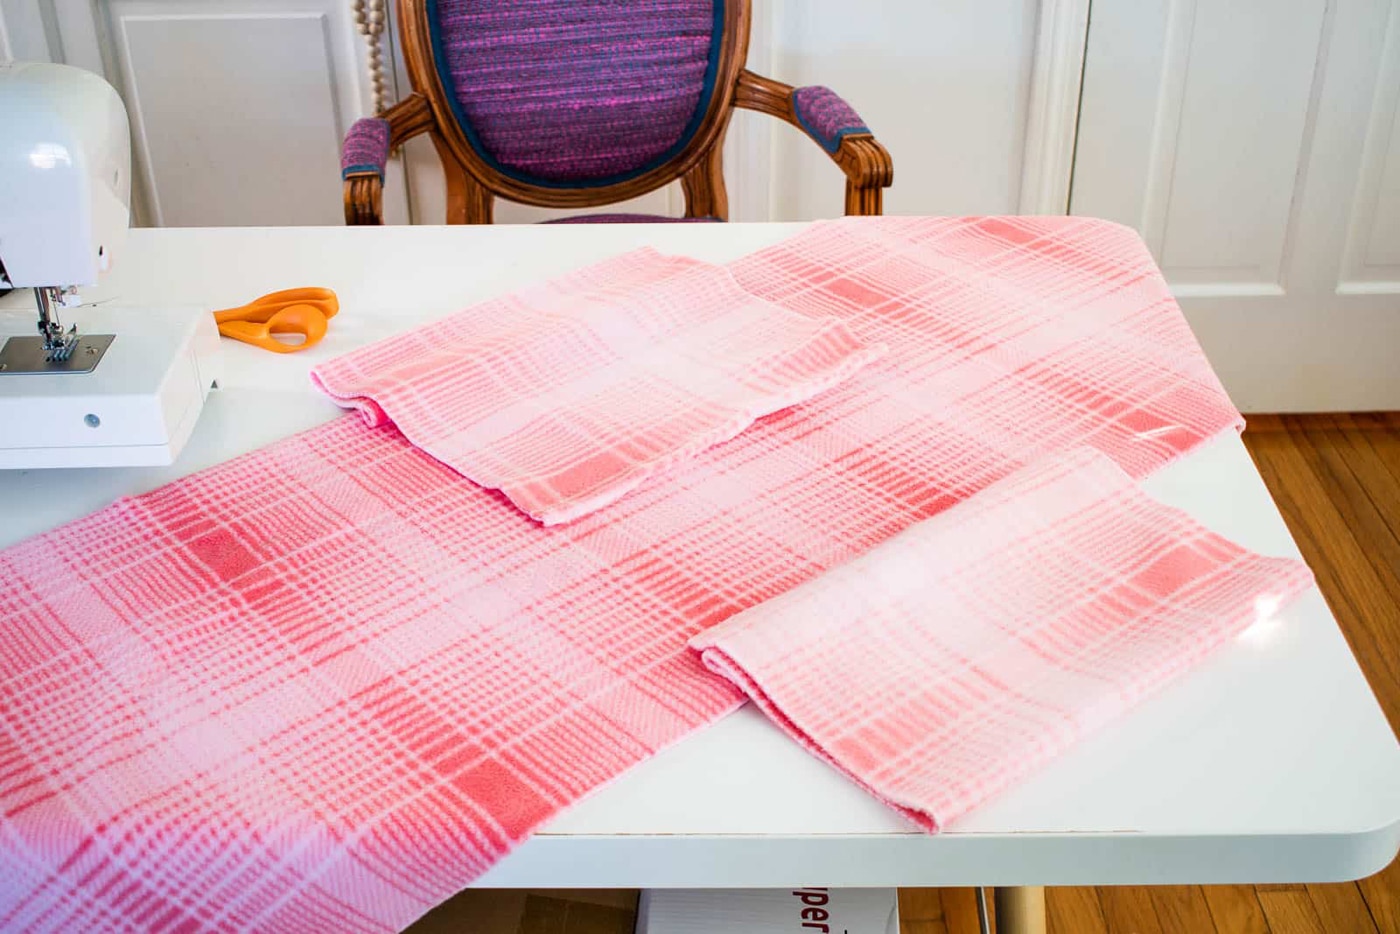
Before you start, remember: measure twice, cut once! Now that we have that out of the way, you’ll need a strip of fabric long enough to cover one side, the top, and down the other side. Give yourself an additional half inch of fabric all around to account for the seam. With the recommended cube dimensions, this should measure approximately 17 inches wide and about 44 inches long. We recommend draping the fabric over the wood to be sure you have enough before cutting. Then, proceed to your next two pieces of fabric, which will cover the two ends of the ottoman. These should measure about 13 inches wide and 16 inches long.
Next, use your needle and thread to sew the slipcover together. First, sew the seams along the length of the 44-inch-long fabric. Then pin the two smaller pieces of fabric to the larger piece to form a plus sign. Sew the seams of the “arms” to the larger fabric piece. Bring the remaining unfinished seams together and sew the material into a box-shaped slipcover.
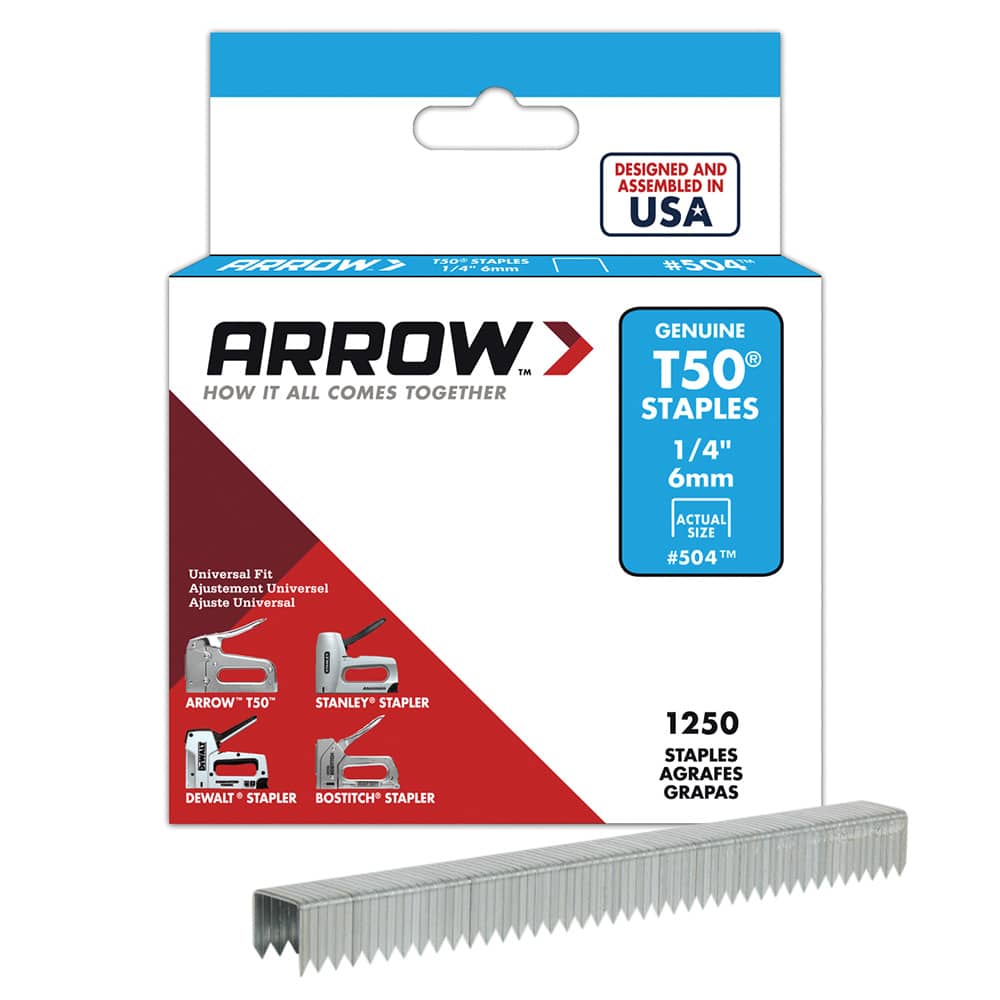
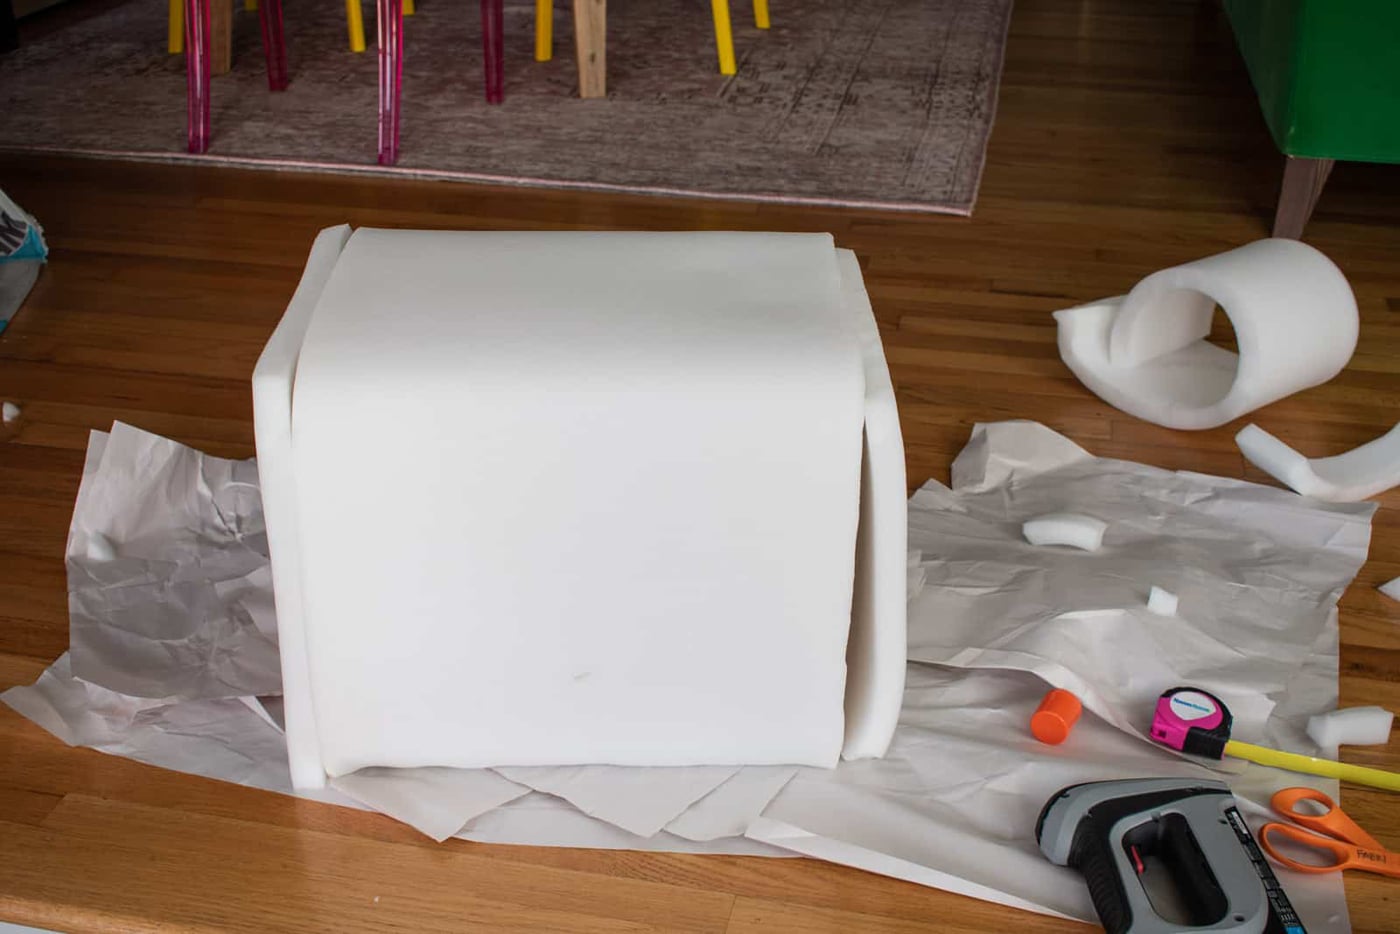
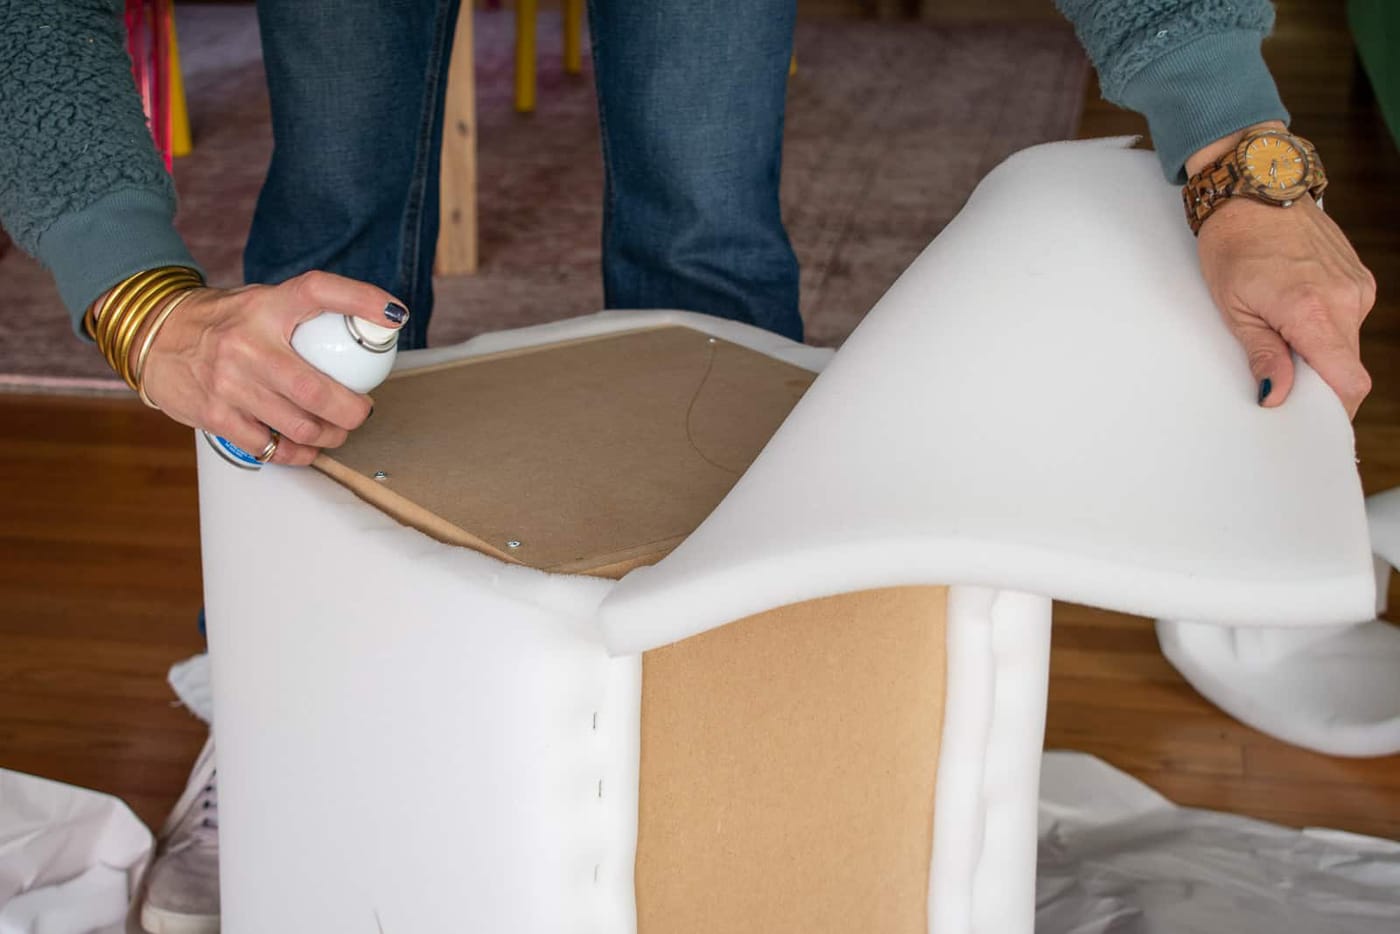
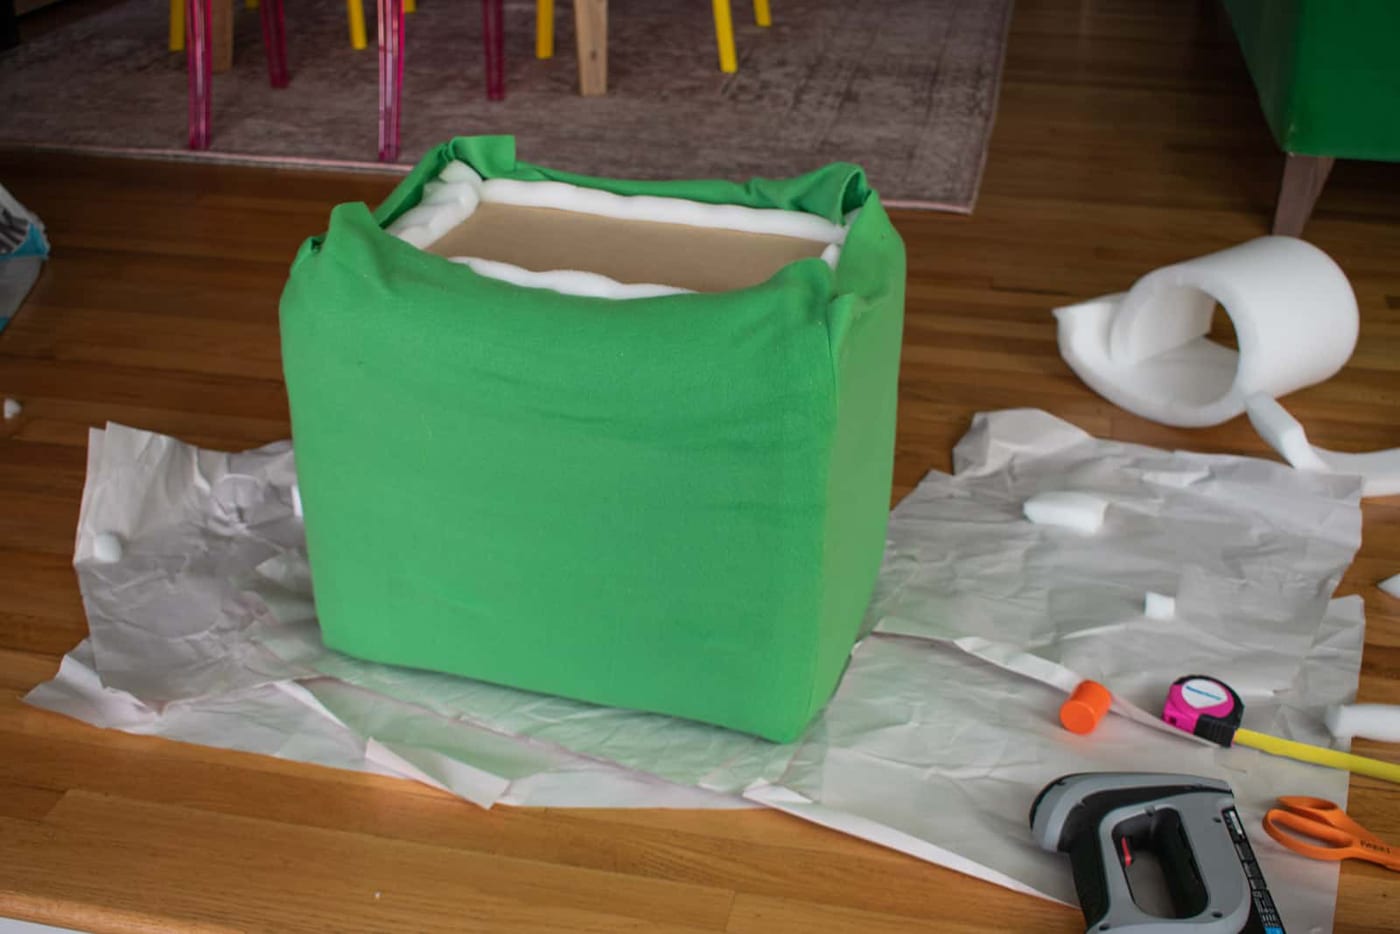
Cut a strip of foam large enough to cover the top and sides of your ottoman (similar to how you cut the fabric for the slipcover). Leave enough room for the foam pieces to curl underneath the ottoman. (Not only will this prevent it from scratching your flooring or snagging on the slipcover, but it is also where you will be stapling the foam to attach it to the MDF.) Use your Arrow T50ACD compact electric staple gun and Arrow T50 staples to attach the foam to the bottom of the ottoman. If necessary, trim excess bits of foam (like at the corners) so that the ottoman sits flat. Then, adhere the foam to the sides, ends, and top of the cube with spray adhesive.
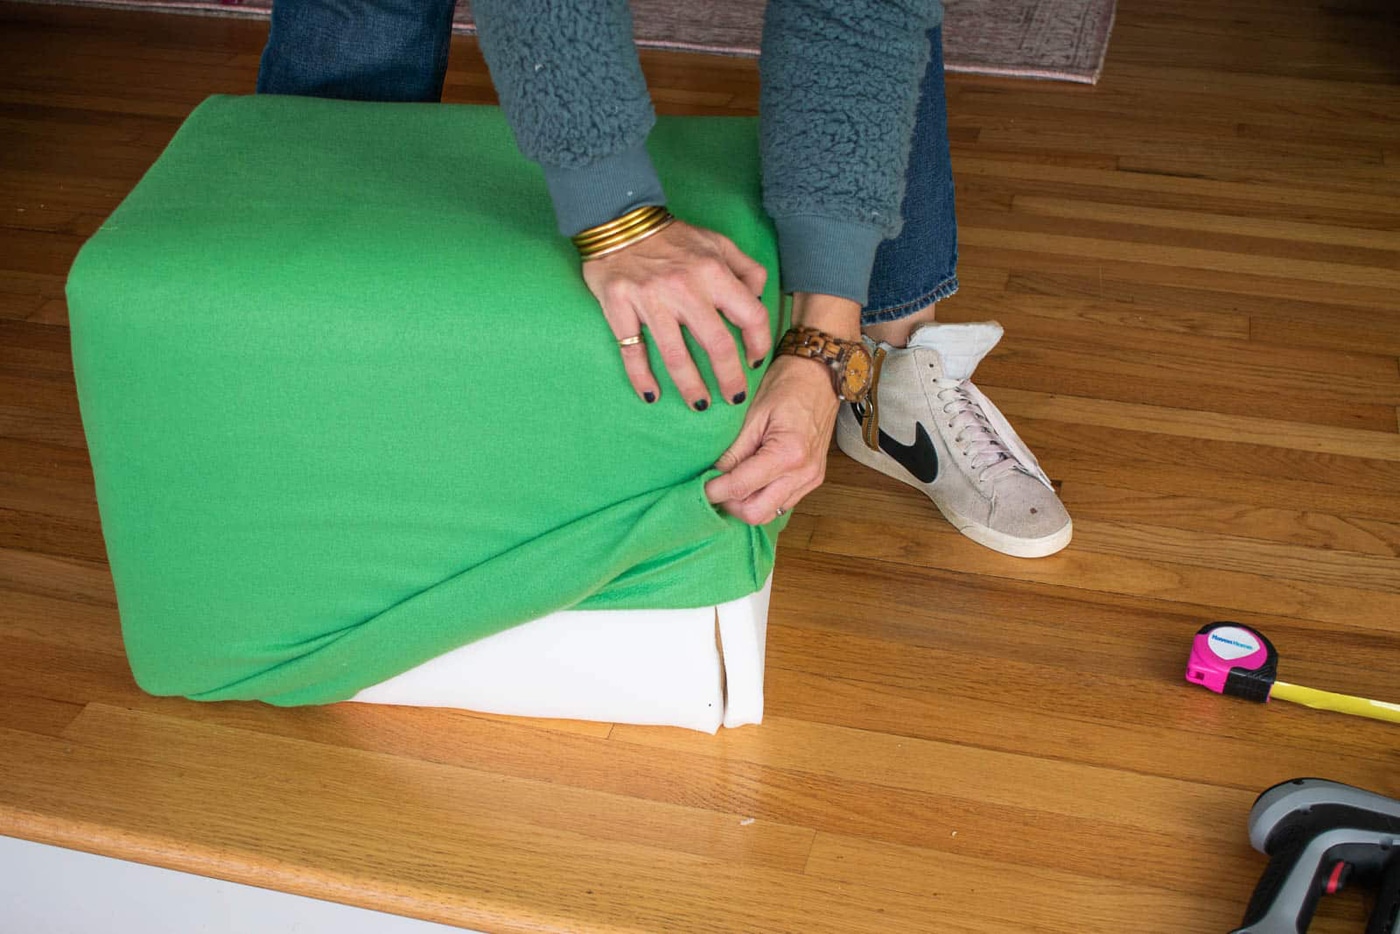
It’s time to place the slipcover on your base. Pull it over your ottoman and check that the seams line up with the edges and that the foam is smooth. Flip the newly dressed ottoman upside down, pull the slipcover tight, and use your Arrow T50ACD compact electric staple gun and Arrow T50 staples to attach the fabric to the underside of the ottoman. Now it’s on to the final touch!
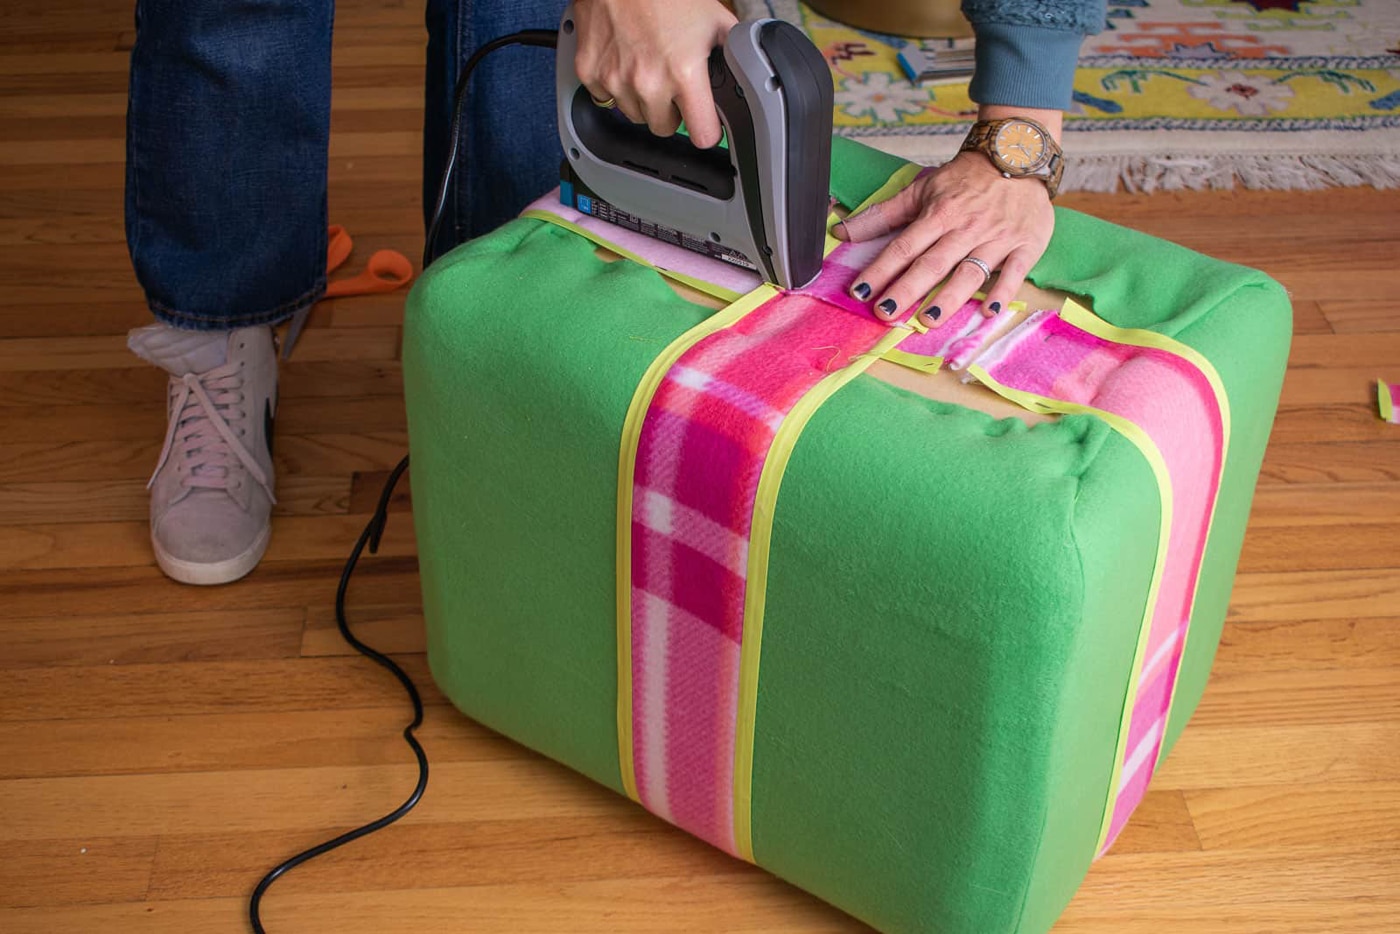
Your ribbon material should be slightly wider than three inches. Measure enough ribbon to go from one end of the ottoman, over the top, and down the other side. Do this twice. Keep in mind that you’ll need enough extra ribbon to attach the ends to the underside. Sew the seams of the ribbons so they won’t fray over time.
Heat up your Arrow GT30Li cordless glue gun to affix the ribbons in place. (Tip: For a more professional look, sew the ribbons to bias tape before gluing to the ottoman. This prevents the hot glue from seeping through your ribbon material and into view.) Slowly apply the glue down the edges and middle of the ribbon strips, smoothing the ribbon onto the ottoman as you go. Once that’s done, turn off your Arrow GT30Li cordless glue gun, and grab your Arrow T50ACD compact electric staple gun once more to attach the ribbon bottoms to the underside of the ottoman.
Ta-da! You’ve successfully completed the Build Your Own Ottoman project. Now it’s time to kick back, relax, and put your feet up! Don’t wait until your next party, show off your hard work now by sharing pics of your finished product on Facebook, Instagram, or X, and tag us @arrowfastener or use #ArrowStrong. Until next time!
Get Arrow tips, tricks, projects and promos in your inbox!
Hey there! We’ve updated our Privacy and Cookie Policies at the request of some of our friends in Europe. Click Accept to let us know you’re okay with the updates. Thanks!
View Cookie Policy Accept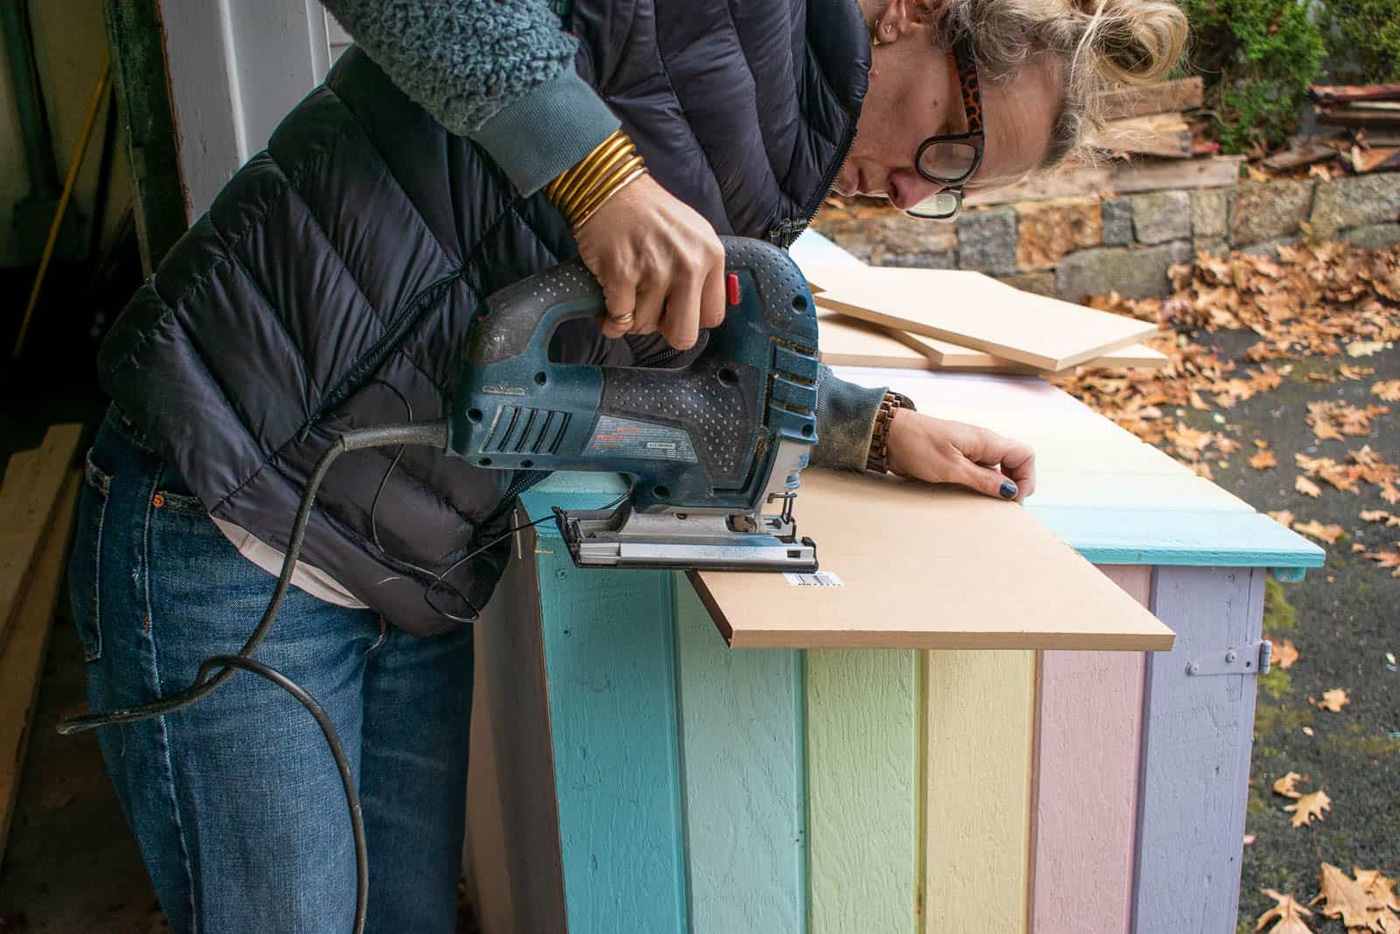