or Call Us at 1-800-776-2228
or Call Us at 1-800-776-2228

Tired of your old tree skirt? This picture-perfect project is a great way to spruce up your holiday decor. Find some inexpensive frames and festive fabric, then grab your Arrow T50AC professional electric staple gun and nailer to take on this DIY Christmas tree collar.
Professional Electric Staple Gun and Nailer
Frames substitution:
Use plywood pieces or another thin wood cut into 8″ x 10″ pieces.
How to determine the amount of fabric to buy:
If you are using 8″ x 10″ frames, figure about ¼–¾ yard to cover two frames.
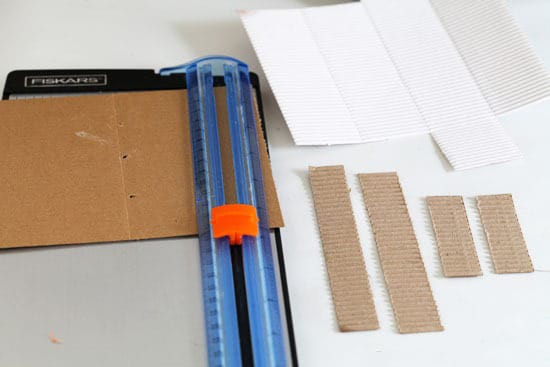
Where to find corrugated cardboard:
Source it. Check the packaging of any products you’ve bought or received in the mail for bits and pieces of corrugated cardboard to make the hinges. For example, look at the packaging used for fragile items, such as china or cosmetics.
Buy it. Corrugated cardboard is sold in two places at the craft store: in the teaching supplies section as colorful scalloped trim commonly used to decorate bulletin boards, and in the scrapbooking aisle sold as sheets of paper.
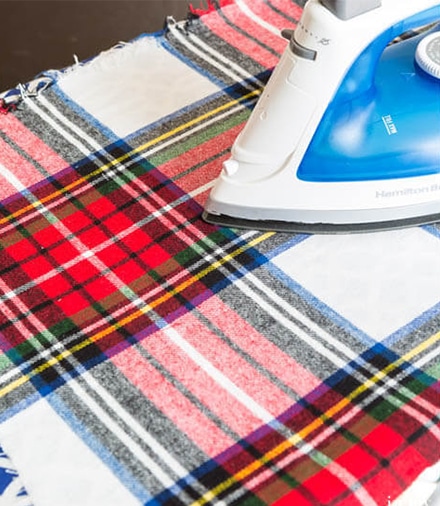
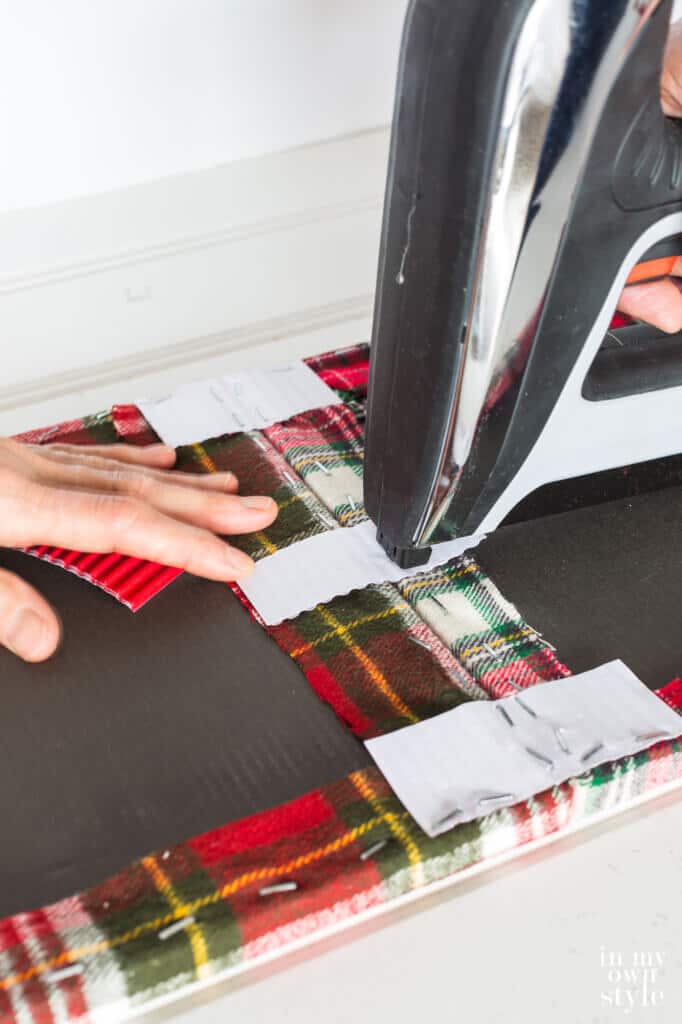
Start by laying out your fabric and first picture frame. If the fabric has an image or a pattern, lay it over the frame so the image or pattern is placed as desired before you cut. Then cut your fabric larger than the frame so there is enough to fold around the edges of the frame, about 2″ around. If your fabric is wrinkled or creased, iron before securing the fabric.
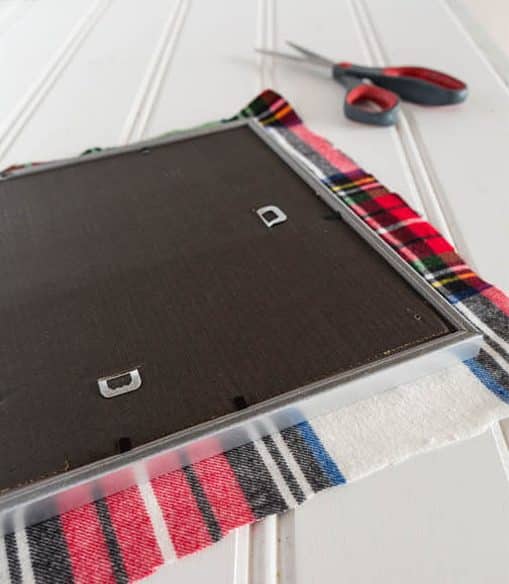
Now lay the front of the frame onto the back of the cut fabric square. Starting on one side of the frame, pull the fabric up and over the edge, then fold the raw fabric edge under. Using your T50AC professional electric staple gun and nailer to secure the fabric, staple at the center of the frame edge. Then staple outward toward each of the corners to finish the first side. Next, pull the fabric taut to the opposite side of the frame and staple to complete that side. Be careful not to pull your fabric too tight where the image or pattern becomes skewed.
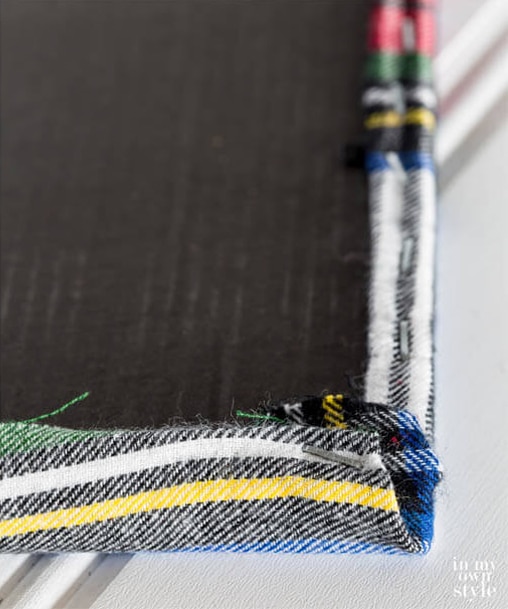
To finish a corner on the frame, pull the fabric over the corner and staple to the back of the frame. Then fold the fabric edge over what you just stapled, and staple again to hold in place, like you’re wrapping a present. Keep moving along that same edge to complete the side and repeat this step on the next three corners.
After you’ve repeated steps 1–3 to cover each frame, set them aside. It’s time to create the cardboard hinges for your tree collar.
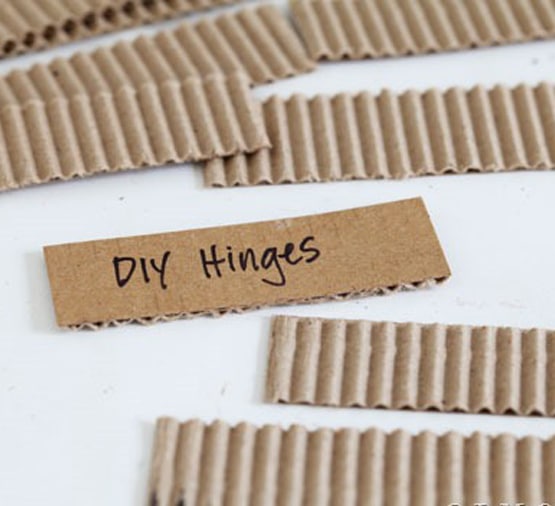
Start by cutting your corrugated cardboard down to 1″ x 3″ pieces (or larger) using your paper cutter or scissors. You’ll want three “hinges” per frame connection.
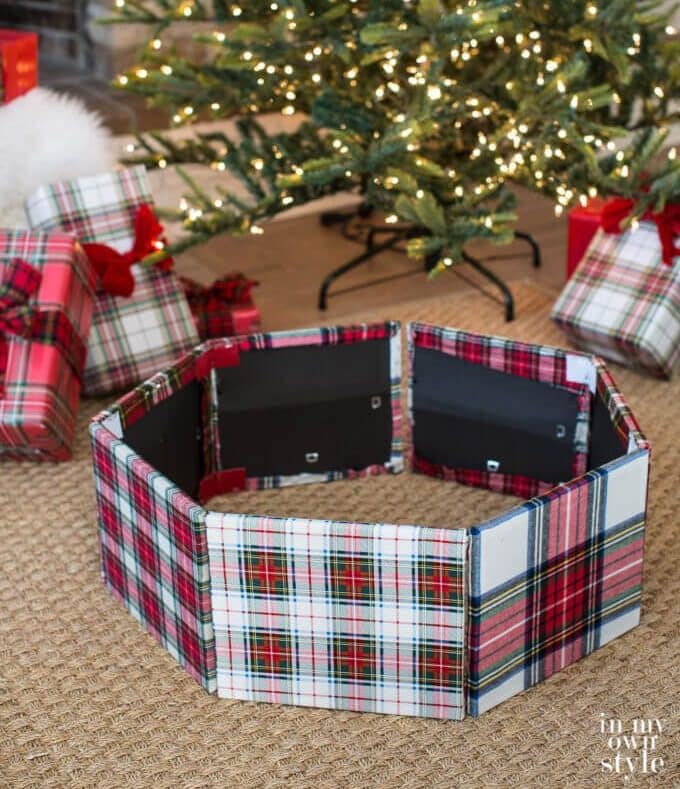
Now it’s time to assemble your Christmas tree collar! Lay the frames facedown on your work surface. Line up the bottoms of each frame and place three hinges at each connection: one at the top, one in the middle, and one at the bottom. When stapling the cardboard, the corrugated side can face down or up (either way will work). Try to get the staple as close to the frame edge so that when the stand is around the tree, you don’t see the hinges where the frames are connected.
Be sure not to connect your first and last frames to each other – you do not need to attach the frames in a complete circle.
To arrange the collar around your Christmas tree, find the center of the collar and place it on the floor in front of the tree. Wrap each half around the tree until the end frames meet in the back. Adjust the circle of frames if necessary so the collar sits symmetrically around the stand.
When the holidays are over, loosely fold the frames on top of one another and place them in a box to store. If you have thicker frames, you may not be able to fold them. If this is the case, remove the hinges on one side of each frame (keeping the hinge attached to the other frame side) so you can stack and store them. The next time you use your Christmas tree collar, you can simply reattach the hinges.
This project can turn into a family tradition for years to come! Check out all the ways you can give it a facelift each year below.
We’d love to see how your DIY Christmas tree collar turned out! Share your work with us on Facebook and Instagram by tagging @ArrowFastener or using #MadeWithArrow.
This tree collar is unique because you can switch it up year after year.
Here are a few ideas to keep your collar looking fresh:
Family fun – Put a photo of each family member in each frame with their name written on the frame.
Total glam – Spray-paint wood-framed mirrors gold.
Vintage – Use old black-and-white family photos of past Christmases.
Create magic – Frame mirrors (or buy some) at the dollar store to create a tree collar that will reflect and double the tree lights and the number of presents under the tree.
Chalkboard – Frame chalkboards and use chalk to draw a design on each (“Merry and Bright” and “From Santa” downloadable templates here).
Get Arrow tips, tricks, projects and promos in your inbox!
Hey there! We’ve updated our Privacy and Cookie Policies at the request of some of our friends in Europe. Click Accept to let us know you’re okay with the updates. Thanks!
View Cookie Policy Accept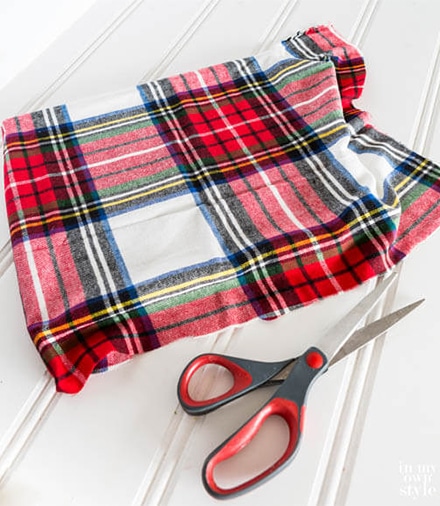