or Call Us at 1-800-776-2228
or Call Us at 1-800-776-2228
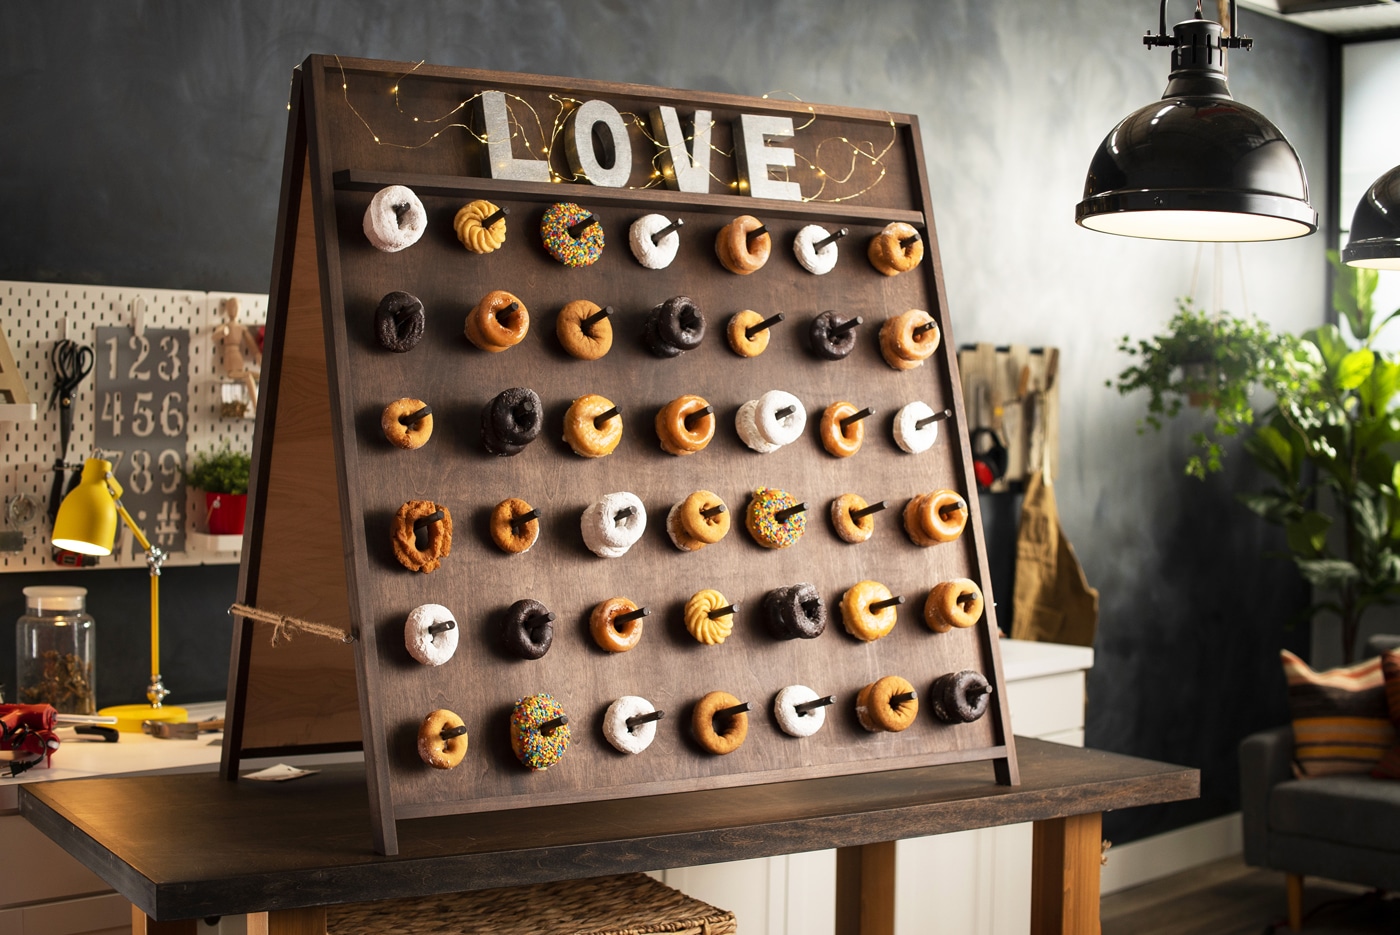
Whether you’re a chocolate glazed or strawberry sprinkle type, it’s safe to say that almost anyone would be excited about a wall full of donuts! Add a little something sweet to your next celebration with this DIY donut wall project. The best part? You can customize it for any occasion with the decorative letters and lights of your choice. So grab your Arrow TT21 TruTac™ light-duty forward-action stapler and a few other handy Arrow tools and let’s get building.
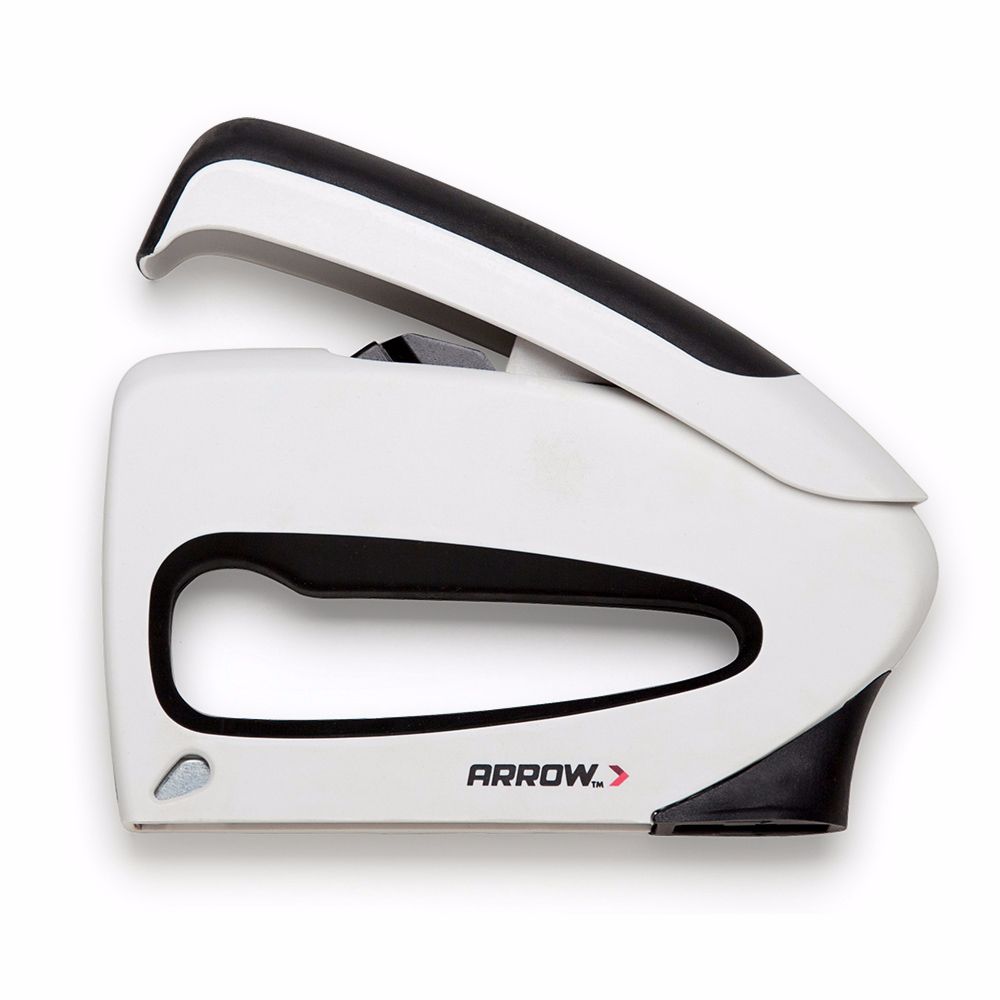
TruTac™ Light Duty Forward Action Stapler

Pneumatic Brad Nailer
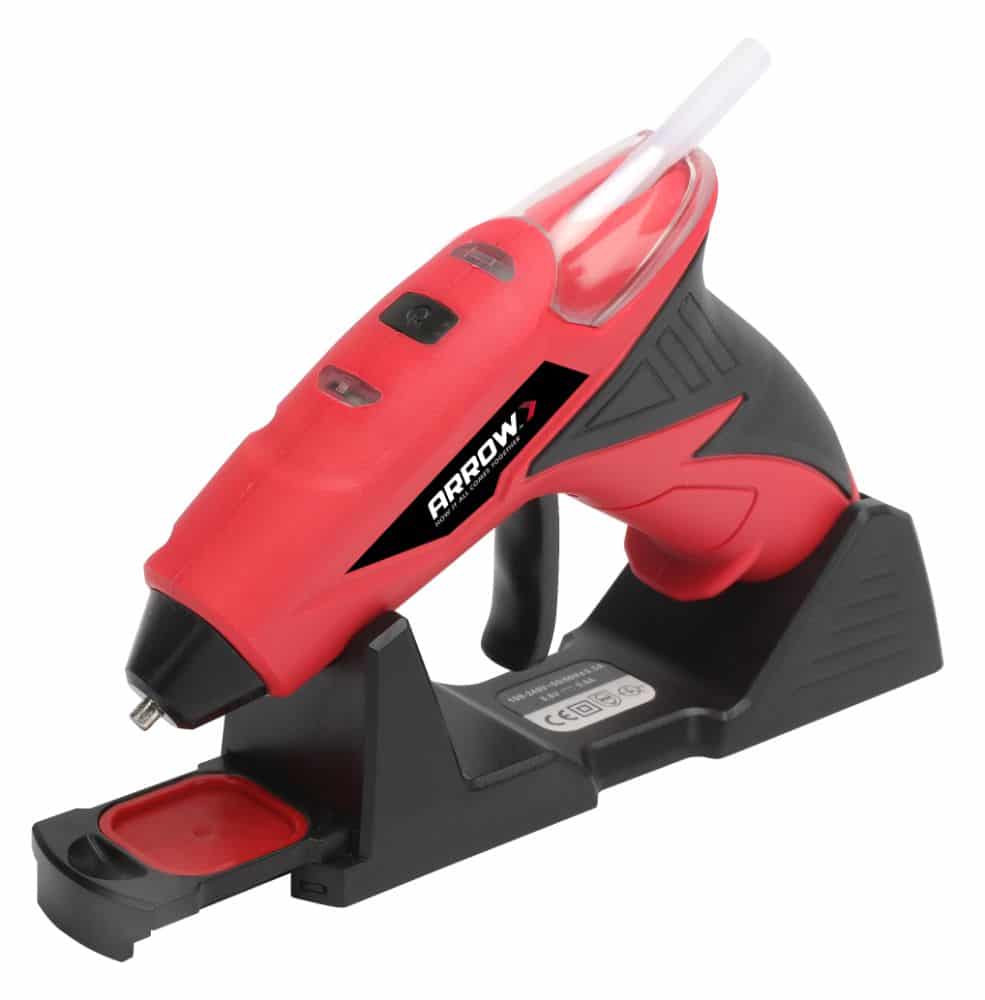
Cordless Glue Gun
Start by cutting the plywood to your desired size – we made our wall 3′7″. Then cut the 1″ x 2″ lumber to frame the perimeter of the front and back A-frame panels and to create the front shelf.
Next, you’ll want to mark the wood on the front panel where your dowels will go. We started 3 ½″ from the border and then 6″ on center after that. Lay out and drill ½″ diameter holes that are ½″ deep to accommodate the dowels. To add the front shelf, omit the top row of holes.
Let’s paint! Or stain – it’s up to you. We decided to go with a stain for a more natural wood look. But you can certainly have some fun with a vibrant paint color. Don’t forget to paint/stain your shelf and dowels too, and then use a food-safe topcoat!
Next, attach the 1″ x 2″ lumber along the perimeter of both the front and back A-frame panels using your PT18G pneumatic brad nailer.
Using your woodworking clamps, hold the upper shelf in place against the front panel, then turn the entire panel over. Attach the shelf using your PT18G pneumatic brad nailer, nailing through the back of the panel and into the shelf board clamped in place.
Now it’s time to lay the front and back panels face-to-face with the tops touching. Be sure the two pieces are perfectly aligned before using your TT21 TruTac™ light-duty forward-action stapler to secure the nylon webbing that will connect your panels. Make sure the panels are connected but will pivot at the top once stood upright.
Lay your A-frame down. Using your GT30Li cordless glue gun, glue each of the dowels in place.
Attach the eye hooks to the front and back panels 12″ from the bottom. Using twine, connect the two panels at the desired angle once the A-frame is standing up and stable.
Time to light it up! Stand your decorative letters on the top shelf and arrange your string lights around them. The best part is, you can change out the word for different occasions.
Now that you’ve got your donut wall, the possibilities are endless. Decorate the shelf with flowers and “I Do” for a bridal shower, or some wooden blocks for your next baby shower. You could even swap donuts for bagels for a bubbly brunch!
We’d love to see how your DIY donut wall turned out! Share your work with us on Facebook and Instagram by tagging @ArrowFastener or using #MadeWithArrow.
Get Arrow tips, tricks, projects and promos in your inbox!
Hey there! We’ve updated our Privacy and Cookie Policies at the request of some of our friends in Europe. Click Accept to let us know you’re okay with the updates. Thanks!
View Cookie Policy Accept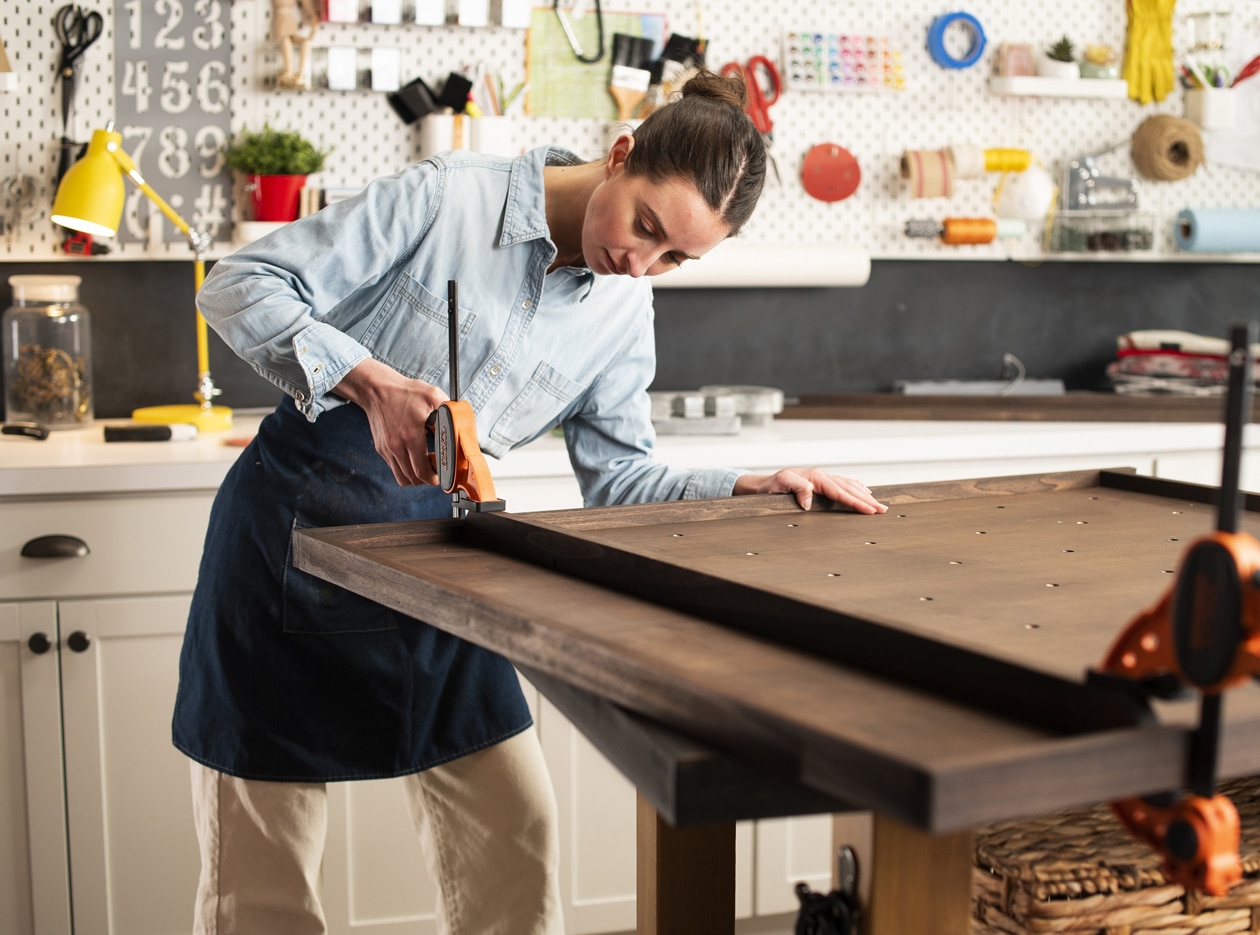