or Call Us at 1-800-776-2228
or Call Us at 1-800-776-2228
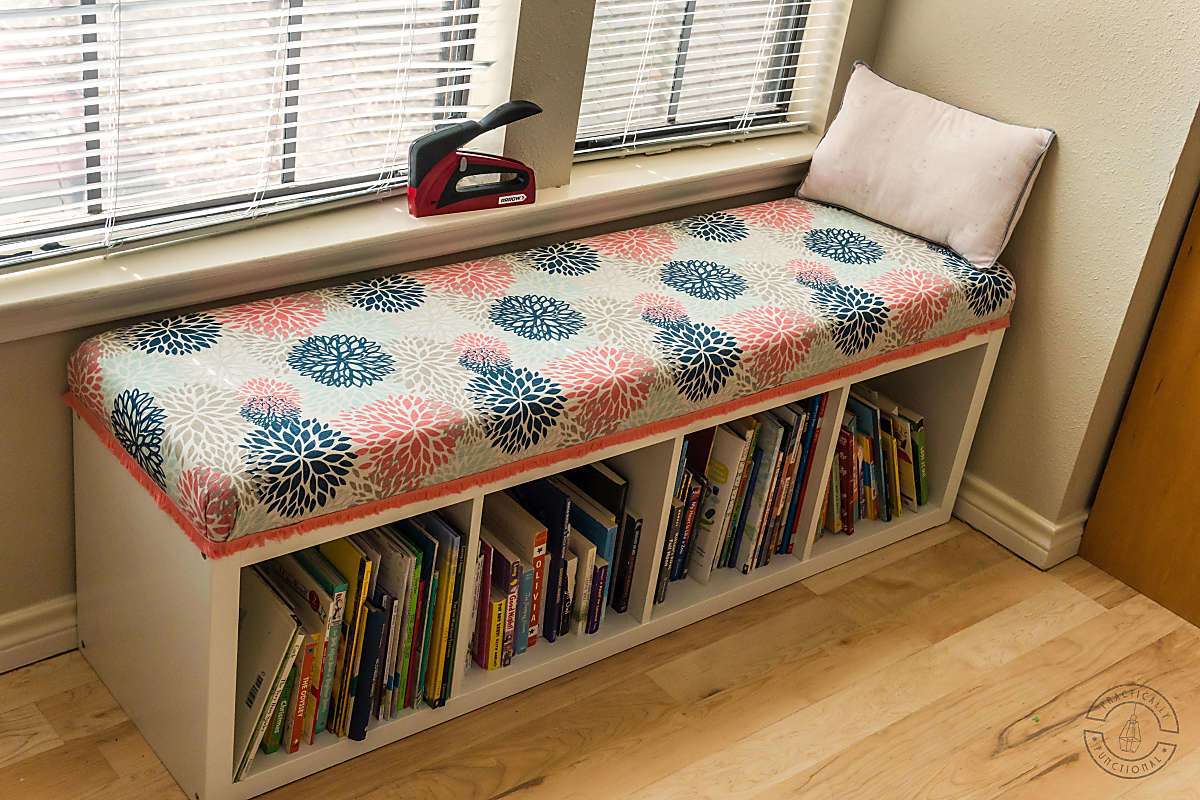
Have a cozy spot that could use a little comfy? Follow these easy steps for a DIY no-sew cushion to fit any indoor bench, window seat, or outdoor bench – all you need is an Arrow T50R.E.D. staple gun and nailer and a TR550 all-purpose glue gun.
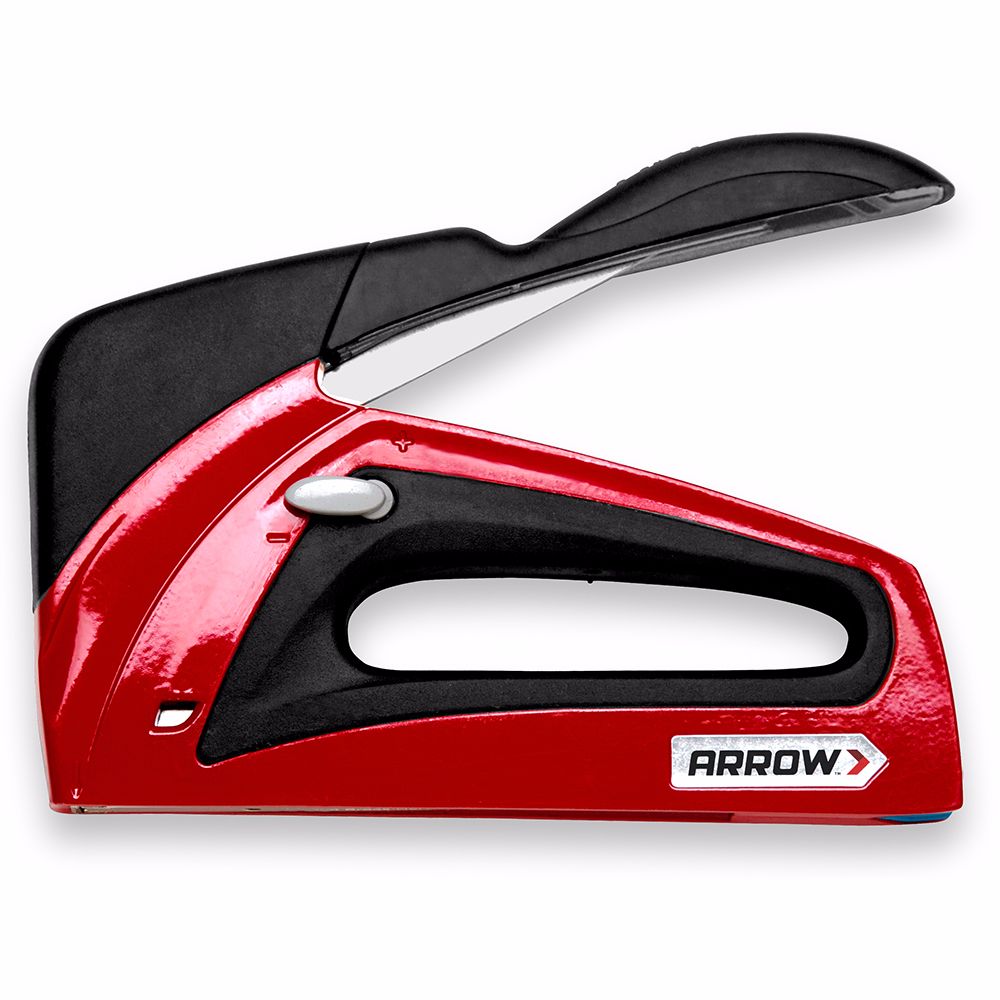
Professional Staple Gun and Nailer

All Purpose Glue Gun
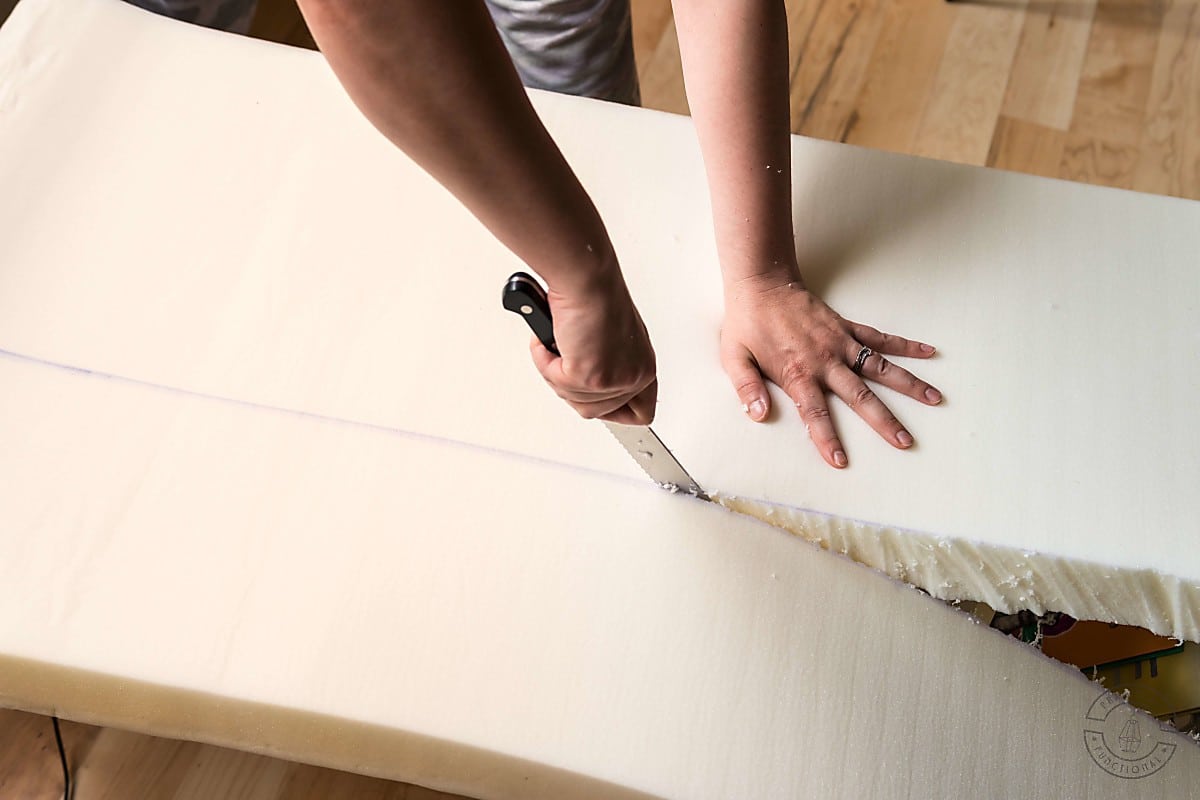
Lay your plywood on top of the bench foam, lining up two sides at a corner. Mark the edges of the other two sides on the foam using a pen or marker. Then cut the foam down to size using your serrated knife (a bread knife works just as well). Don’t worry if the edges of the foam aren’t perfectly smooth – the batting will cover that up later.
Place the foam on top of the plywood and lay your batting over the foam. Trim the batting so that it overhangs the bottom of the plywood by a few inches on all four sides. You will want to do this step to make it easier to work with the batting before you start with the spray adhesive.
Next, it’s time to attach all the pieces to make the DIY no-sew cushion. Start by laying the drop cloth to protect your workspace from the spray adhesive. Set the plywood down on the drop cloth and coat the entire surface of the plywood with spray adhesive. Position the foam on top of the plywood so that all the edges are lined up, then gently press the foam onto the plywood for about 30 seconds until the adhesive dries.
The next step is to attach the batting. Batting helps minimize friction between the fabric and the foam, so you want the batting to be able to move a bit – but you can’t leave it totally unsecured or it will bunch up over time.
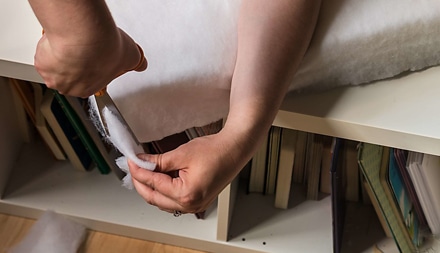
Lay the batting over the foam, then lift the batting up on one side and spray the side edge of the foam (the 3″ tall part) with spray adhesive. Gently press the batting against the side of the foam. Repeat for all four sides. For the corners, press the sides and smooth all the way to the corner, leaving the extra batting puckering out at the point.
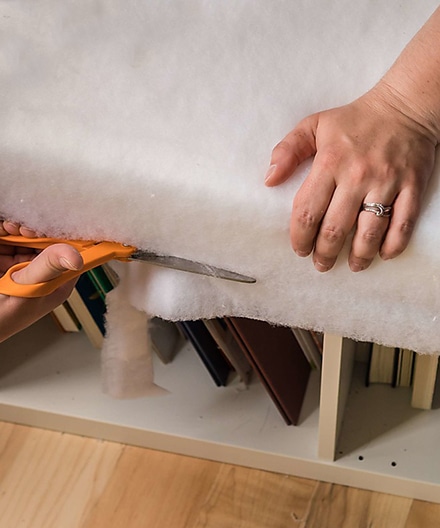
Trim the batting flush with the bottom of the plywood by running one blade of your scissors along the wood. When you get to the corners, pull the puckered corner batting straight out, away from the corner, then point your scissors straight down and cut off the excess, flush with the corner. Be sure to smooth the batting at the corners so you don’t end up with wrinkles.
Now it’s time to upholster your cushion! Start by laying out your fabric on top of the cushion; line it up so that any patterns are straight and square to the cushion. Trim away the extra fabric, leaving 3″–5″ of fabric overhanging the bottom of the plywood on all four sides.
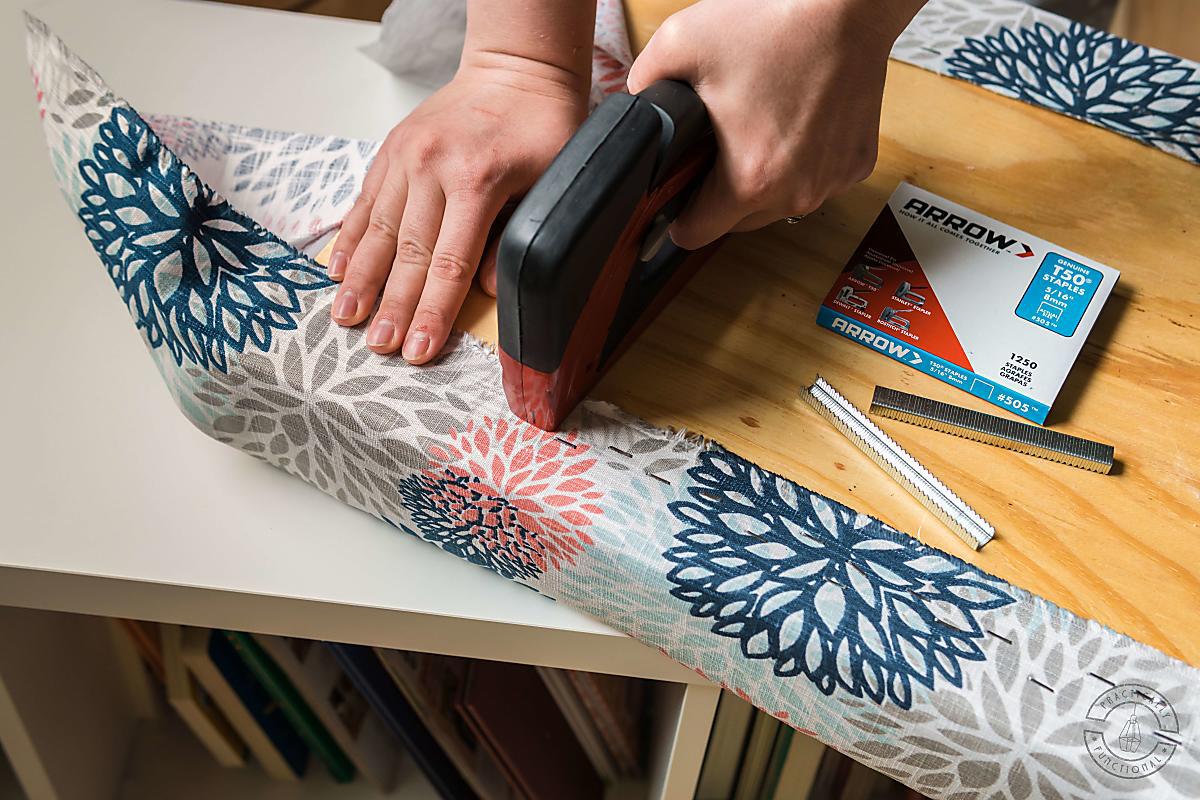
On a clean surface, carefully turn the entire cushion over, including the fabric, so that the bottom of the plywood is facing up, and the fabric is pretty-side down. Double-check that your fabric pattern is still square to the cushion before you start stapling!
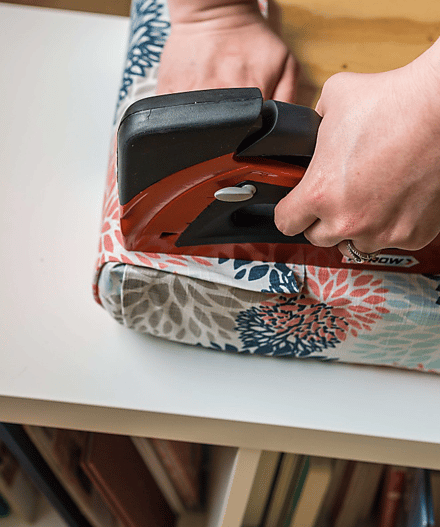
Starting in the middle of one straight edge, gently pull the fabric up and around to the back of the cushion and staple it to the plywood using your T50R.E.D. staple gun. Your staples should be 1″–2″ from the edge of the plywood – don’t worry if that leaves a bunch of loose fabric behind the staple, you can trim that off after you’re done stapling. Be sure to pull the fabric straight back (perpendicular to the edge of the plywood) so that you don’t end up with weird pulls or pleats in your fabric as you go.
Continue to gently pull and staple the fabric around all four straight sides, stopping about 4″ from the corners to leave room for pleating them. Don’t be afraid to use a lot of staples! If there are large gaps between your staples, the fabric can pull and tear at those points when someone sits down on the cushion. If you hit a knot in the plywood or put a staple in the wrong spot, just use your Arrow staple puller to easily remove any bent or misplaced staples.
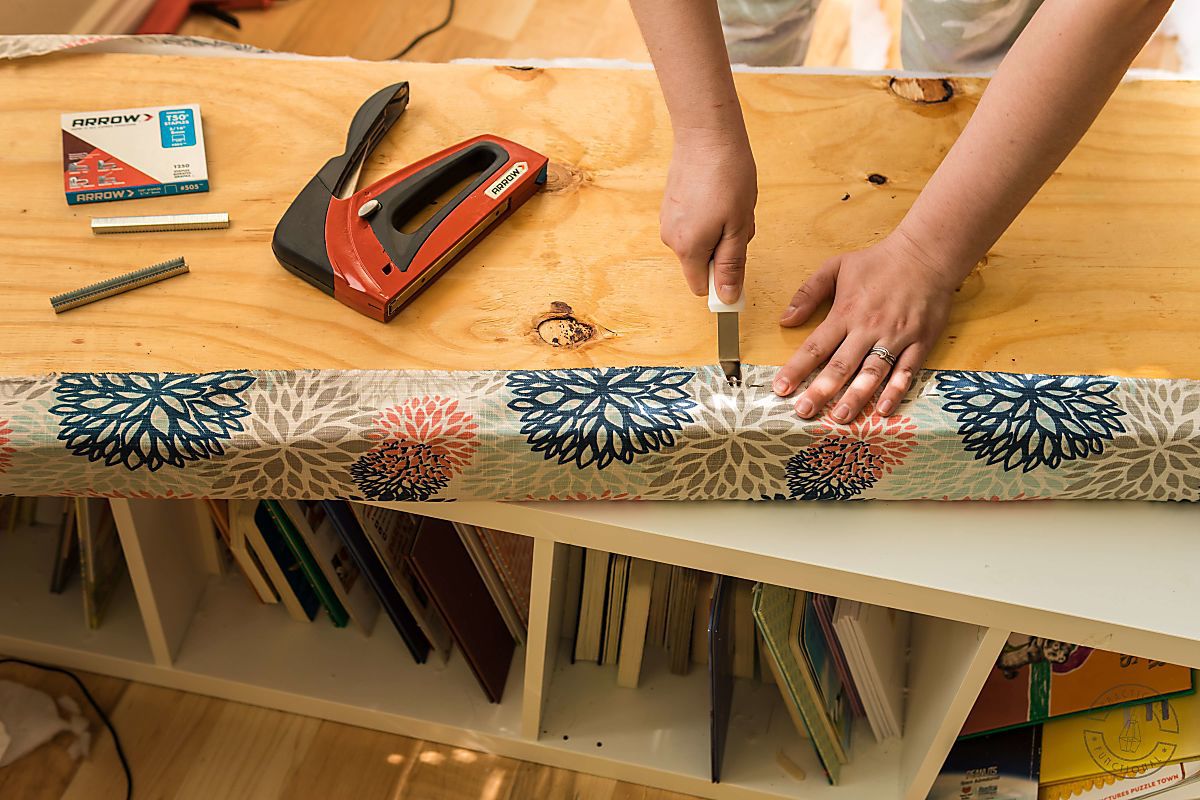
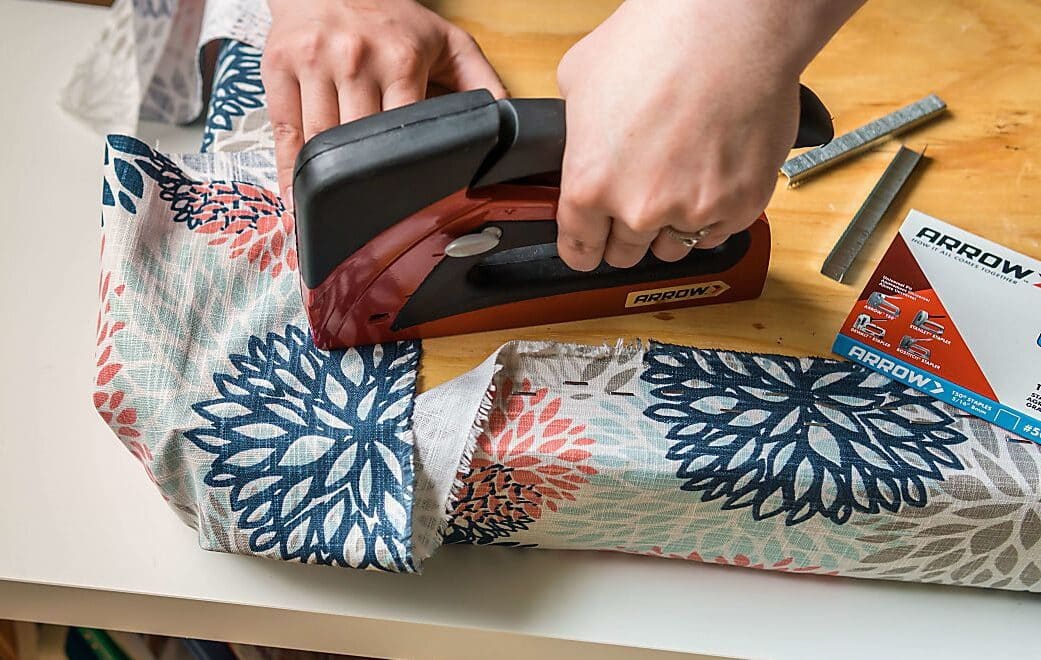
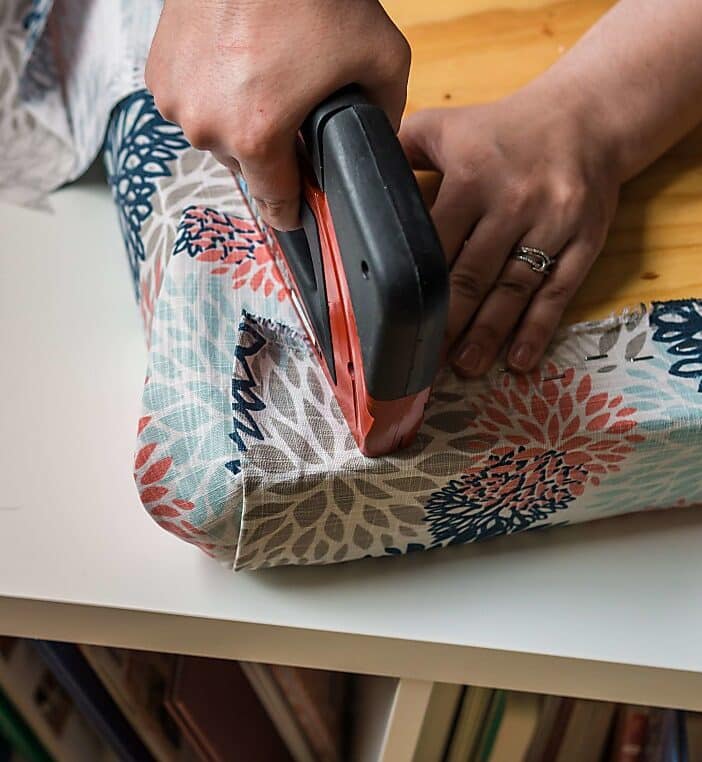
To upholster the corners of your cushion, it helps to use a three-step process. First, pull the center of the fabric corner straight back and staple it once to hold it in place. Next, fold one side in to create a “wing,” like a present, and staple it once. Then fold the other side in a “wing” and staple it once to secure it. You’ll need to add more staples to really secure the corner, but first trim away excess fabric so that your corner lays as flat as possible.
Repeat for the remaining three corners. Then examine the top and bottom of your cushion to ensure that there aren’t any gaps in your fabric. If there are, add more staples.
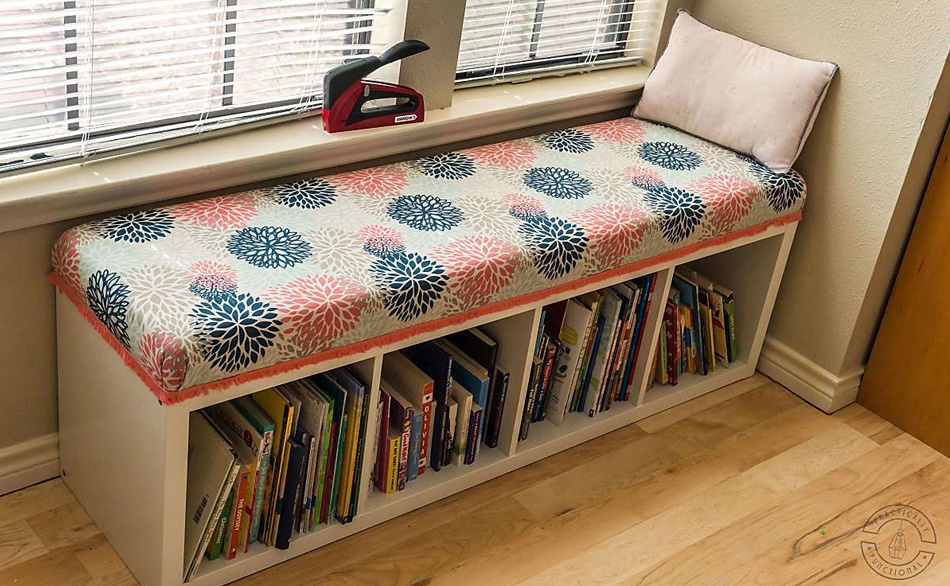
The last step is to attach your trim! Working in sections, use your TR550 all-purpose glue gun to run a small bead of hot glue around the very bottom of the sides of the cushion, then press your trim into the hot glue for a few seconds until dry.
What’s fun about this project is that you can always create more cushions to swap out every season: gingham for summer, plaid for the holidays – the possibilities are endless!
We’d love to see how your DIY no-sew bench cushion turned out! Share your work with us on Facebook and Instagram by tagging @ArrowFastener or using #MadeWithArrow.
Get Arrow tips, tricks, projects and promos in your inbox!
Hey there! We’ve updated our Privacy and Cookie Policies at the request of some of our friends in Europe. Click Accept to let us know you’re okay with the updates. Thanks!
View Cookie Policy Accept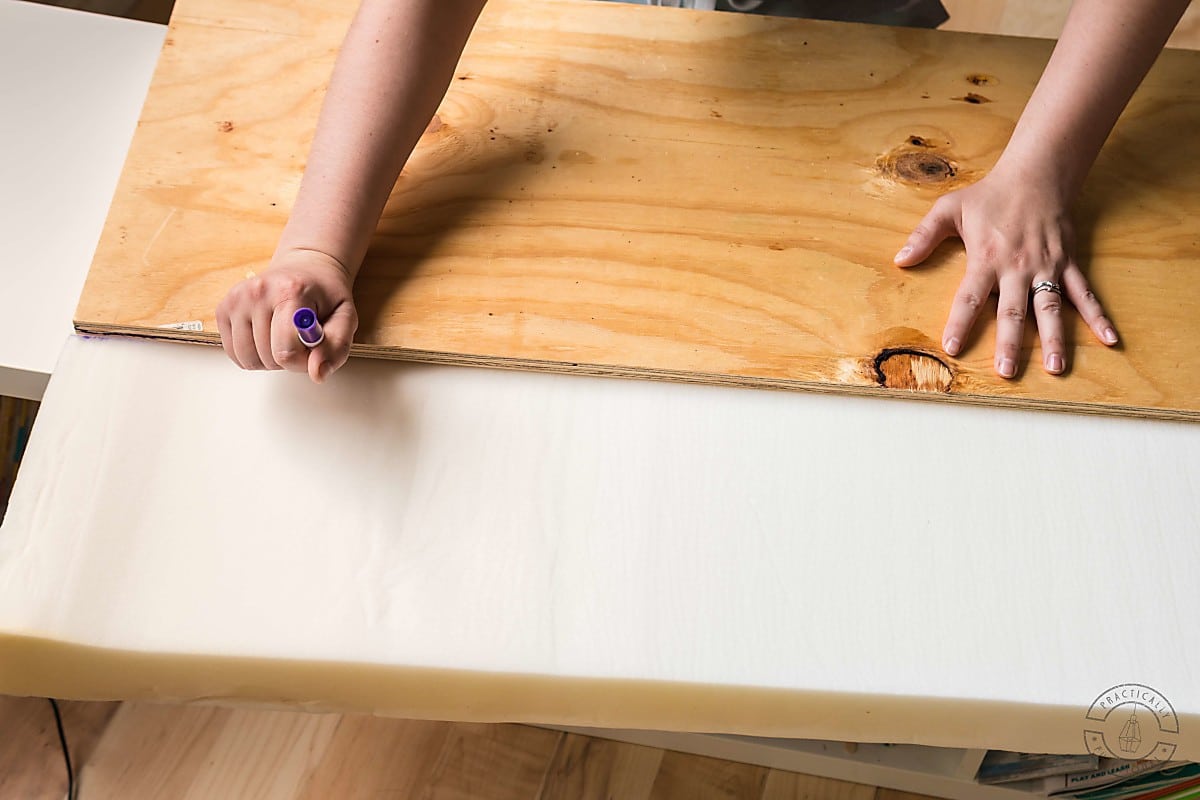