or Call Us at 1-800-776-2228
or Call Us at 1-800-776-2228
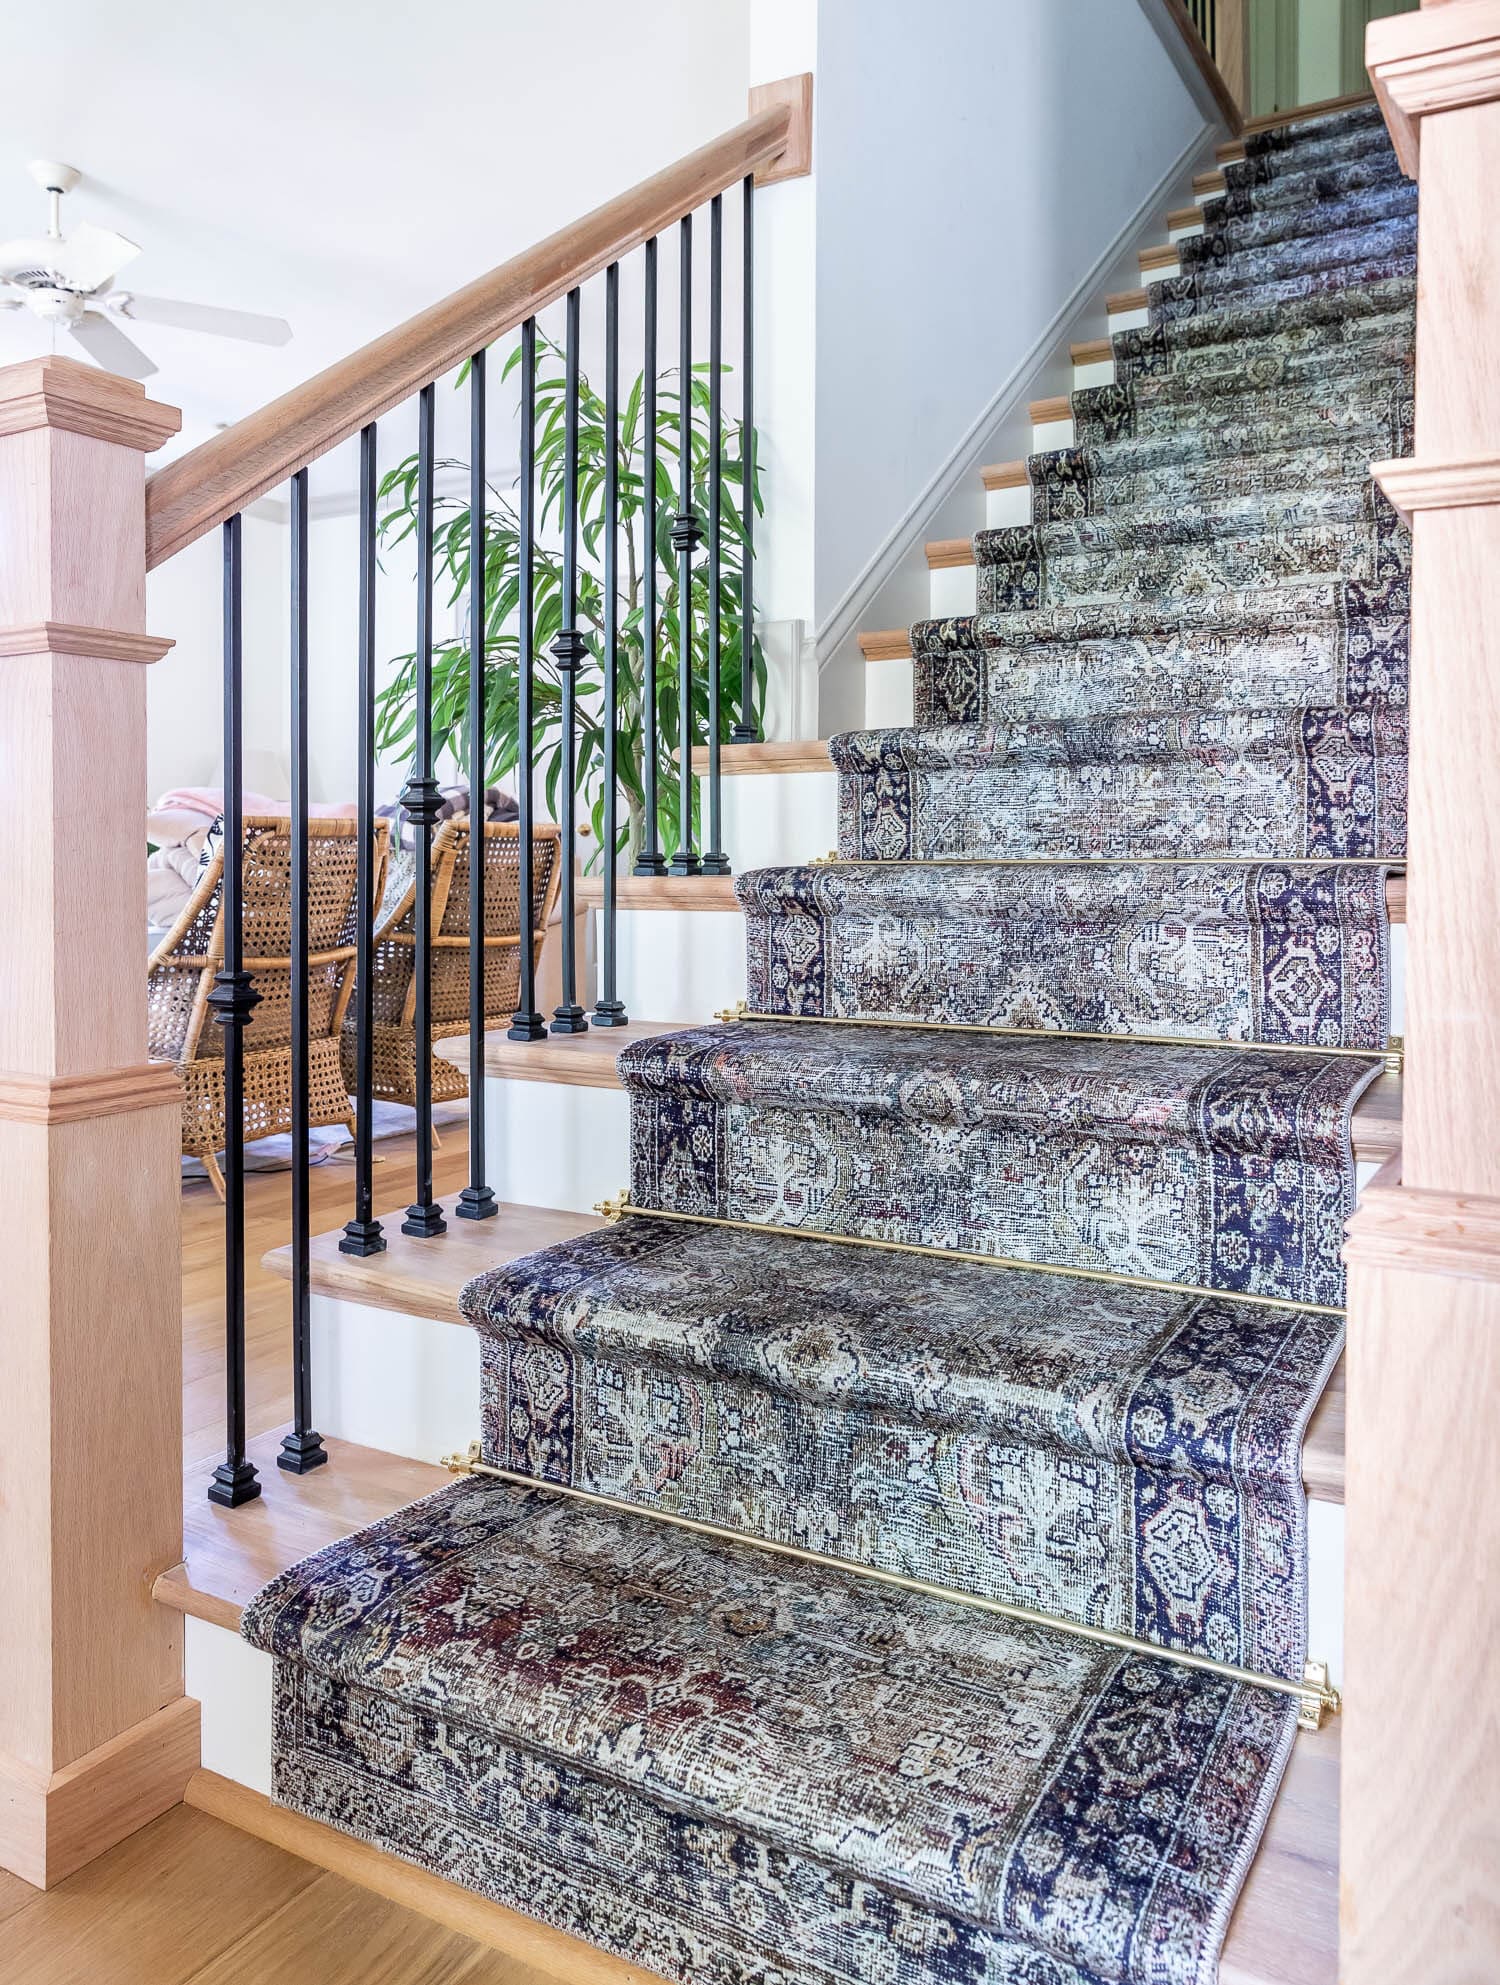
A stair runner does more than just look pretty. It can minimize those creaky steps, prevent slips and falls, and even make the ups and downs easier for your furry friends! So pick out the carpet runner of your dreams, grab your Arrow PT50 pneumatic staple gun, and give this DIY stair runner project a try.
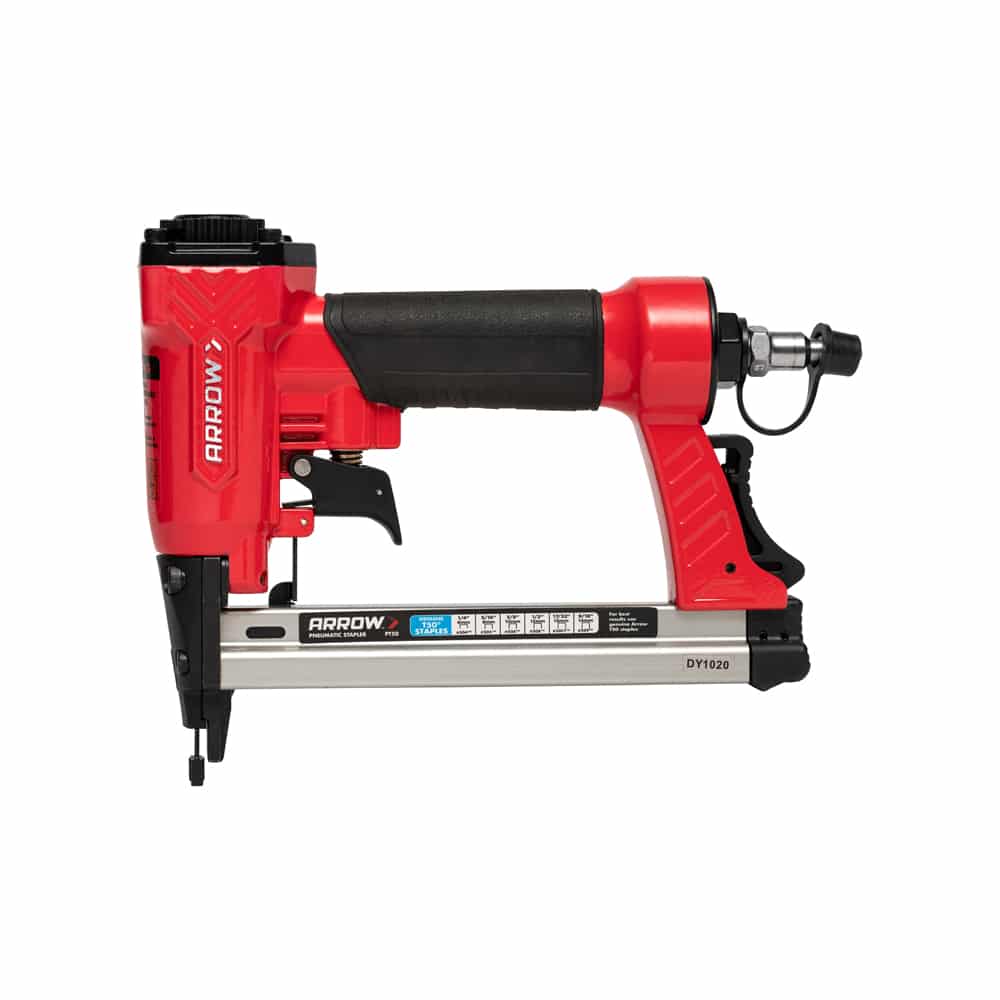
Pneumatic Staple Gun
We had a little work ahead of us before we could start laying our runner. If you need to prep your wood stairs, start here. If not, you can skip to step 3!
Foot traffic can wear down your stairway, but that’s nothing a little sanding can’t fix! Start by sanding each stair tread with your 120-grit sandpaper to expose the raw wood. This also opens up the wood fibers so that the wood oil finish can easily penetrate the surface. After about 30 minutes of sanding all the treads, the wood should look clean and new again!
It’s time to finish your hardwood! Apply your first coat of wood finish, then go back and fill in holes with wood filler, if necessary. Once the wood filler is dry, apply a final coat of wood finish. Allow it to dry overnight, then make any paint touch-ups in the morning. Keep in mind that the majority of the stairs’ surface will be covered by the rug.
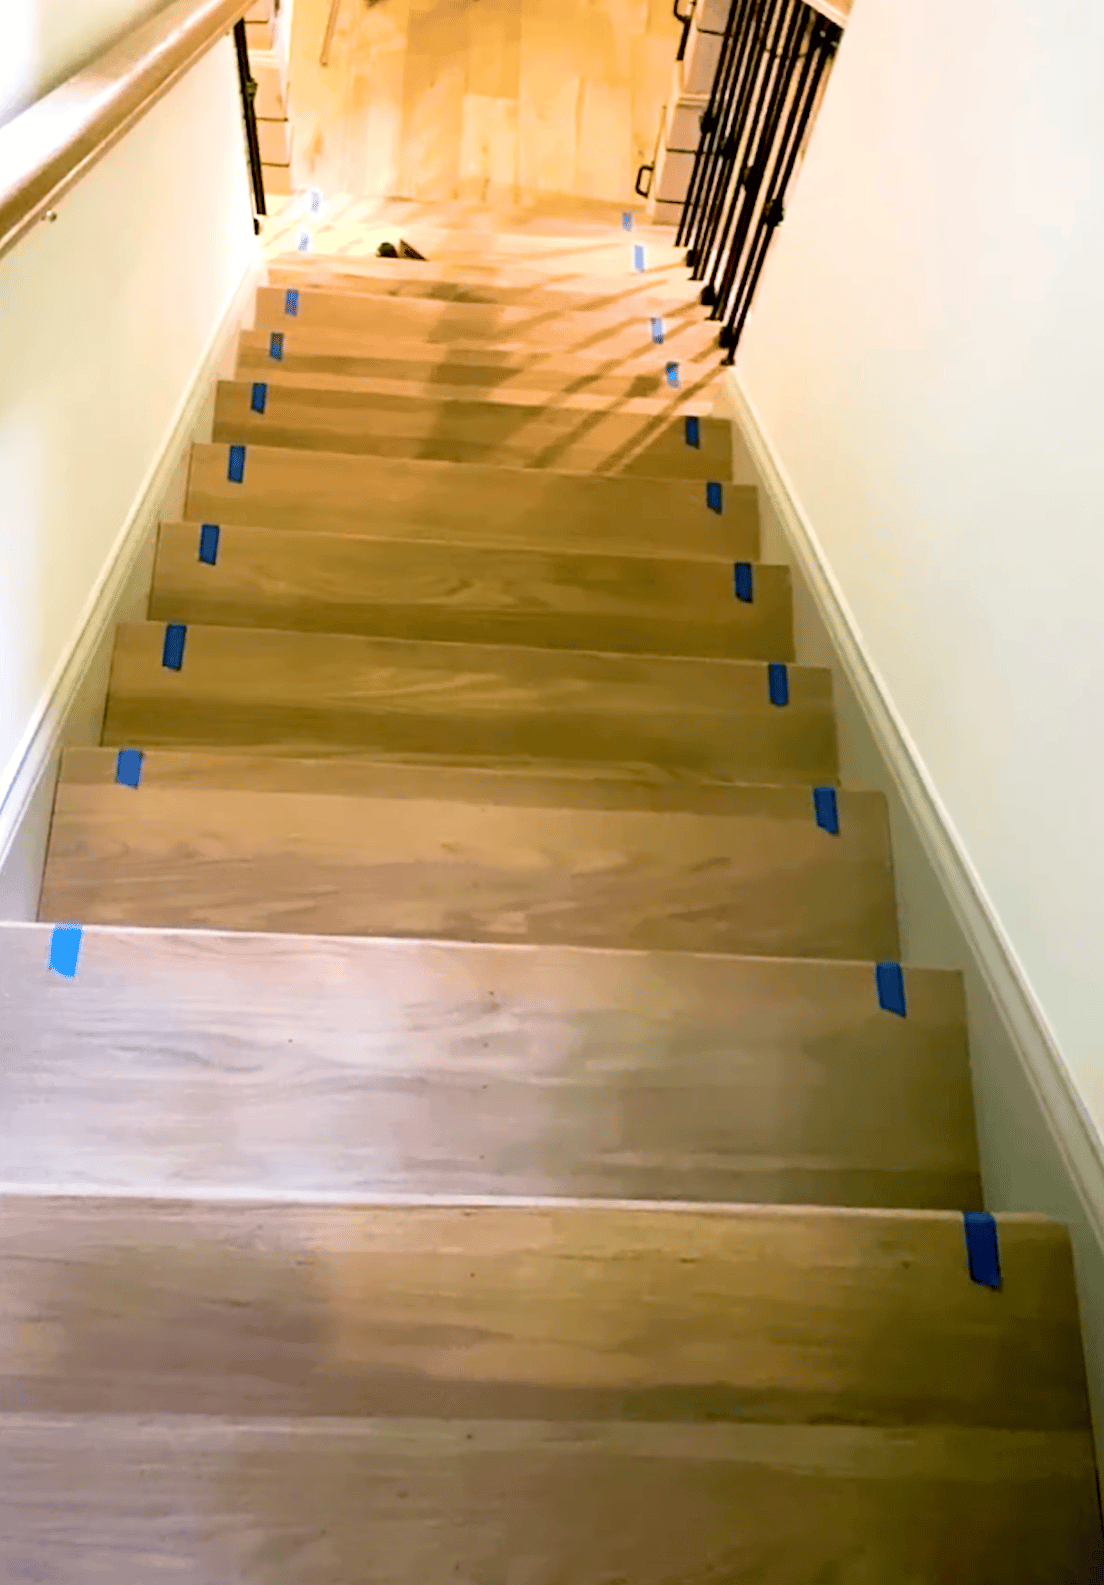
Now that the necessary prep work is done, let’s move on to the fun part – installing the rug! First, figure out where to position the runner so that it’s centered on the stairs. One way to do this is to scoot the runner all the way over to one side of the stair tread, then measure the other side where the tread isn’t covered by the rug. Take this measurement and split the difference. Use painter’s tape to mark those measurements so the runner will stay straight and centered on the stairs.
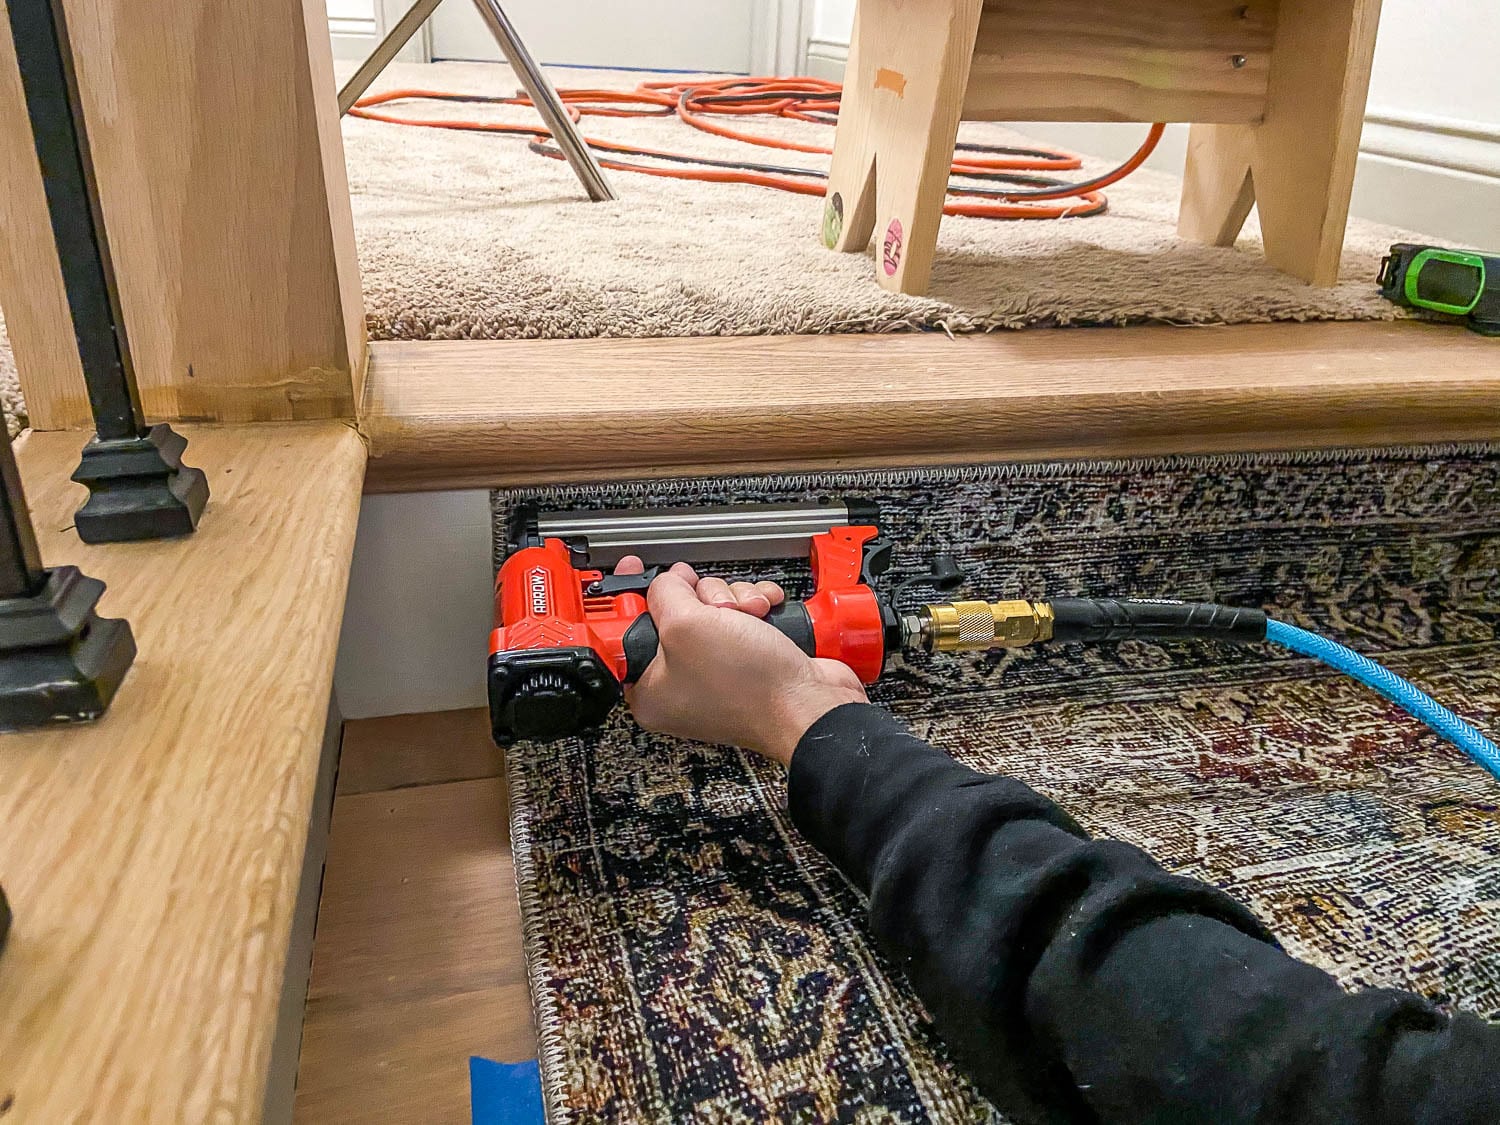
Next, use scissors to cut the rug pad down to size and staple it to each tread using your Arrow PT50 pneumatic staple gun and Arrow ½″ staples.
And now for the runner itself! Starting from the top of the stairs and working your way down, staple the runner just under each stair nose and at the joint where the riser meets the tread, spacing the staples about 2″–3″ apart. You can use the painter’s 5-in-1 tool to tuck the rug into the crease for the tightest fit. Continue down the stairs until the rug ends. Depending on the color of your rug, you can also color the top of the staples with a black marker so they’re less noticeable on the runner.
If your staircase is extra-long, you may need to use multiple runners. To join separate runners, use scissors to cut the first rug just under the stair nose and then cut off the top seam of the second rug and staple it right where the first rug ends. If you need to join a third runner, start from the bottom and work your way up to the second rug. This way, your border or seam can end at the bottom of the staircase. Just be sure to double- and triple-check your measurements because you want each rug to line up exactly with the previous one.
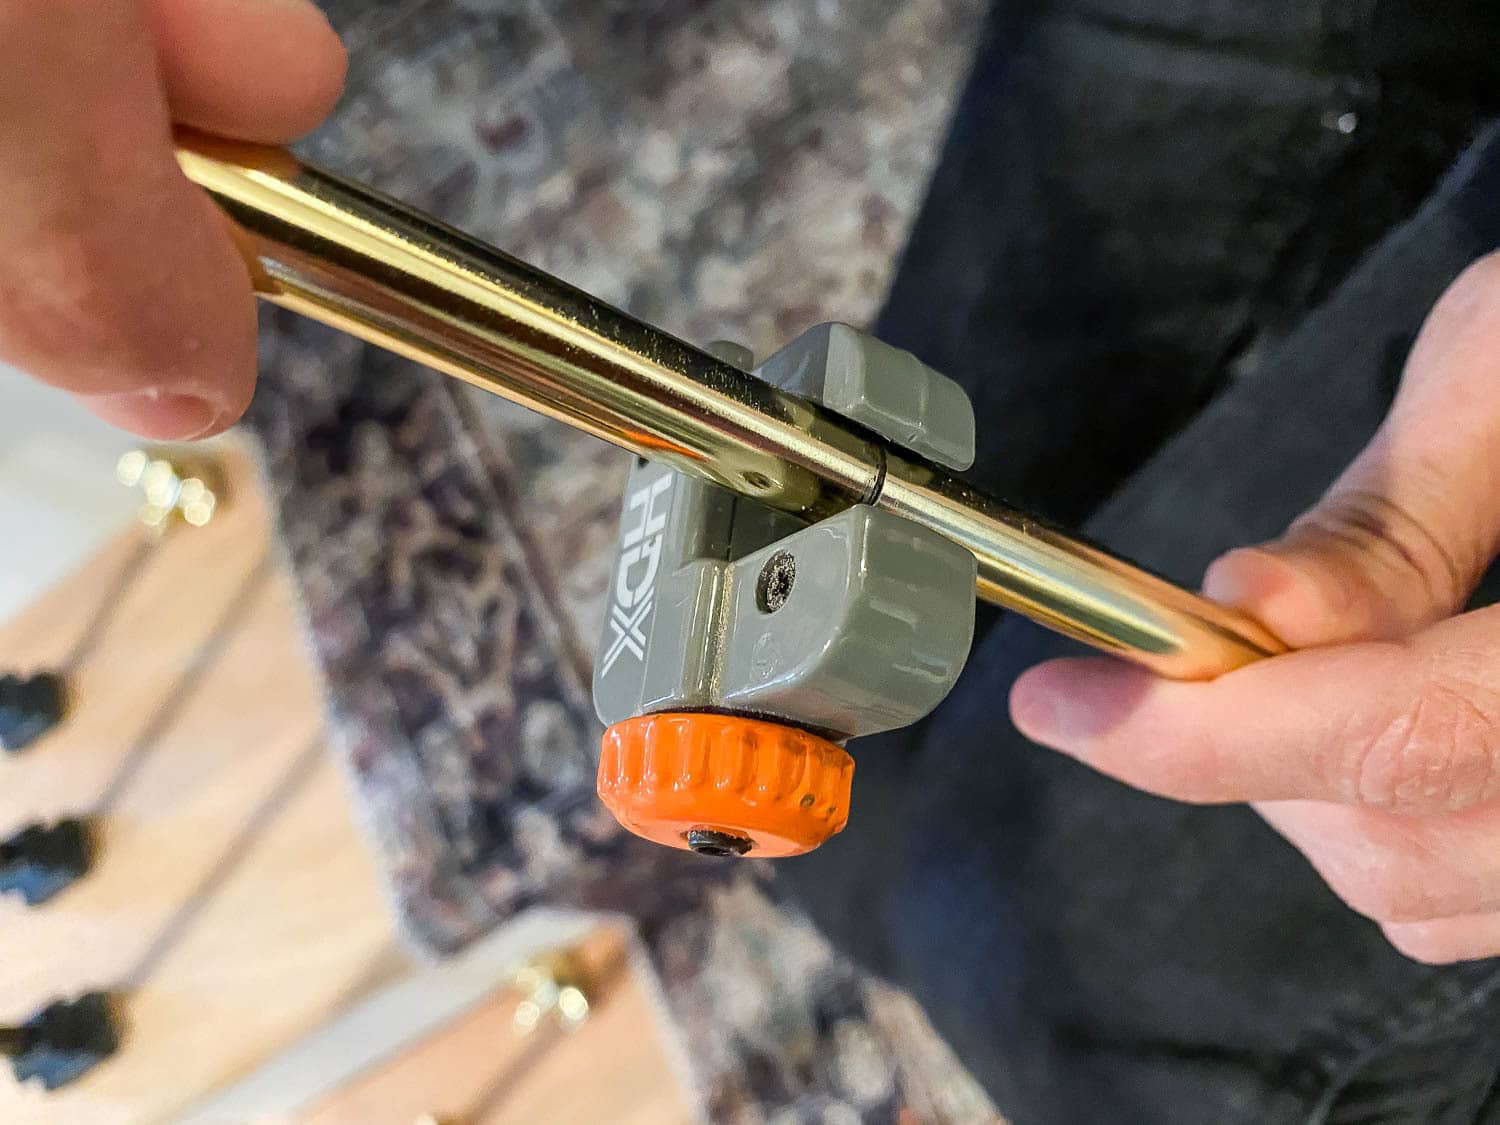
For a finishing touch of elegance, add some optional brass stair rods and brackets. You can use a pipe cutter to cut the brass tubing to length, then use a cordless drill to screw the brackets to the stairs.
This is the perfect project to brighten up your home over a rainy long weekend! We’d love to see how your DIY stair runner turns out! Share your work with us on Facebook and Instagram by tagging @ArrowFastener or using #MadeWithArrow.
Get Arrow tips, tricks, projects and promos in your inbox!
Hey there! We’ve updated our Privacy and Cookie Policies at the request of some of our friends in Europe. Click Accept to let us know you’re okay with the updates. Thanks!
View Cookie Policy Accept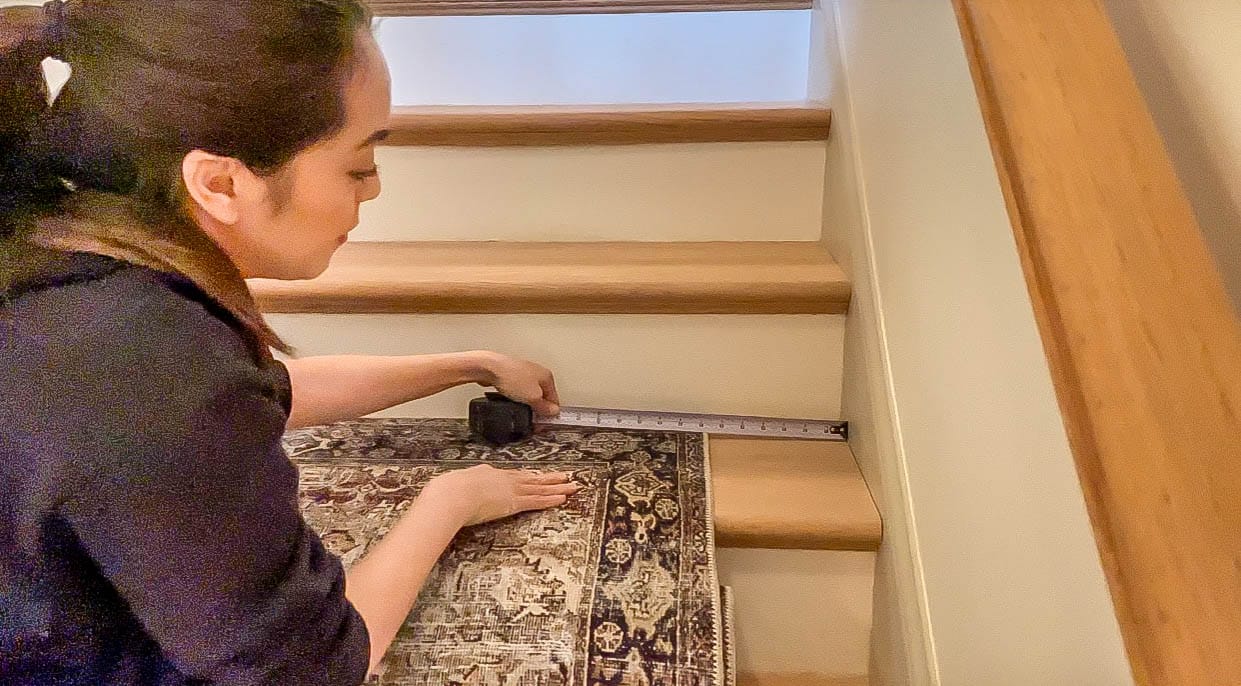