or Call Us at 1-800-776-2228
or Call Us at 1-800-776-2228
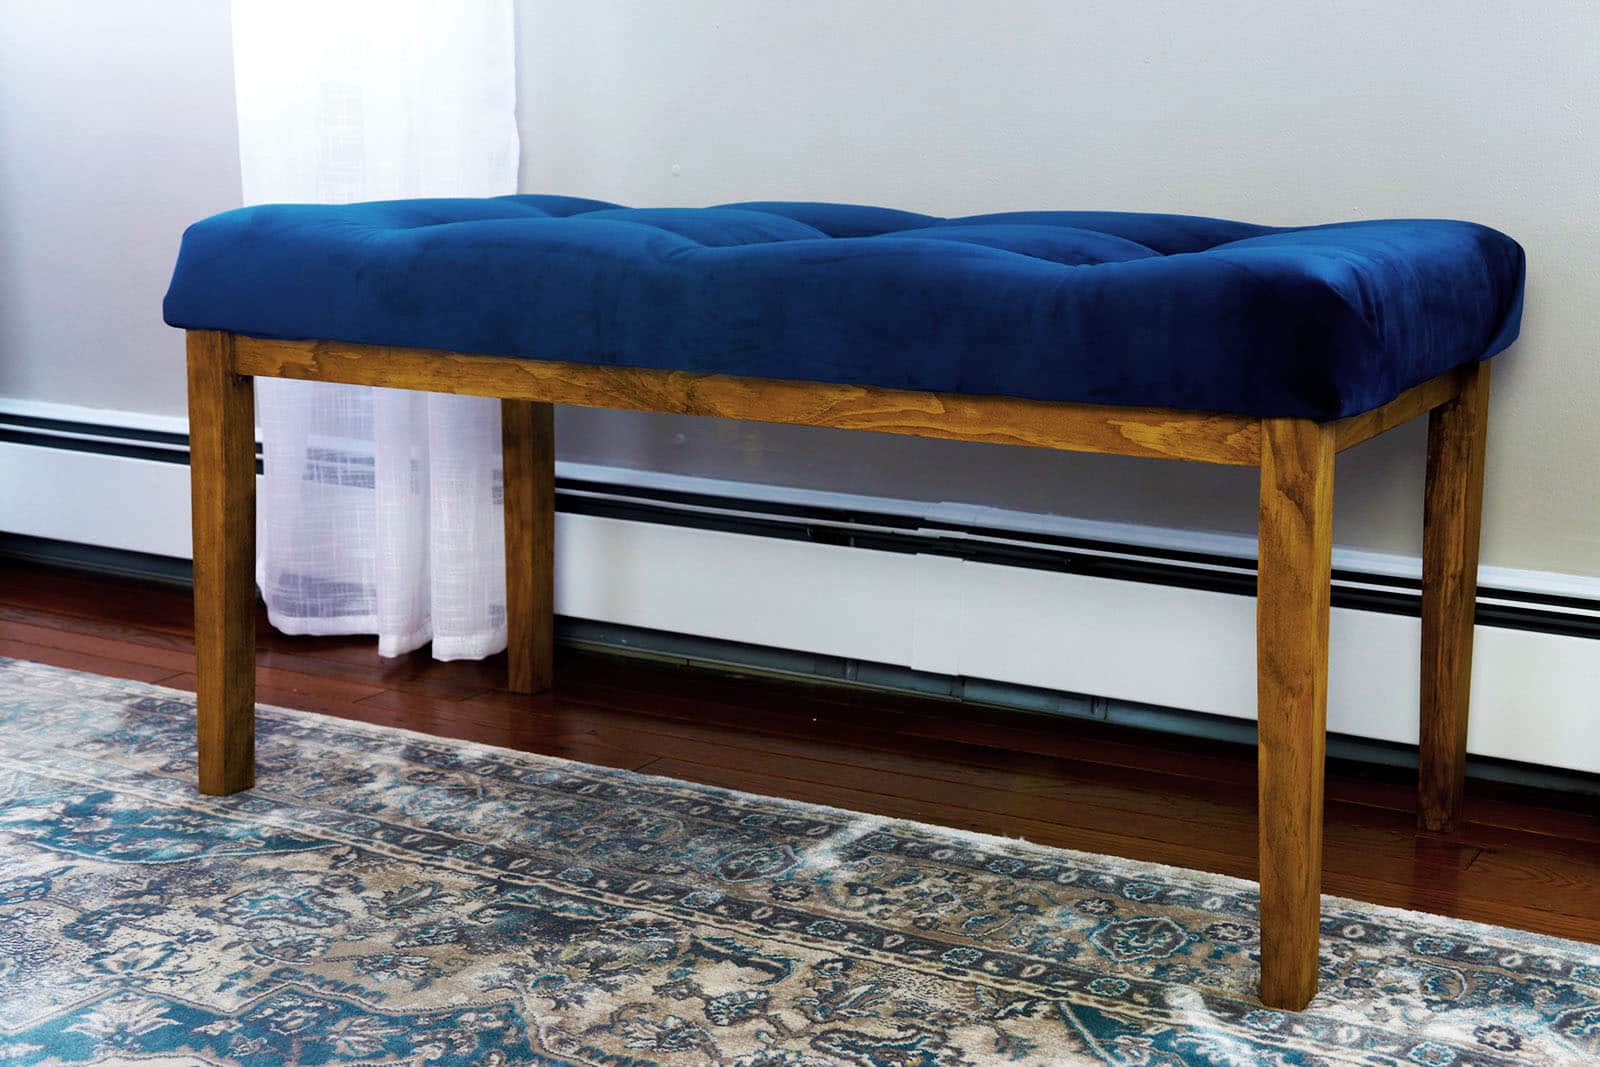
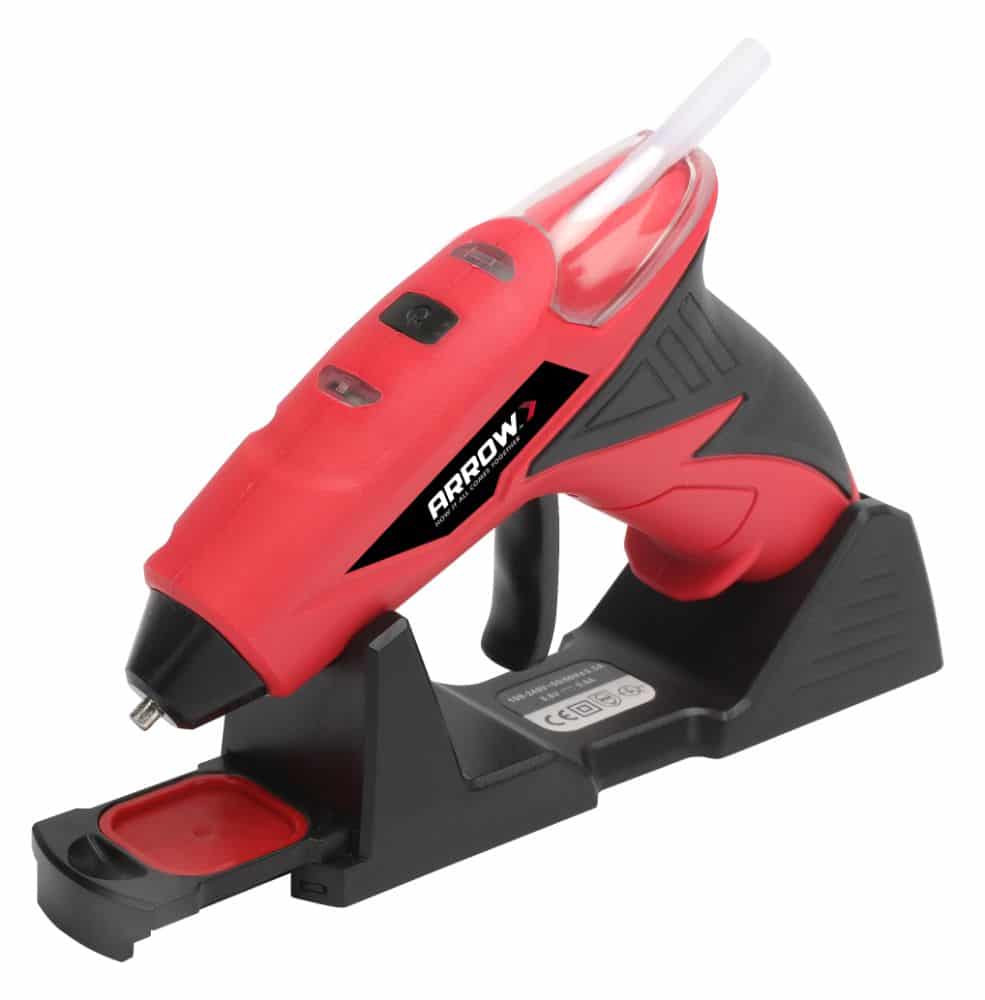
Creating custom furniture doesn’t have to be complicated! This easy DIY vintage-style velvet bench will add a touch of chic to any living space. Grab your Arrow E21 cordless electric staple gun and GT30Li cordless glue gun and let’s get to work!

Cordless Electric Staple Gun
Cordless Glue Gun
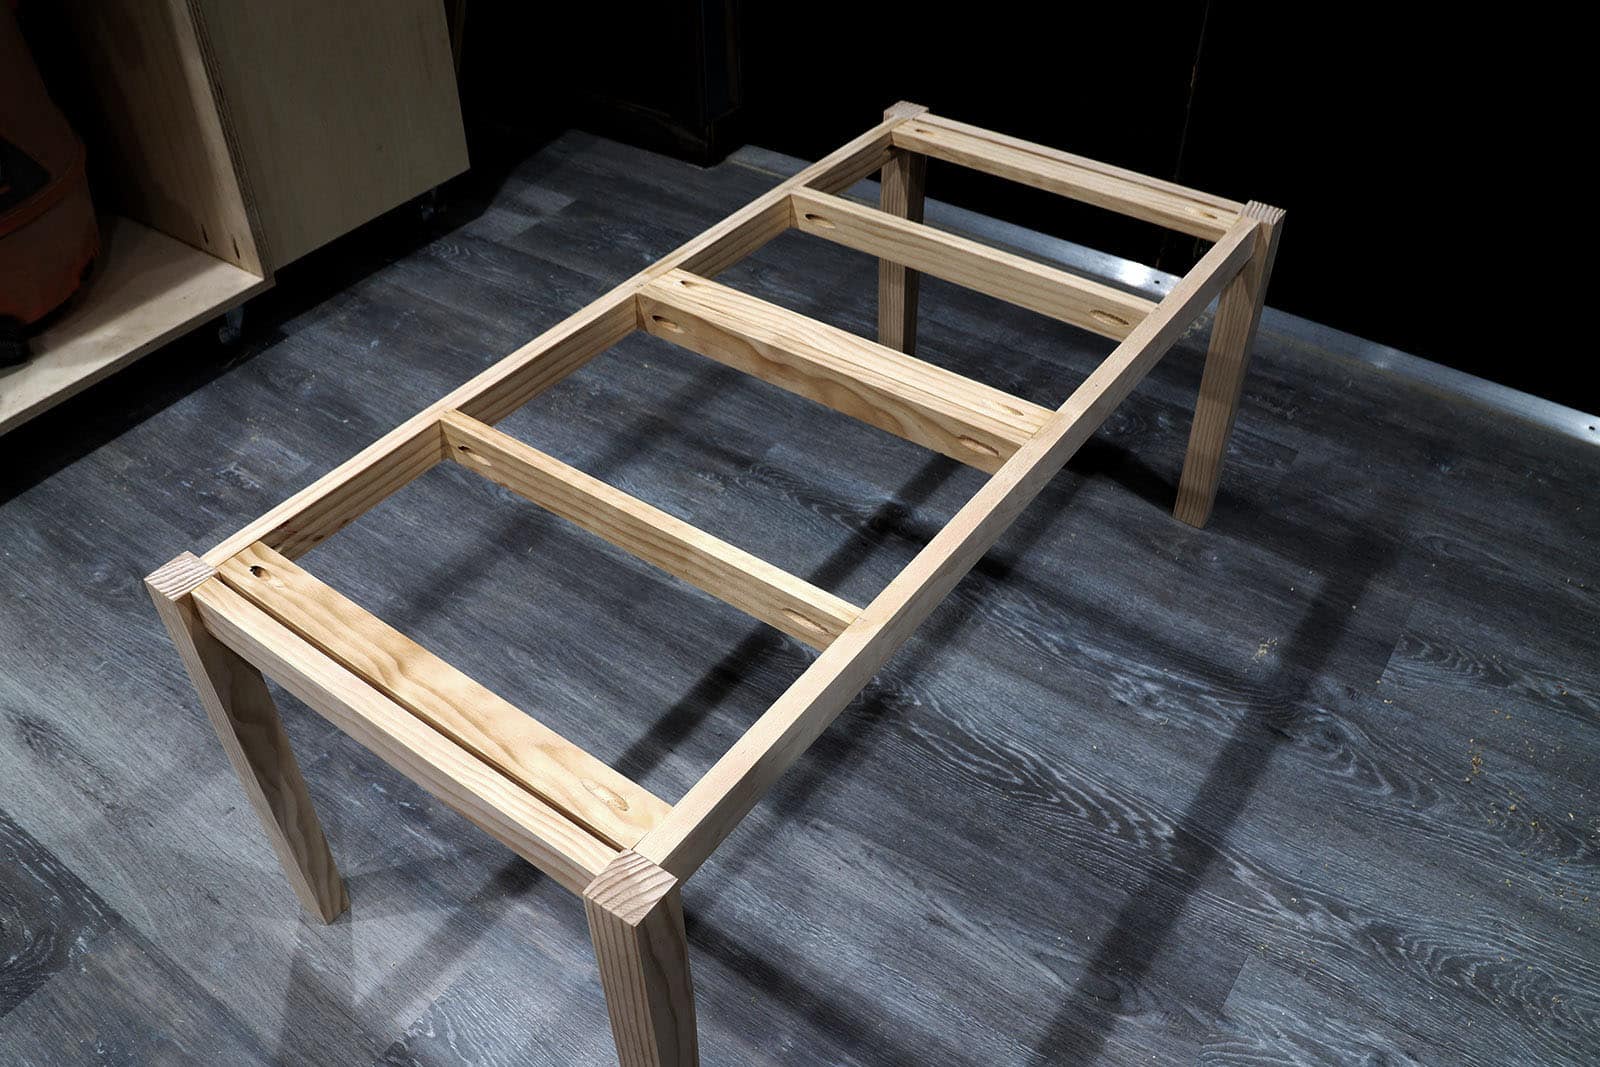
First, use the miter saw to cut your 2″ x 2″ x 8′ wood into four 16″ legs. If you’d like, use a table saw or taper jig to taper the ends of the legs. Then cut the 1″ x 2″ x 6′ wood pieces to create the bench frame sides and supports.
Lengths
Next, drill pocket holes into the ends of each of the frame sides and supports. The pocket holes should be on only one side of each piece, and for the legs and frame sides, aim to drill the pocket hole on a side that faces in. Start by attaching the frame sides to the legs at about a ¾” inset to create some depth at the corners. To assemble the pieces, first use wood glue and clamps to hold them in place, then secure with the 1 ¼” pocket hole screws.
Once the bench frame is built, you can sand, stain, and seal it (we used a polyurethane spray for this project instead of wiping or brushing it on).
Using a circular saw, cut your half sheet of ¾” plywood to create the bottom of your bench cushion. Then cut and attach your 3″ foam to the board using spray adhesive.
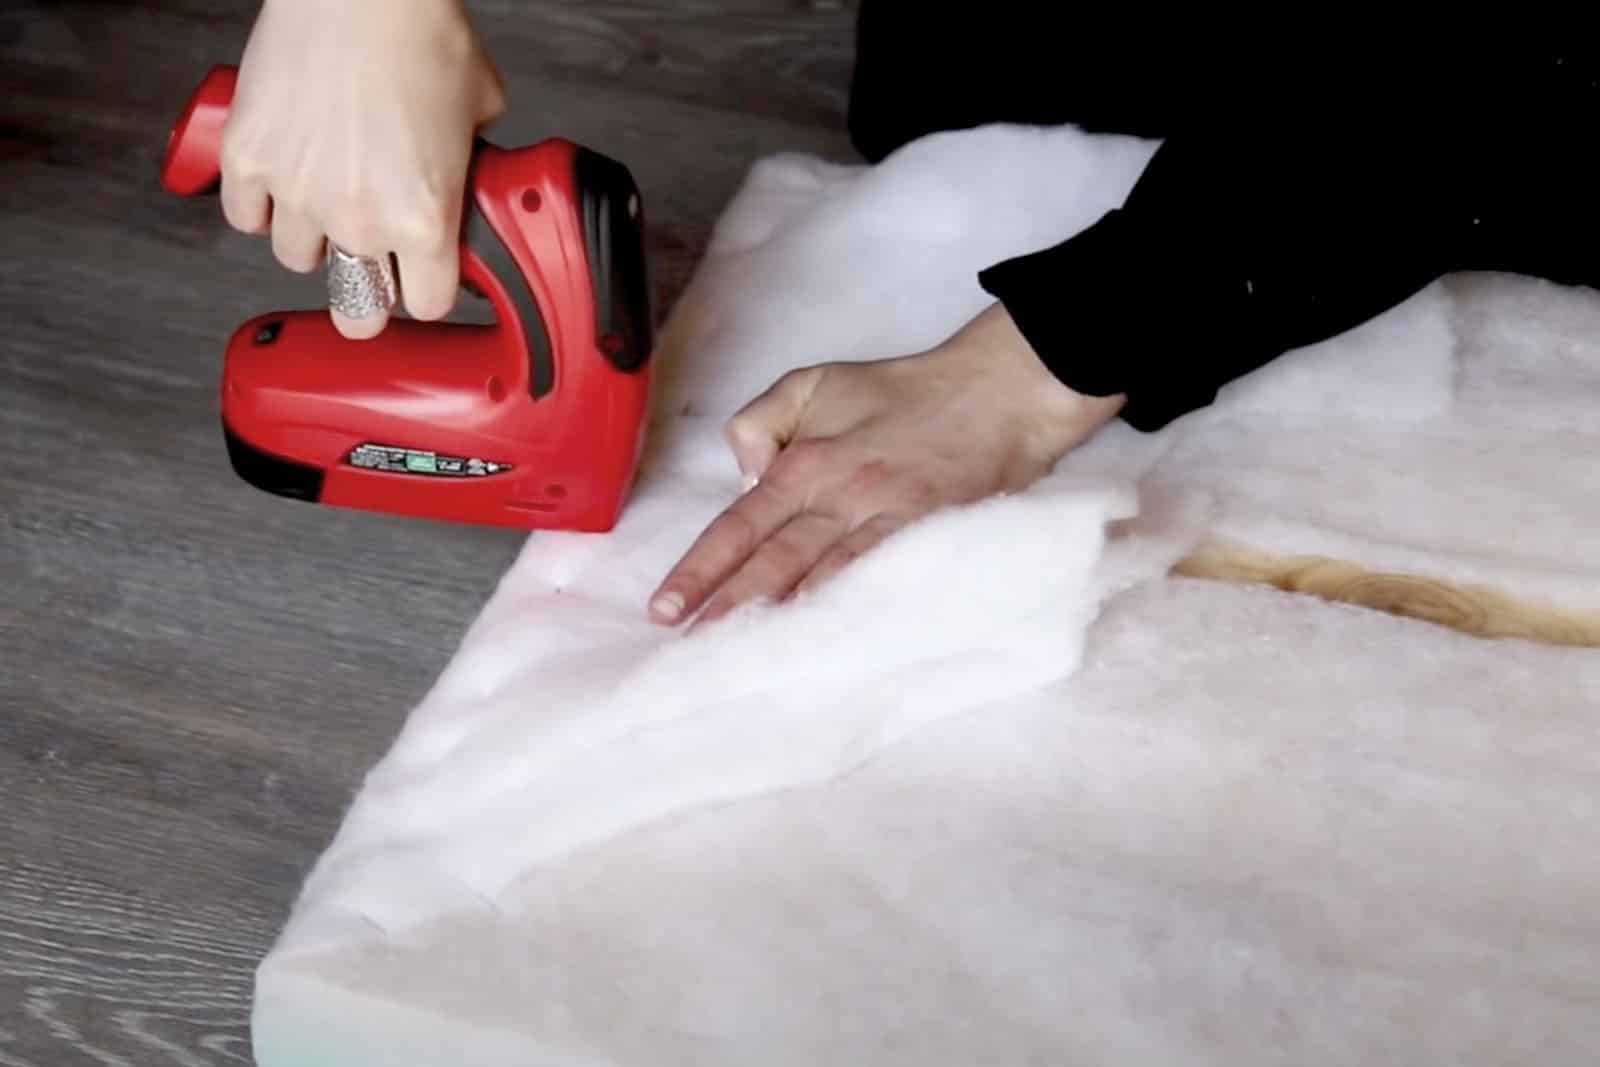
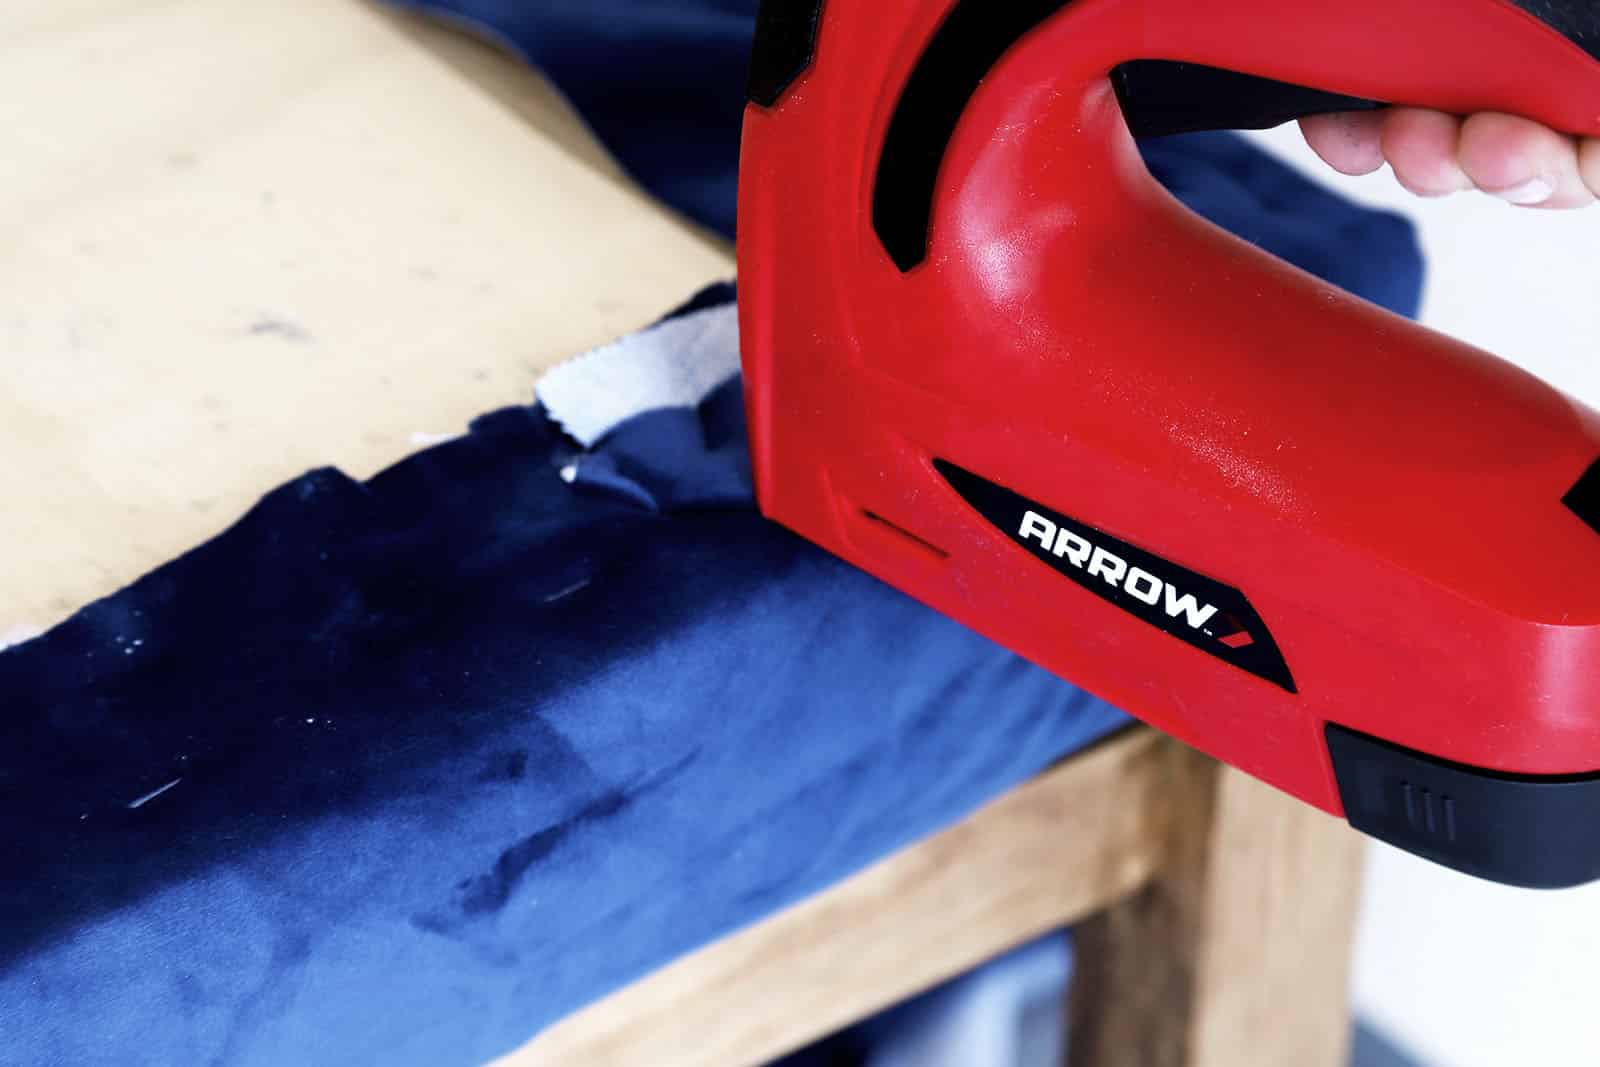
Add a layer of batting, followed by your fabric, and attach them to the plywood using your Arrow E21 cordless electric staple gun and Arrow JT21 ⅜” staples. After stapling down the batting, trim any excess so it will be covered when you wrap the bench with your fabric. Once you’ve secured the fabric with staples, trim any excess fabric as well. Pro tip: steam (do not iron!) your velvet fabric to get the wrinkles out.
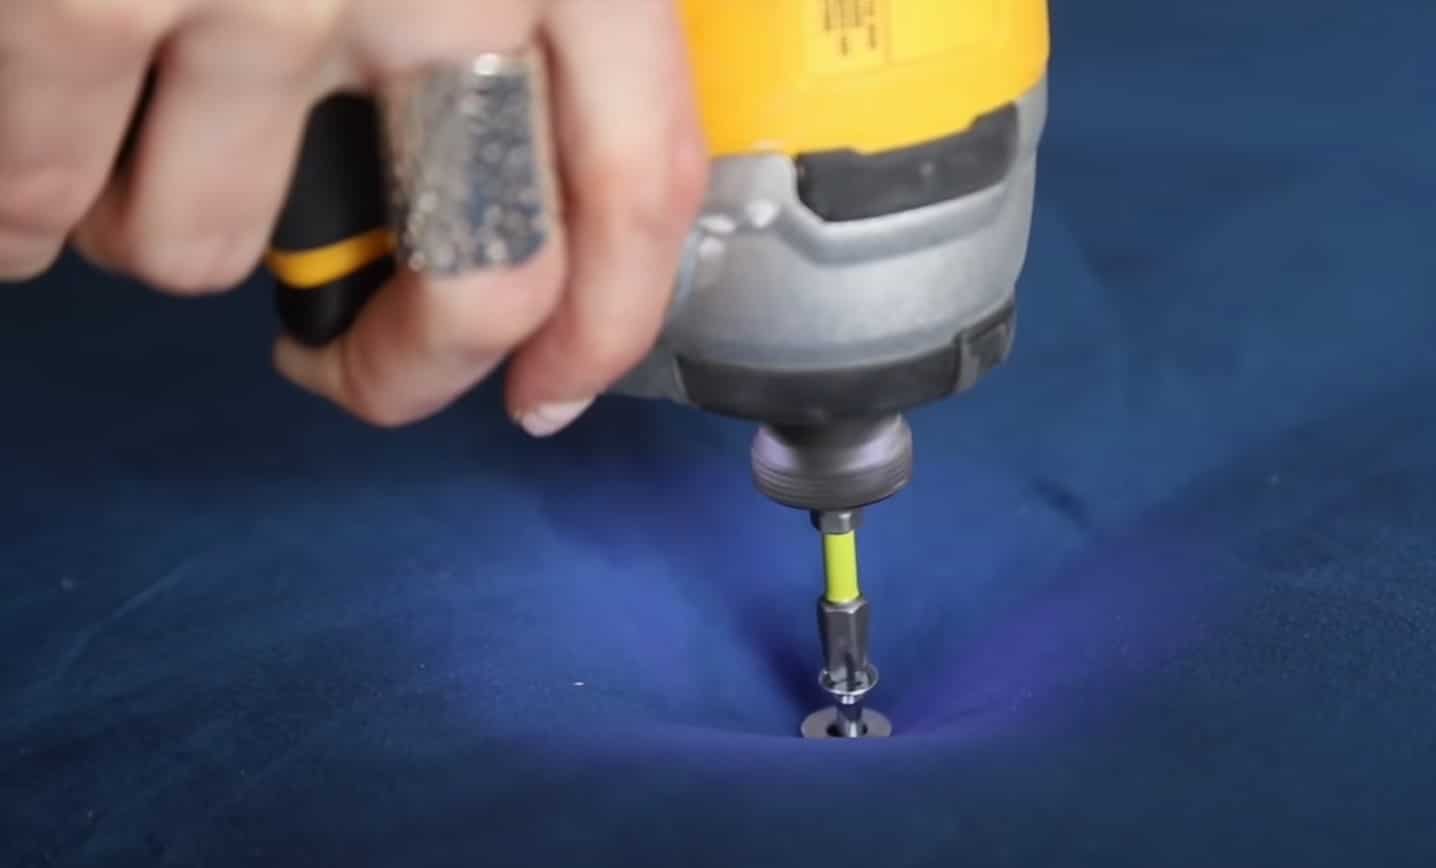
To add some tufting to the cushion, drill a washer and screw through the top of the cushion and down into the plywood base. Repeat this step for each tuft. Once you’ve added the number of tufts you want, use some remaining fabric and your button-making kit to create custom buttons to cover each washer and screw. Glue them on using your Arrow GT30Li cordless glue gun.
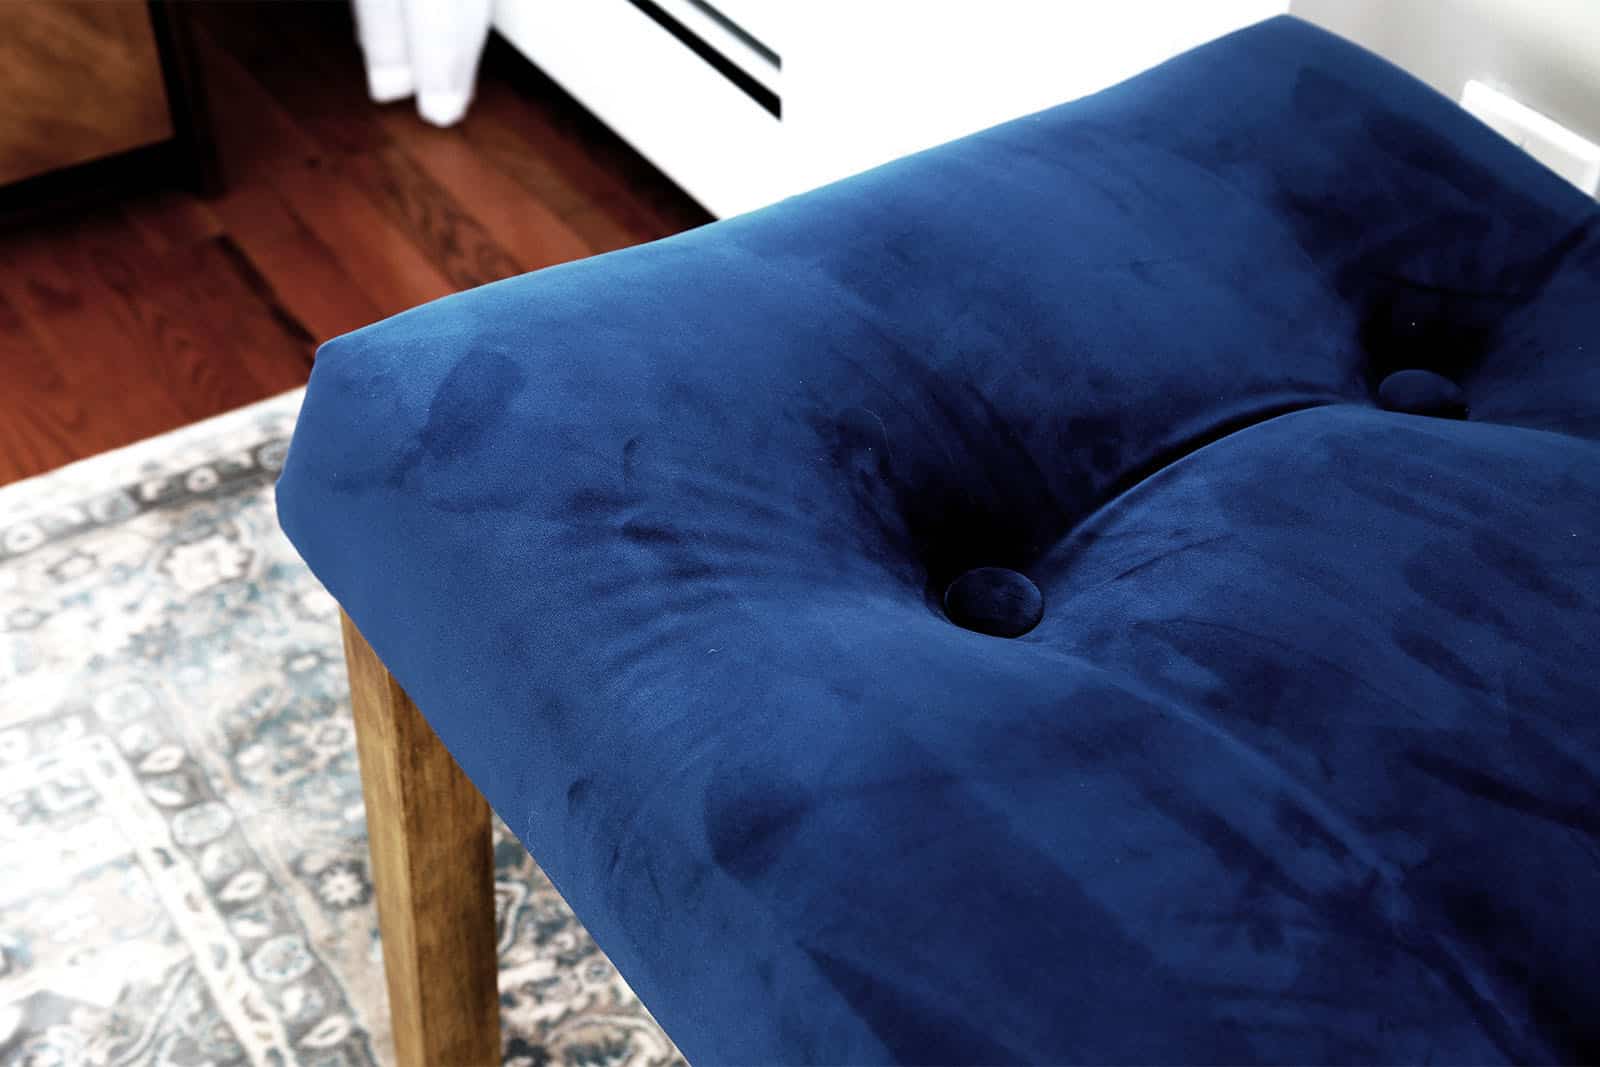
To finish it all up, simply attach the cushion to the bench with wood screws from the underside.
We love the vintage look of this tufted velvet bench and that we conquered this project in one weekend! Now you can use this lovely little DIY bench as extra seating for guests, a place to tie your shoes, or a statement piece!
Share your work with us on Facebook and Instagram by tagging @ArrowFastener or using #MadeWithArrow.
Get Arrow tips, tricks, projects and promos in your inbox!
Hey there! We’ve updated our Privacy and Cookie Policies at the request of some of our friends in Europe. Click Accept to let us know you’re okay with the updates. Thanks!
View Cookie Policy Accept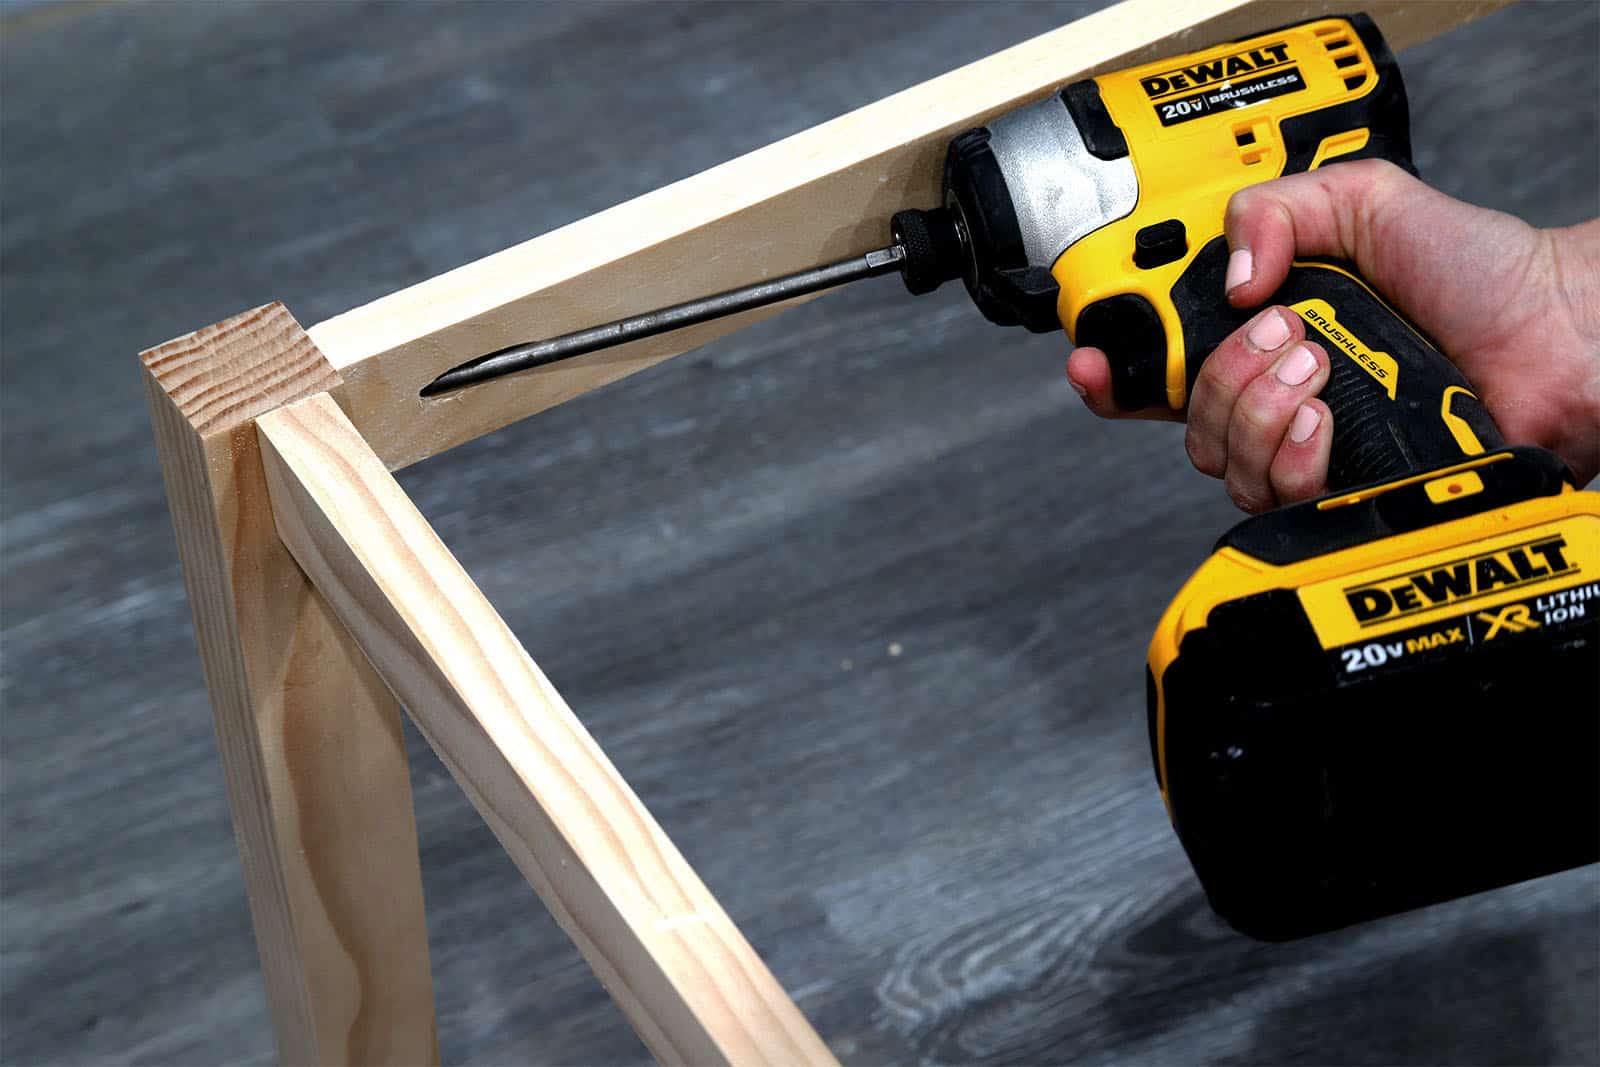