or Call Us at 1-800-776-2228
or Call Us at 1-800-776-2228
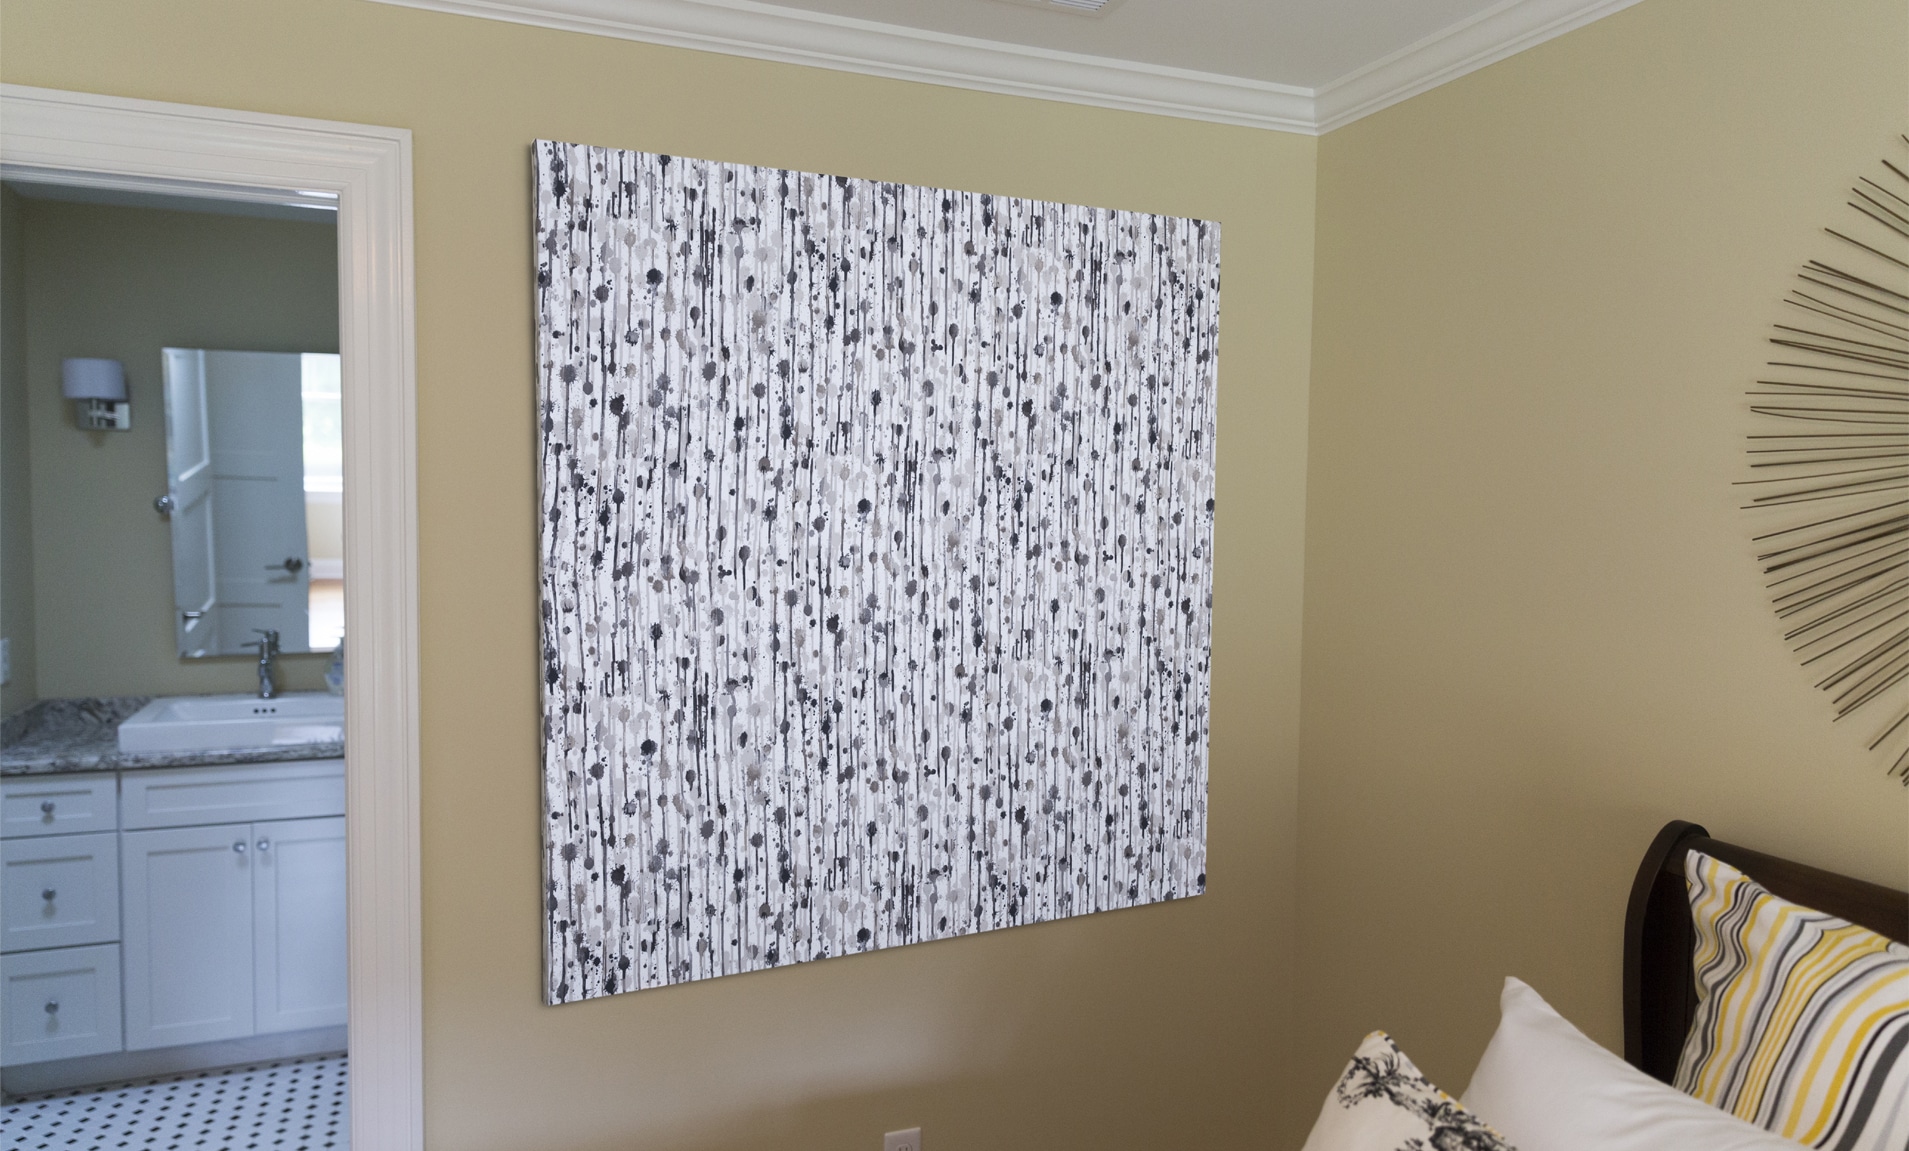
Crafting custom wall art is a simple way to make any room look professionally decorated at a budget-friendly rate. Even better, you can tackle this DIY project in one afternoon.
We picked the T50ACD Compact Electric Staple Gun for this project. Its lightweight design works well for users with limited grip strength and its electric motor drive is a perfect choice for the Decorative Fabric Panel, which requires a lot of stapling due to the large frame.
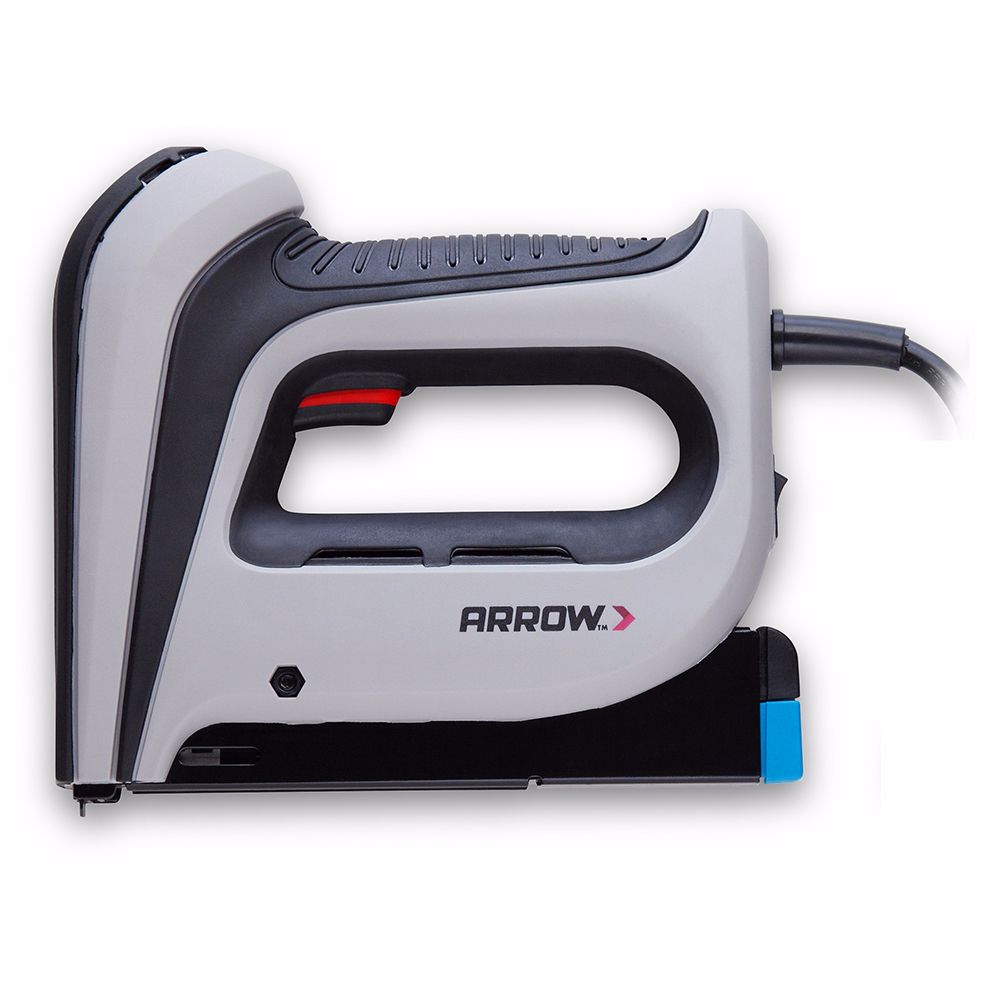
Compact Electric Staple Gun
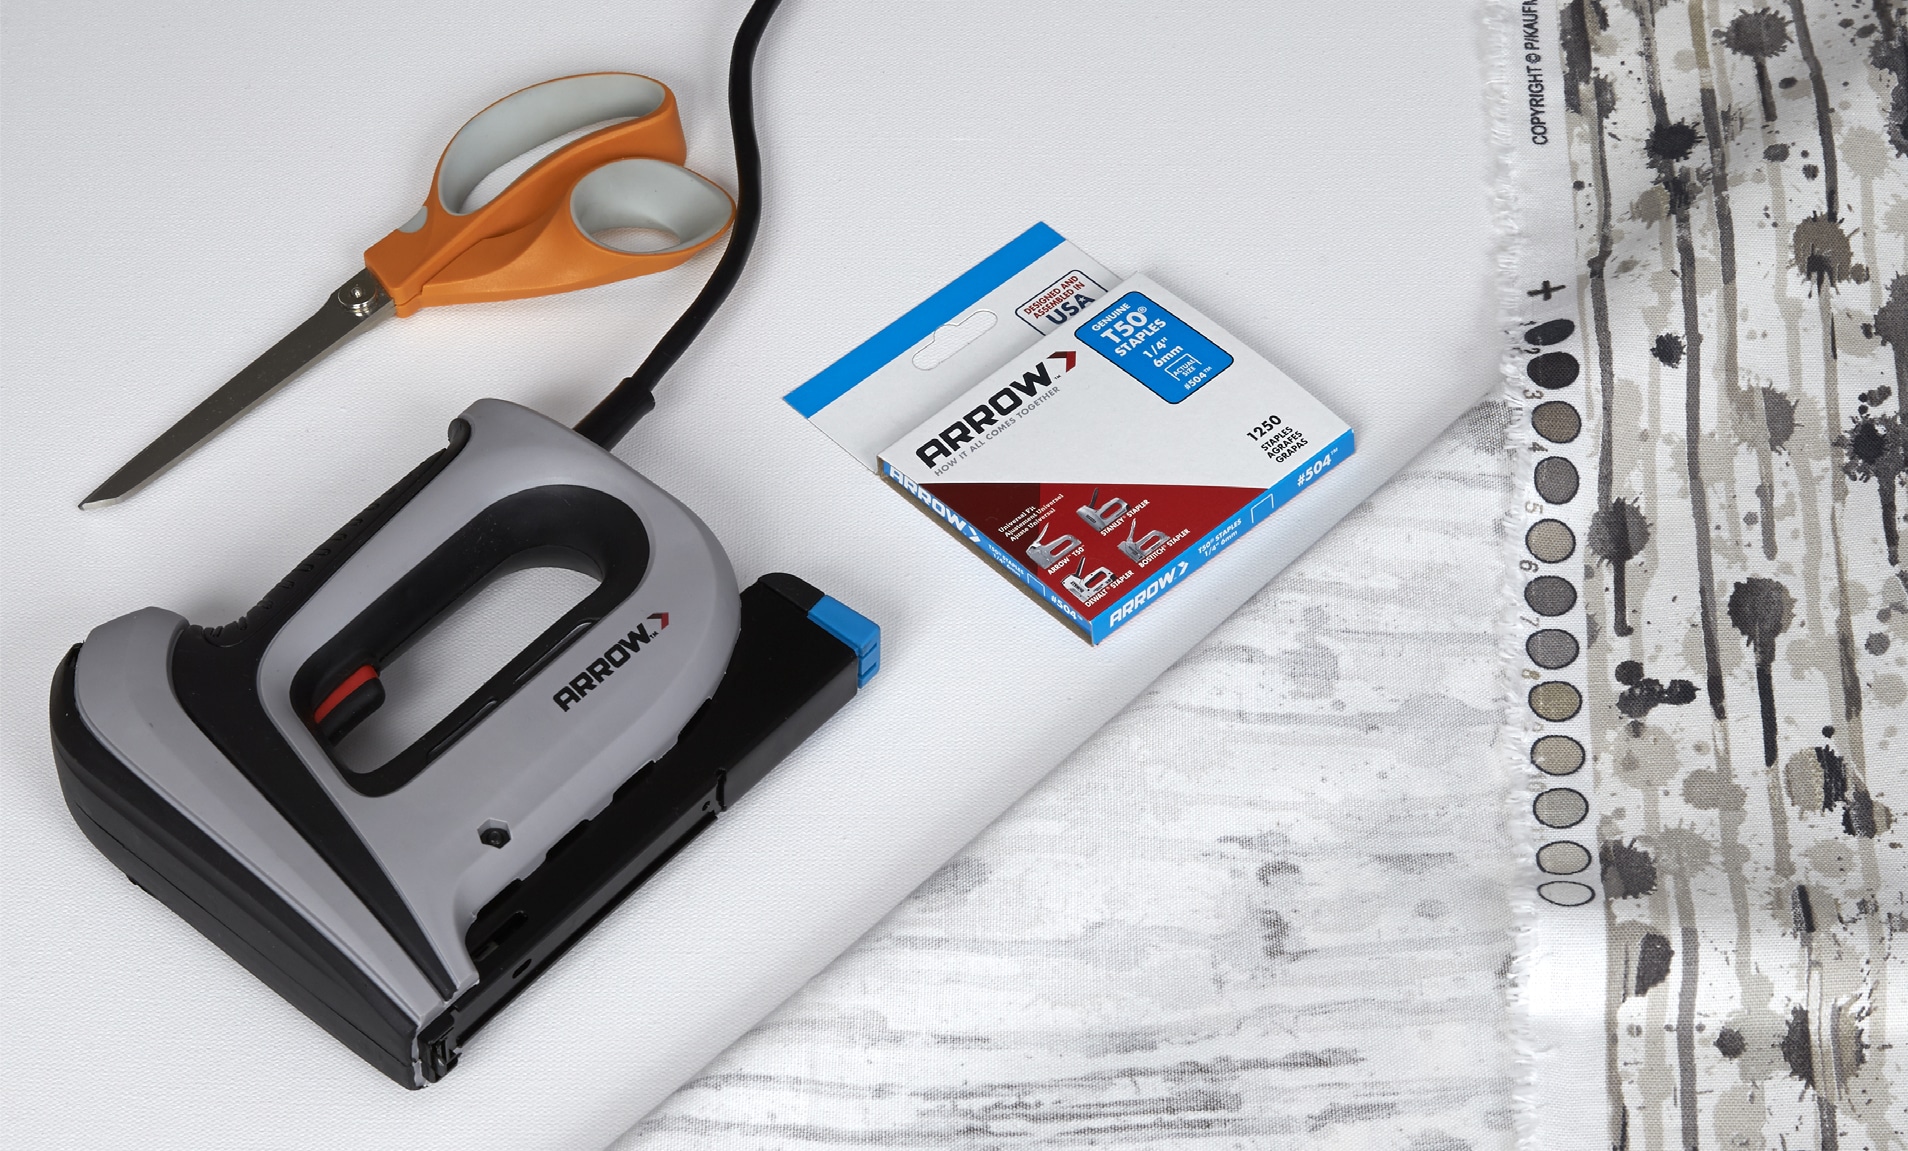
When choosing your fabric, make sure to pick a non-stretch fabric, and then press the fabric if it’s wrinkled. Otherwise your wall hanging may look disheveled rather than elegant.
When choosing your fabric, make sure to pick a non-stretch fabric, and then press the fabric if it’s wrinkled. Otherwise your wall hanging may look disheveled rather than elegant.
Lay the fabric face down on a hard surface. Then place the frame on top of the fabric, also face down. Double-check that you’ve allowed a few inches of extra fabric on all sides of the frame so that you can easily wrap the fabric around the frame to staple it.
Lay the fabric face down on a hard surface. Then place the frame on top of the fabric, also face down. Double-check that you’ve allowed a few inches of extra fabric on all sides of the frame so that you can easily wrap the fabric around the frame to staple it.
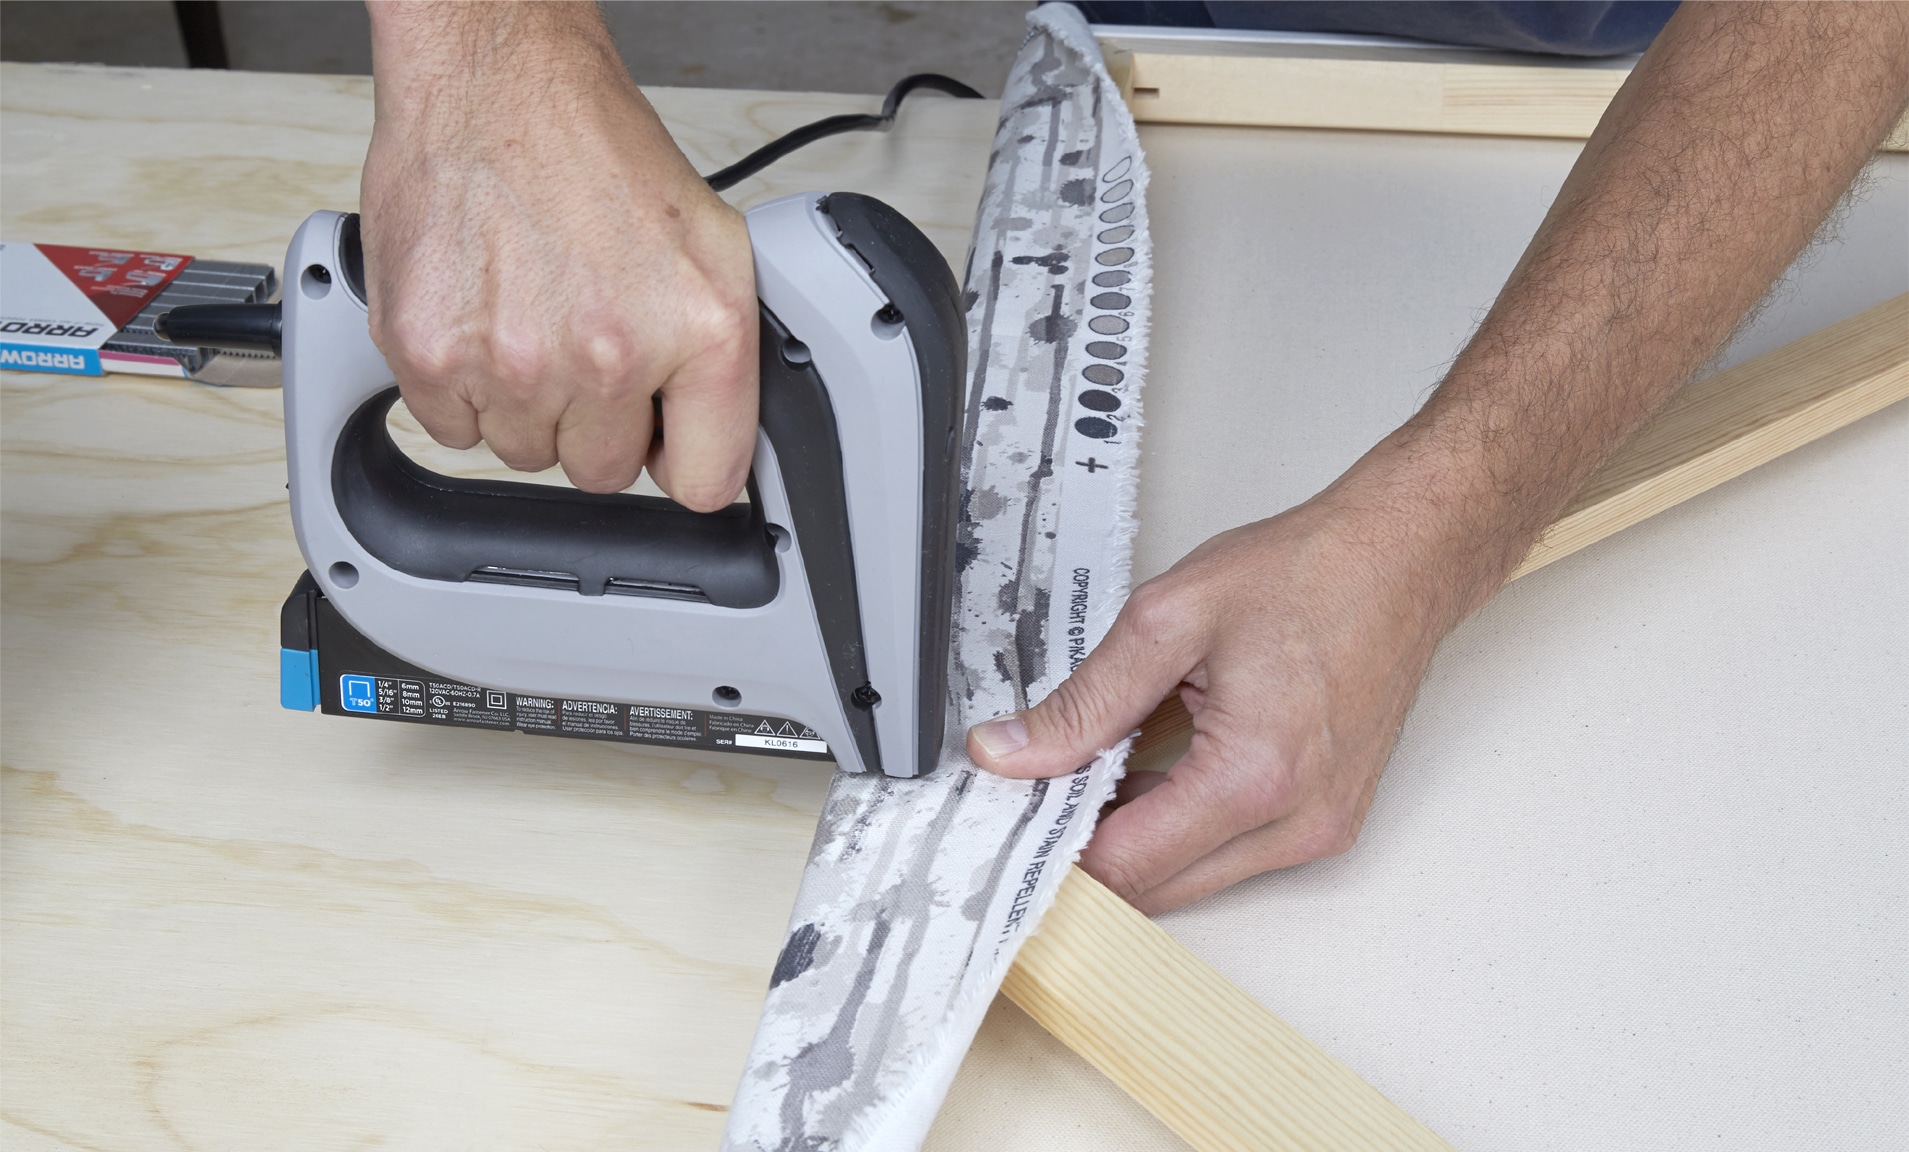
Staple the fabric to the frame along two parallel sides. Remember to keep the fabric taut without overstretching it. As you’re stapling, check the front periodically to assure that the fabric is lined up correctly and isn’t becoming distorted.

Staple the fabric to the frame along two parallel sides. Remember to keep the fabric taut without overstretching it. As you’re stapling, check the front periodically to assure that the fabric is lined up correctly and isn’t becoming distorted.
Repeat the fabric stapling process along the remaining two sides of the frame.
Repeat the fabric stapling process along the remaining two sides of the frame.
Corners really make or break the professional look of wall hangings, so be extra careful when folding and stapling them. First, fold tightly in order to avoid bulges and keep the fabric corners completely flat. You can then trim excess fabric around the corners and edges for a cleaner finishing look.
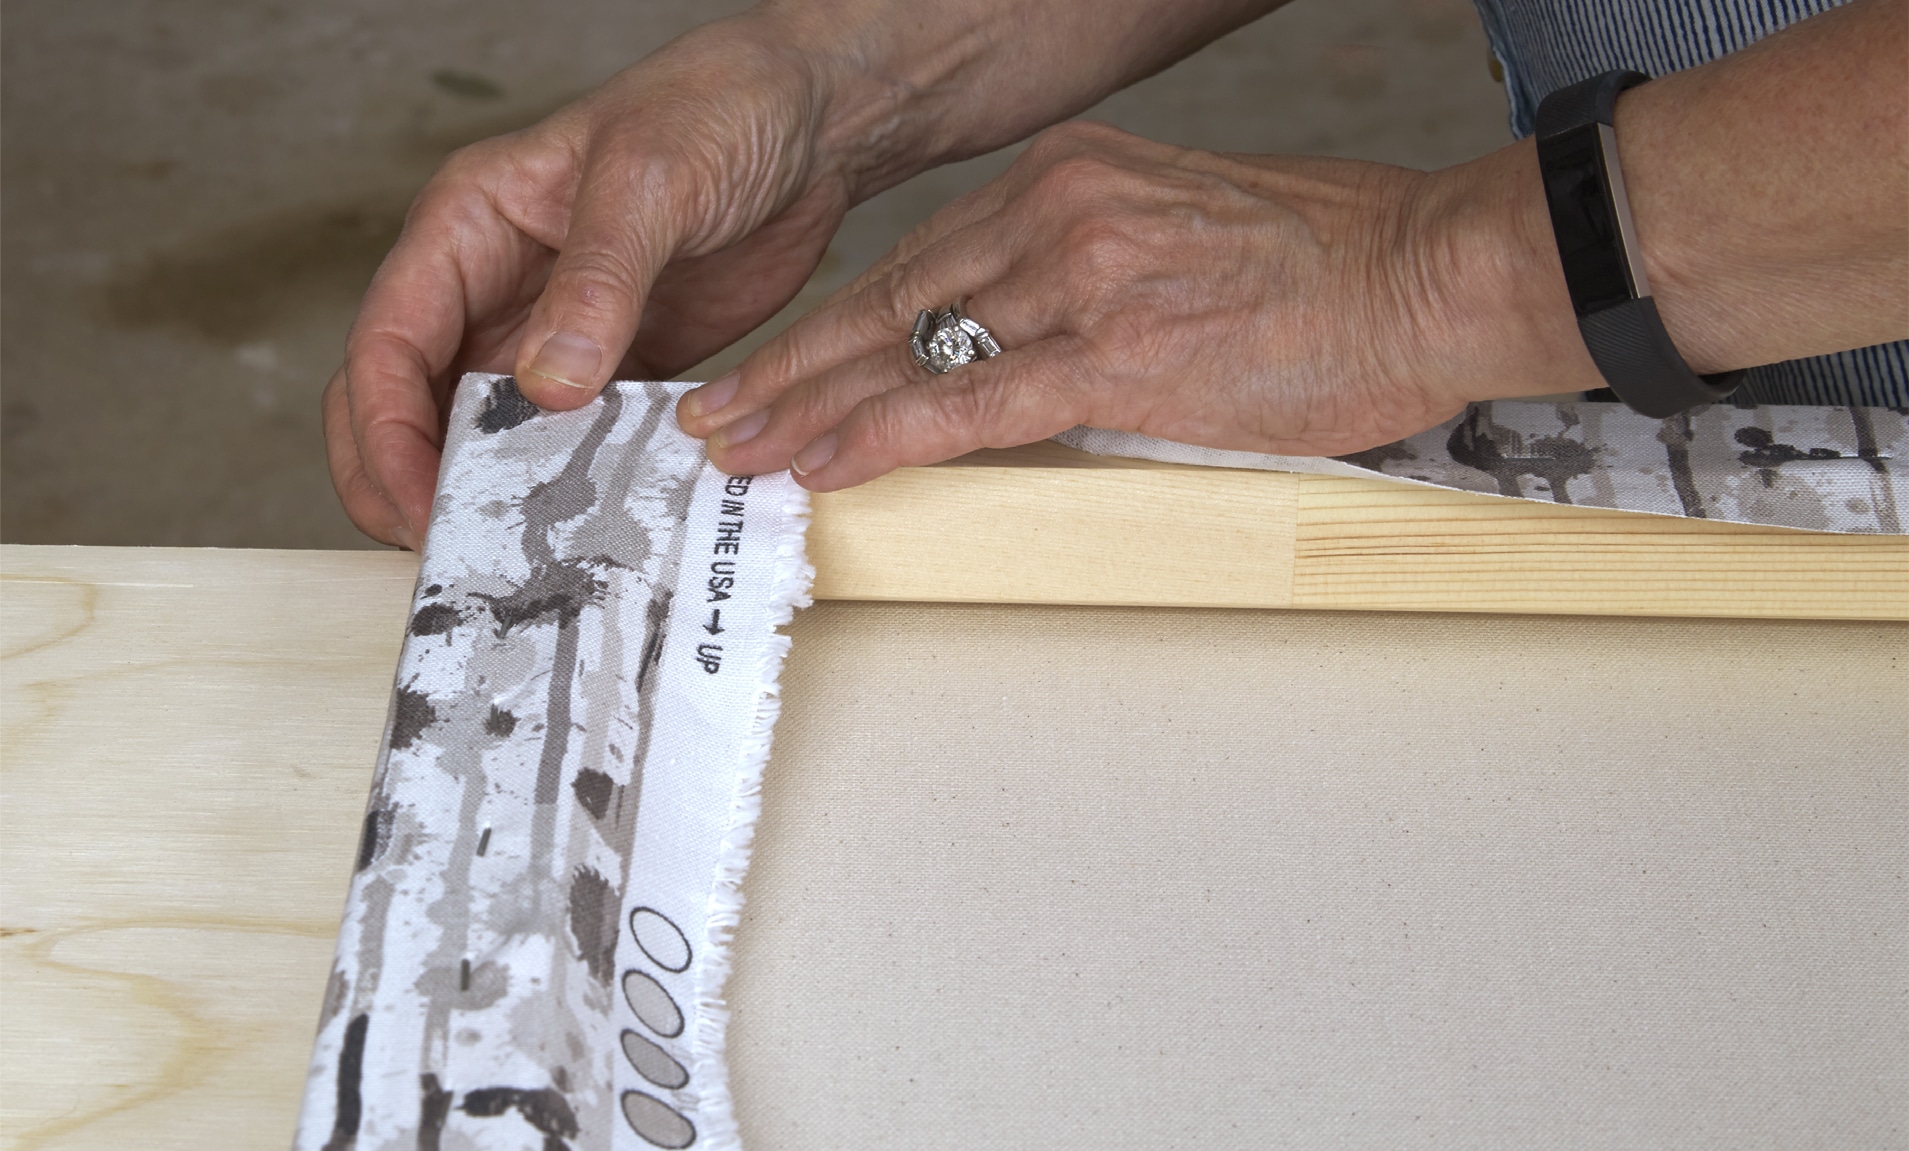
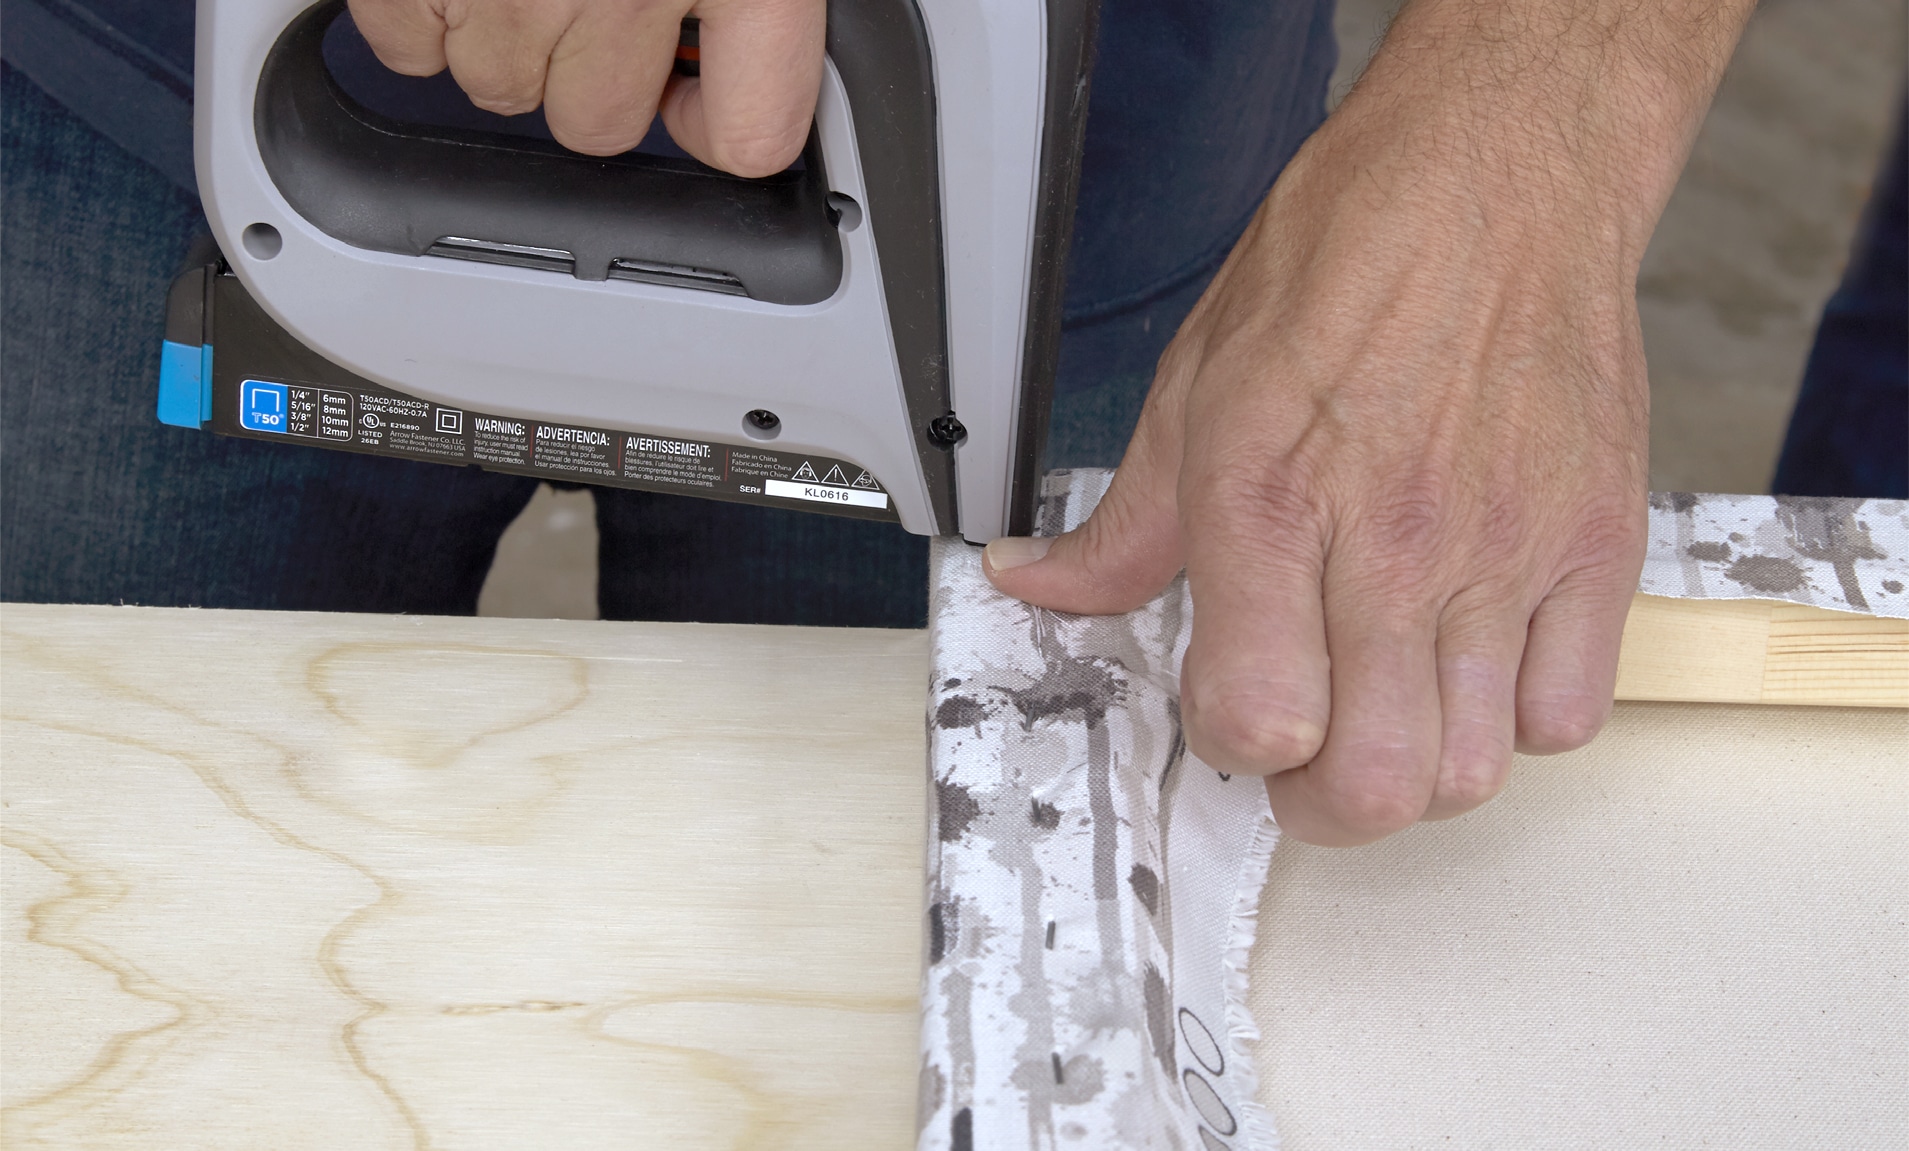
Corners really make or break the professional look of wall hangings, so be extra careful when folding and stapling them. First, fold tightly in order to avoid bulges and keep the fabric corners completely flat. You can then trim excess fabric around the corners and edges for a cleaner finishing look.
We’d love to see how your fabric panel project turned out! Share your results with us on Facebook, Instagram or X by tagging #MadeWithArrow.
Get Arrow tips, tricks, projects and promos in your inbox!
Hey there! We’ve updated our Privacy and Cookie Policies at the request of some of our friends in Europe. Click Accept to let us know you’re okay with the updates. Thanks!
View Cookie Policy Accept